Plant shelves do more than hold your greens—they create living art that breathes life into any room. Whether you’re working with a tiny apartment corner or a spacious living area, the right styling transforms simple shelving into a botanical showcase. These 27 ideas show you how to arrange, layer, and display plants in ways that feel intentional yet relaxed. You’ll find budget-friendly tips for renters, DIY hacks using items you already own, and simple tricks to make even a few plants look like a curated collection. Ready to turn your plant shelf into something worth showing off?
Create Height Variation With Plant Stands
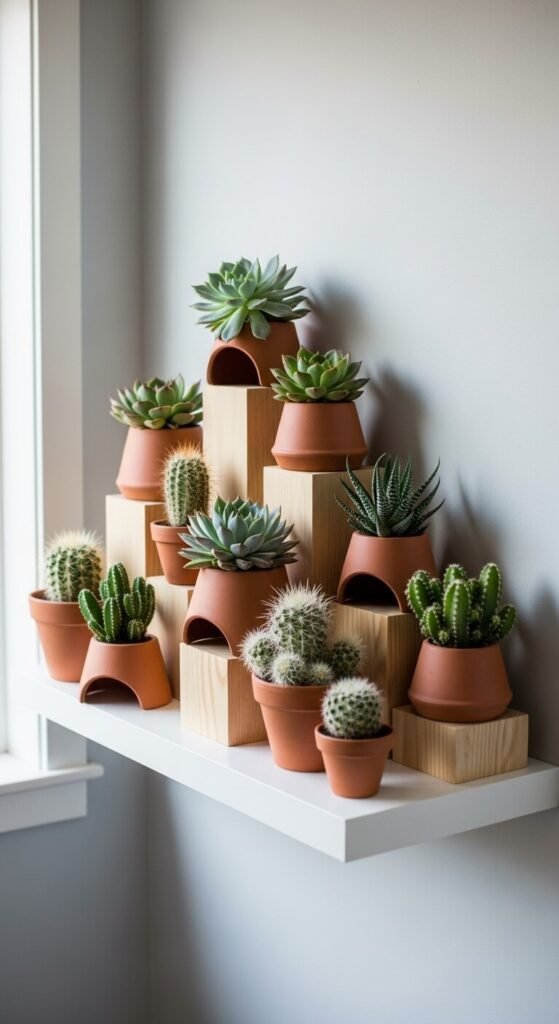
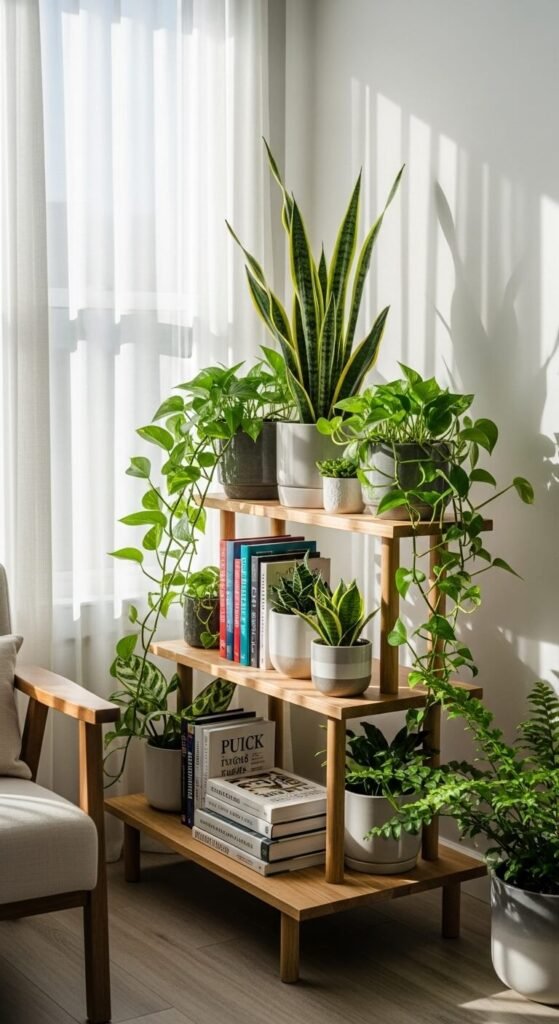
Flat shelves look boring when everything sits at the same level. Use small wooden blocks, upturned pots, or inexpensive bamboo risers to add dimension. This creates visual interest and lets trailing plants hang freely without crowding others.
Place taller items in back, medium heights in middle, shorter plants up front. You can find risers at dollar stores or make your own from scrap wood. Even stacking a few books works perfectly. The goal is creating layers that draw the eye across the entire shelf instead of straight across one line.
Mix Trailing and Upright Plant Forms

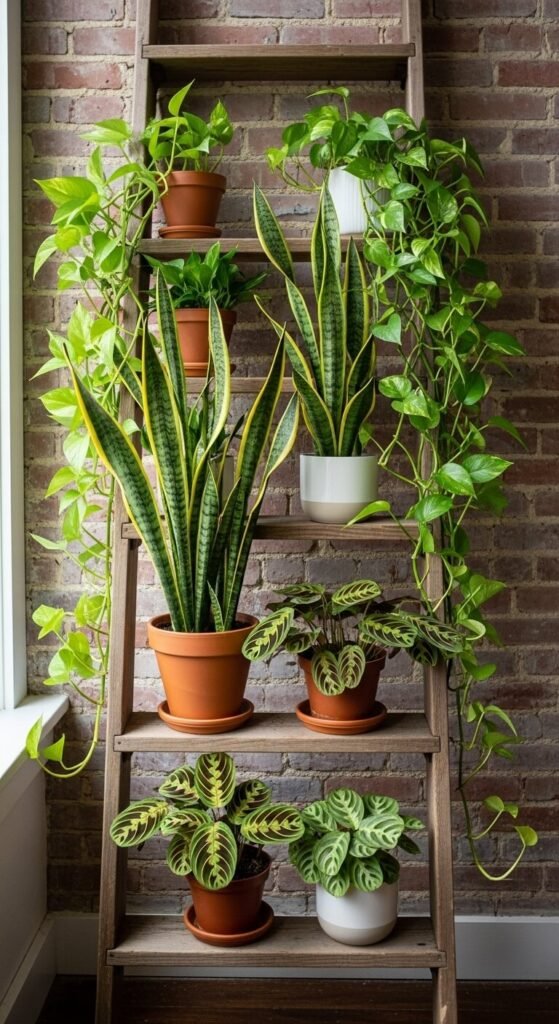
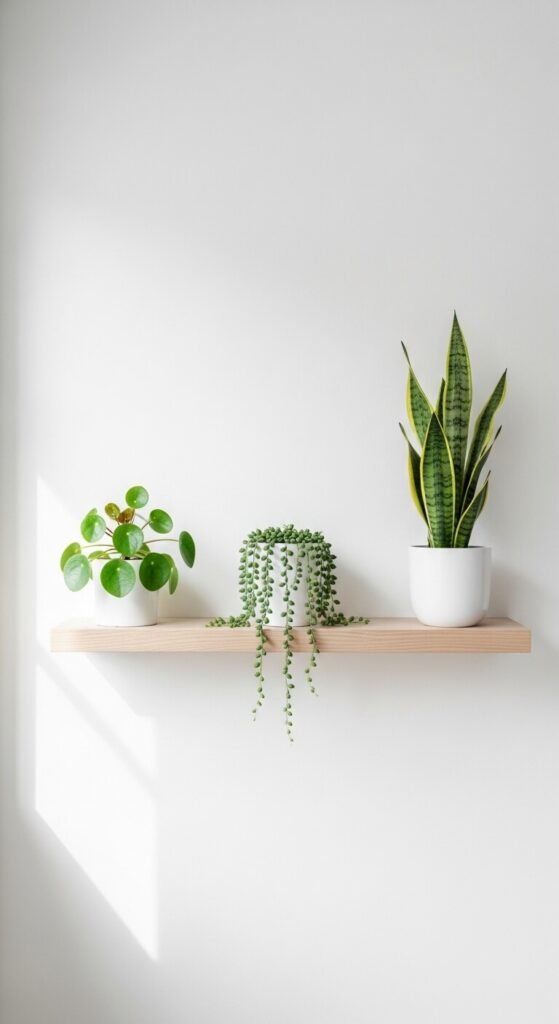
Combine plants with different growth habits for dynamic styling. Pair trailing pothos or string of pearls with upright snake plants or ZZ plants. This contrast creates movement and fills space efficiently.
Let trailing plants cascade from higher shelves while upright varieties anchor lower levels. You don’t need expensive varieties—basic pothos and spider plants trail beautifully and cost under $10. Position trailing plants at shelf edges so vines can drape naturally. This technique works especially well on tall shelving units where cascading foliage softens hard edges and adds organic flow to geometric structures.
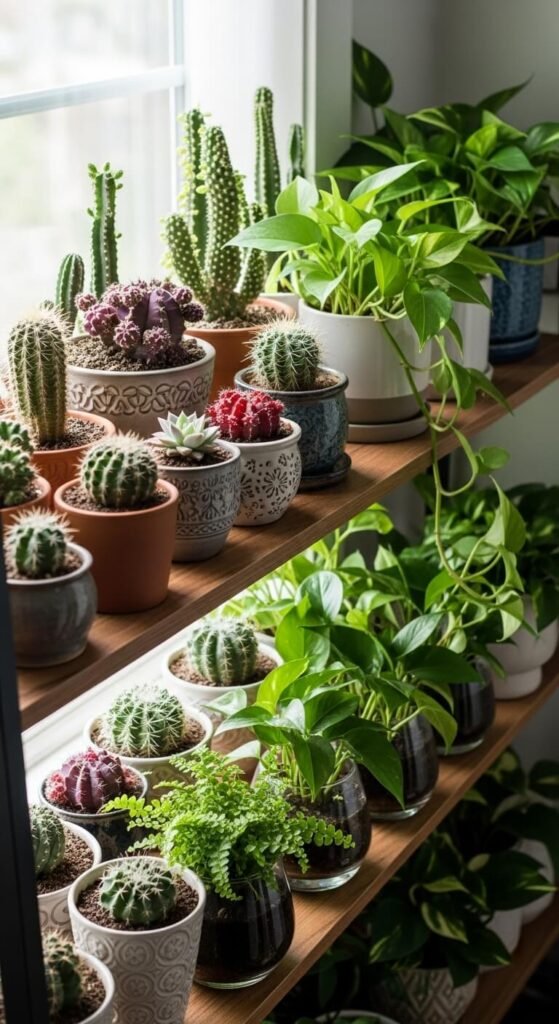
Group Plants in Odd Numbers
Odd-numbered groupings look more natural than even pairs. Arrange three or five plants together instead of two or four. This creates visual balance without feeling too symmetrical or staged.
Try a trio with one large plant, one medium, and one small. This size variation adds depth. Place the largest plant slightly off-center, then position smaller ones around it. You can reuse containers you already have—mason jars, tin cans, or thrifted pots work great. This simple rule applies to any shelf style and instantly makes arrangements look more intentional and professionally styled.
Add Non-Plant Objects for Context
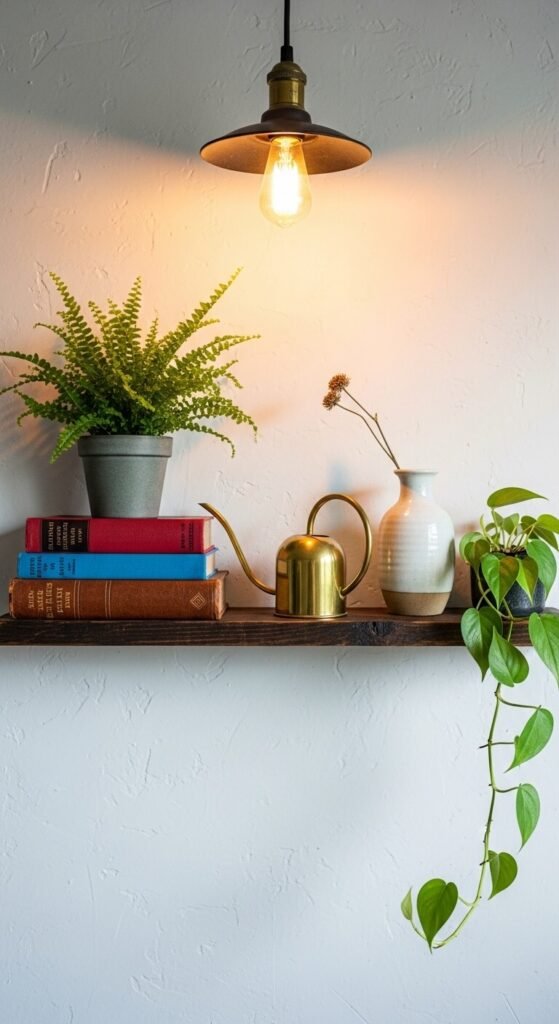
Don’t fill every inch with plants. Mix in books, small sculptures, candles, or vintage finds. These objects provide visual breaks and make your plant display feel curated rather than cluttered.
A stack of books becomes a plant stand. A small watering can adds function and charm. Look for objects in similar color tones or materials to create cohesion. Brass, wood, and ceramic pair beautifully with greenery. Thrift stores offer endless options for under $5. The key is restraint—add just enough to complement plants without competing for attention or overwhelming the display.
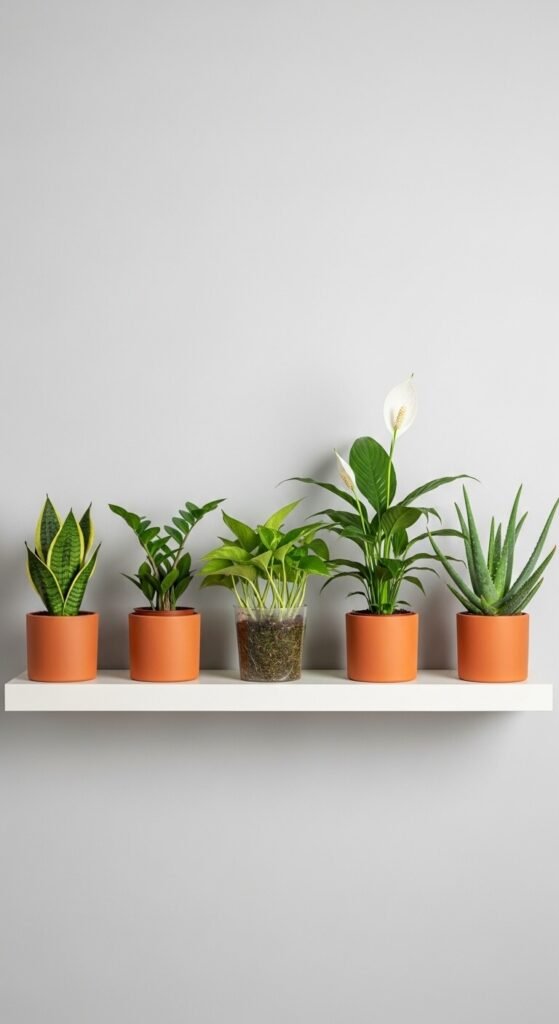
Use Consistent Pot Materials
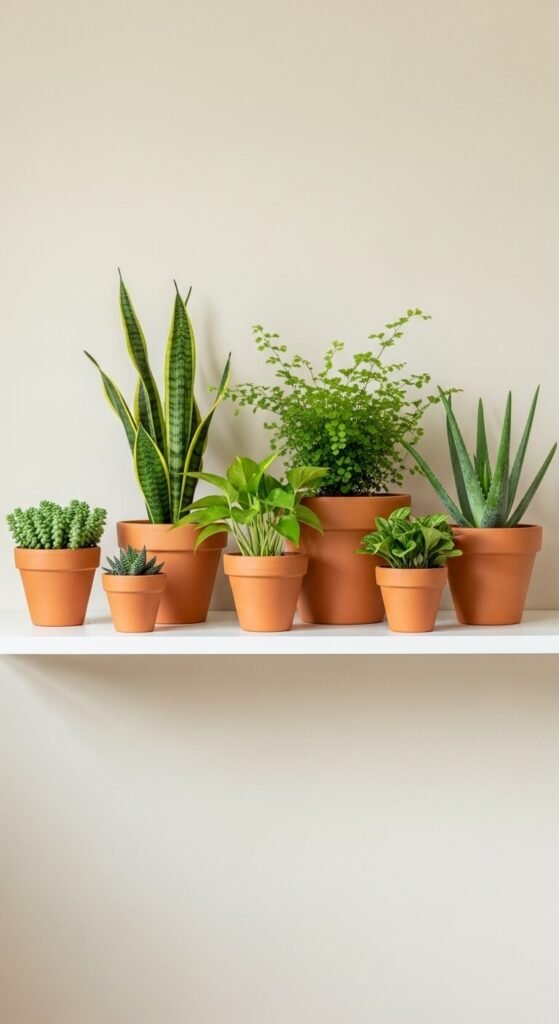
Matching pot materials unify your display even when plant types vary. Choose all terracotta, all white ceramic, or all woven baskets. This consistency creates a cohesive look that feels intentional.
You don’t need to buy everything new. Spray paint mismatched pots one color, or wrap plain plastic nursery pots in jute rope. Terracotta pots start at $1 each at hardware stores. White ceramic cache pots are affordable at IKEA. This simple choice makes even a random plant collection look like you planned it. The uniform material lets plant shapes and colors become the focal point without visual competition.
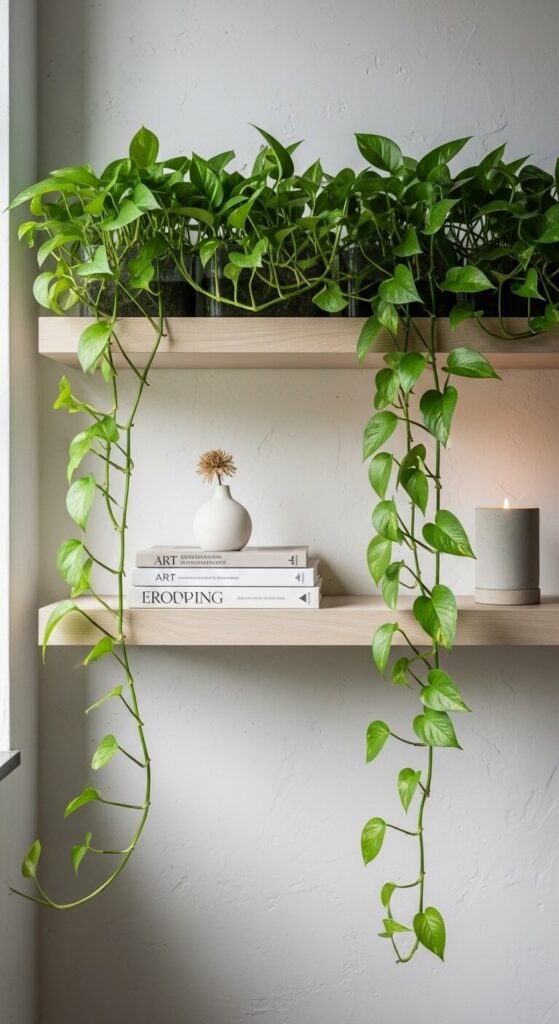
Incorporate Hanging Planters From Shelf Brackets
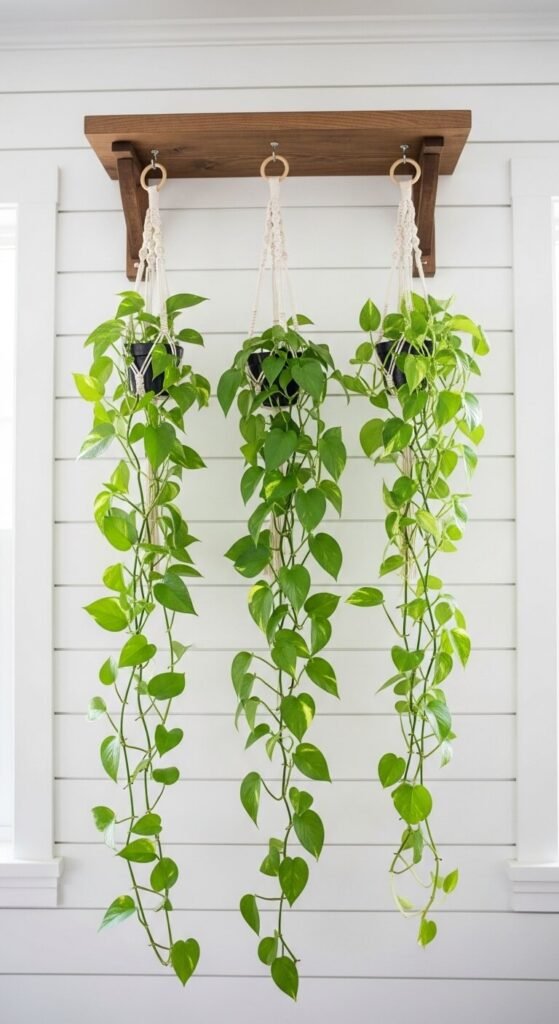
Use the underside of your shelf for hanging plants. Attach small hooks or use macramé hangers from the bracket. This maximizes vertical space and adds another layer of greenery.
String of hearts, pothos, and spider plants work perfectly for this. You can make simple macramé hangers from cotton rope following free YouTube tutorials. S-hooks from hardware stores cost pennies. This technique works especially well on floating shelves where the bracket is exposed. The hanging plants create a living curtain effect that softens the shelf’s hard edges and fills empty wall space below.
Create Color Themes With Pots and Planters
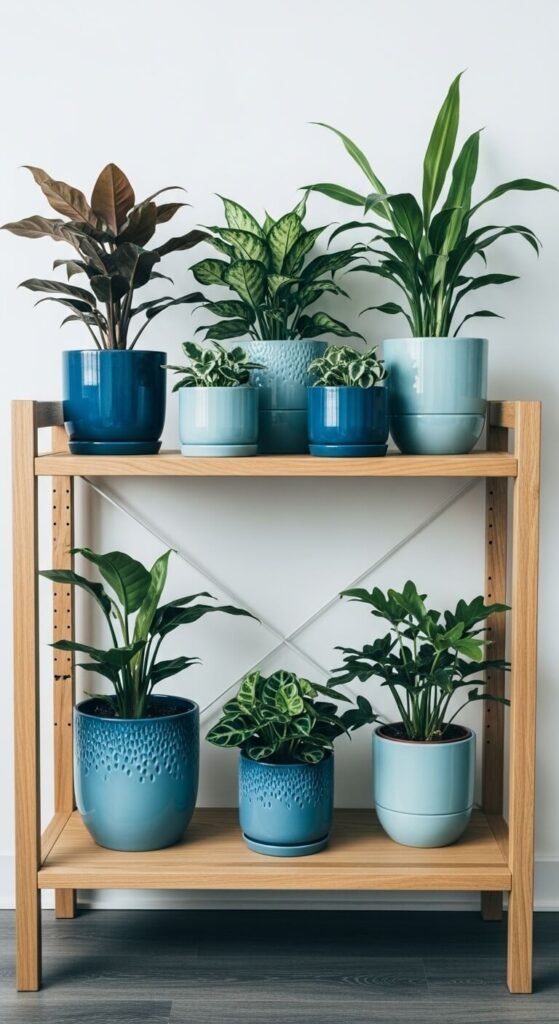
Choose a color palette for your pots and stick to it. Try earth tones, pastels, or bold jewel tones. This creates visual harmony across your entire shelf.
Paint cheap plastic pots with acrylic paint to match your theme. Terracotta takes acrylic beautifully with a clear sealant on top. You can also use fabric scraps or paper to wrap basic containers. Pick 2-3 colors that appear in your room’s decor. This ties your plant shelf into the space rather than making it feel like an afterthought. Cool blues and greens create calm vibes while warm terracottas and creams feel cozy.
Layer Plants at Different Depths
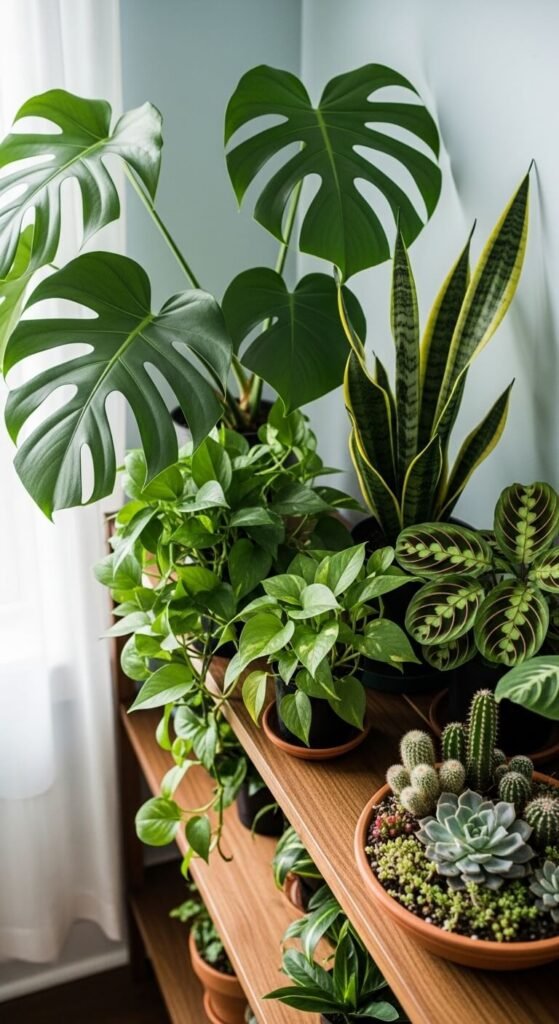
Don’t line plants up against the wall. Push some back, pull others forward. This creates depth and makes your shelf feel more dynamic.
Place larger plants toward the back and smaller ones up front so everything stays visible. Leave a few inches between the wall and back row—this prevents moisture damage and allows air circulation. You can also angle pots slightly instead of facing them all straight forward. This simple adjustment makes flat shelving feel three-dimensional. It works particularly well on deeper shelves where you have at least 10-12 inches of space to play with.
Add Mood Lighting With String Lights
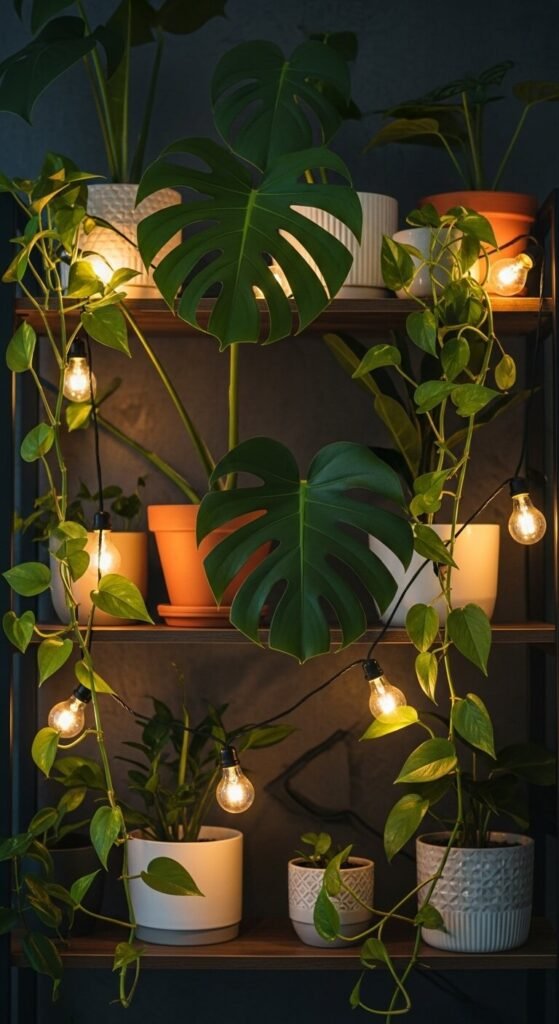
Weave battery-operated string lights through your plant display. The warm glow highlights leaf textures and creates ambiance during evening hours.
Choose battery packs so you’re not dealing with cords. Warm white or soft yellow bulbs look most natural. Drape lights loosely behind plants so bulbs peek through foliage. You can find affordable sets at dollar stores or online for under $10. This simple addition makes your plant shelf feel like a feature wall, especially in rooms with limited natural light. The gentle illumination also helps you appreciate your plants after sunset.
Style With Propagation Stations
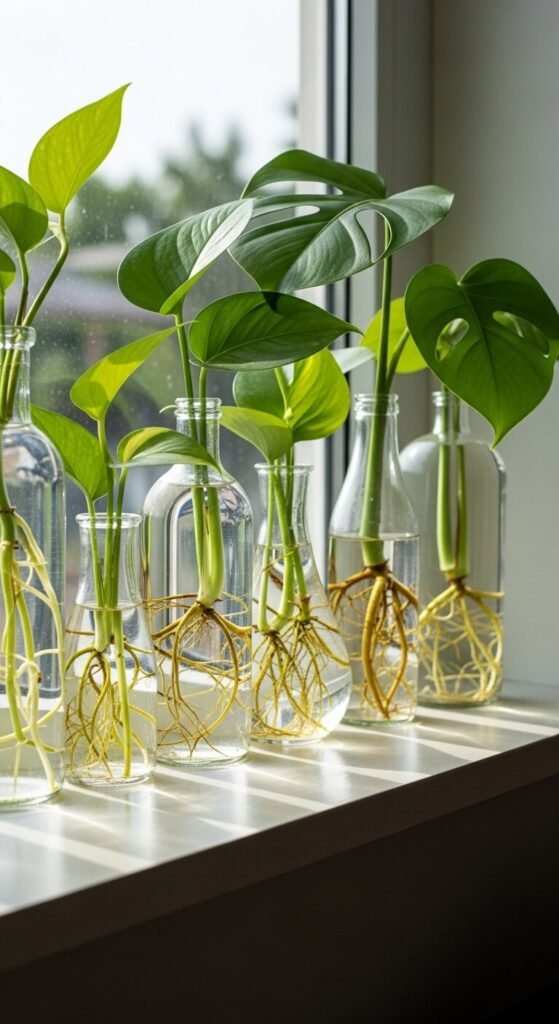
Show off plant cuttings in clear glass containers. Propagation stations add visual interest while serving a practical purpose. The exposed roots and stems create an organic, science-inspired look.
Use old bottles, test tubes, or small bud vases you already own. Line them up in a row or cluster them in groups. Label them with plant names using washi tape if you want a learning element. This approach costs nothing if you’re propagating from plants you already have. Kids especially love watching roots develop. Change water weekly to keep it clear and fresh-looking for the best display quality.
Implement the Triangle Rule
Arrange plants so they form invisible triangles with their heights and positions. This creates natural visual flow that guides the eye around your entire shelf.
Start with your tallest plant, then place the next tallest at a different height and horizontal position. Add a third plant to complete the triangle. Your eye should bounce between the three points. This works with any plant combination. You can create multiple overlapping triangles across a long shelf. The technique sounds technical but becomes intuitive once you try it. This same principle works in professional floral arrangements and interior styling.
Add Texture With Shelf Liners
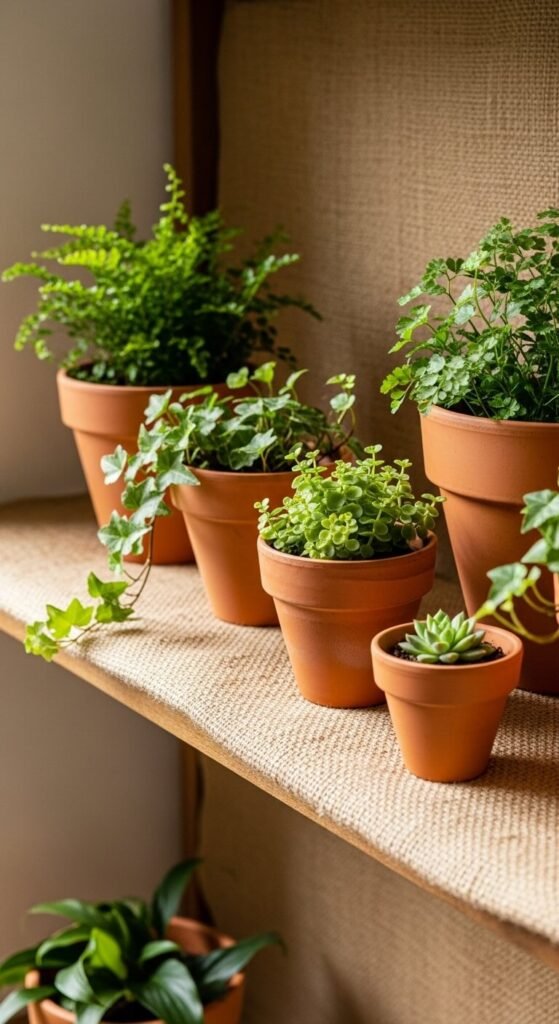
Place fabric, cork, or bamboo mats under your pots. This protects your shelf from water damage while adding textural interest. Choose materials that complement your pots and plants.
Cut fabric placemats to size, or use cork trivets from the dollar store. This also makes cleaning easier—just lift the mat and wipe underneath. Natural materials like jute, linen, or bamboo work best with plant displays. Avoid plastic unless you have drainage concerns. The liner creates a subtle foundation that makes your arrangement feel finished and intentional rather than plants randomly placed on bare wood or metal.
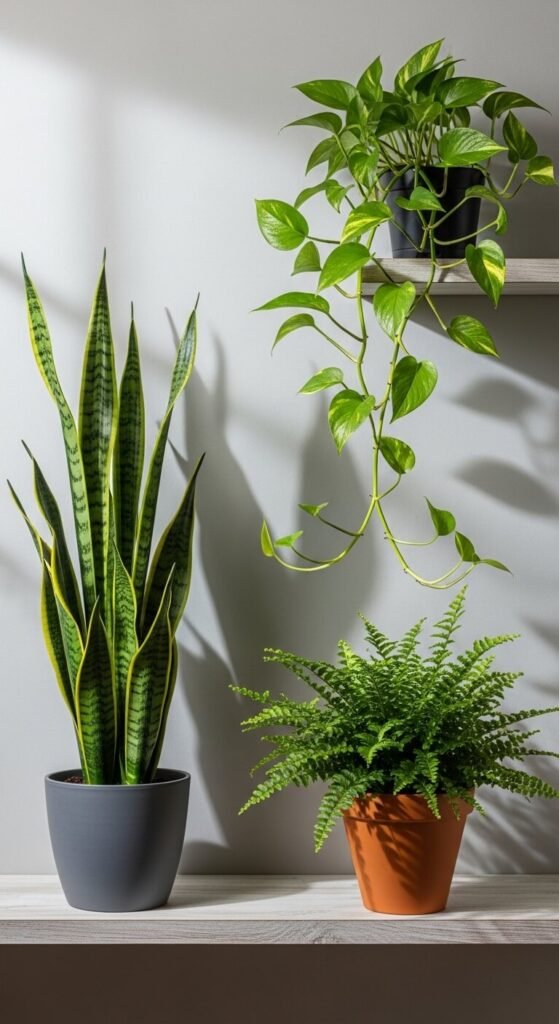
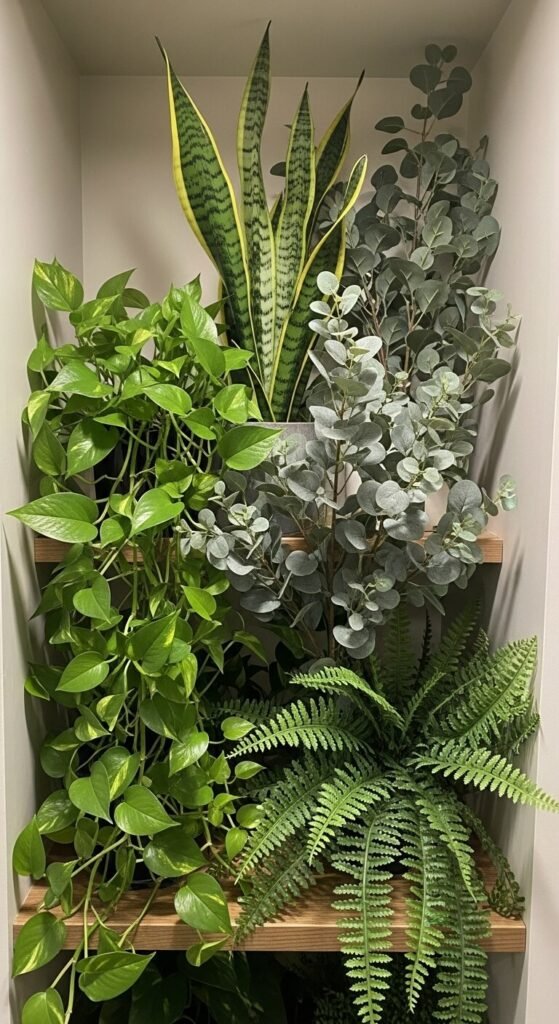
Create Zones by Plant Care Needs
Organize plants by their light and water requirements. Group succulents together, ferns in another section, and trailing tropicals in their own zone. This makes care easier and plants healthier.
The brightest section gets cacti and succulents. Medium light areas work for pothos and philodendrons. Lower light spots suit snake plants and ZZ plants. This practical approach also looks intentional since plants with similar needs often have similar appearances. You’ll spend less time moving plants around and more time enjoying them. Color-code your zones with pot colors if you want to make care needs visually obvious at a glance.
Style With Vintage or Thrifted Containers
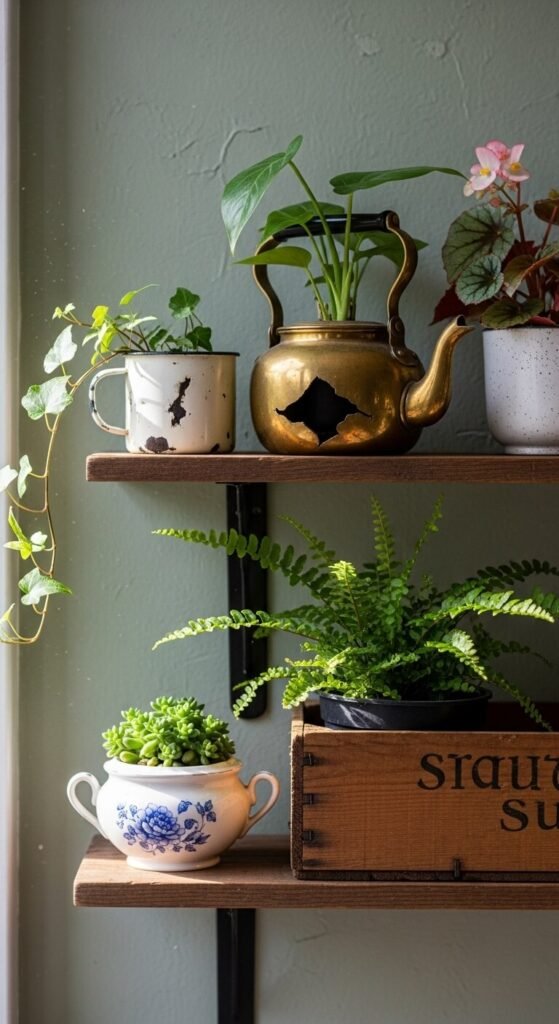
Hunt thrift stores for unique planters. Vintage teacups, old wooden boxes, metal tins, and ceramic bowls make character-filled containers. This approach costs less than buying new and adds personality.
Drill drainage holes if possible, or use containers as cache pots. Look for items with patina and wear—they add story. Mismatched vintage pieces work together when plants are similar sizes or share a color theme. You can find most items for under $3. This styling choice works especially well for cottagecore, farmhouse, or eclectic spaces. The imperfect containers make your display feel authentic rather than store-bought and generic.
Incorporate Air Plants on Driftwood
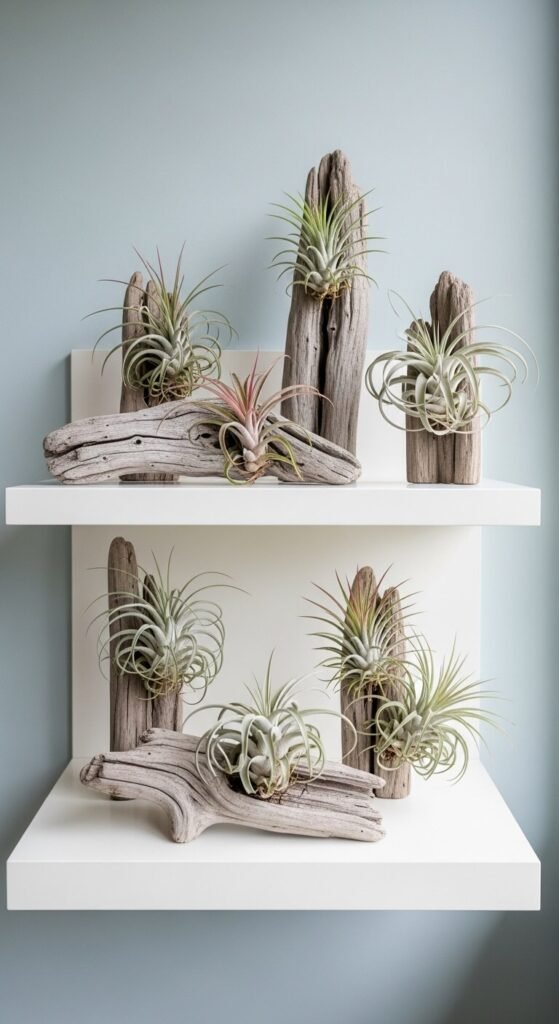
Mount air plants on driftwood pieces or in small holders. These rootless plants add sculptural interest without taking up pot space. Their unusual form creates conversation pieces.
Collect driftwood from beaches or buy pieces online. Use a dot of plant-safe glue to attach tillandsia. You can also nestle them in holes or crevices. Mist air plants 2-3 times weekly. They cost $3-8 each and last years with minimal care. This works beautifully on minimalist shelves where you want greenery without traditional pots. The combination feels organic and beachy, adding texture without overwhelming small spaces.
Balance Negative Space
Don’t overcrowd your shelf. Leave empty space around groupings so each plant can breathe visually. Negative space makes arrangements feel intentional rather than cluttered.
Start with fewer plants than you think you should use. Add more only if gaps feel too empty. The space between plants is just as important as the plants themselves. This approach works particularly well in modern or minimalist spaces. You can always add more later, but removing plants from an overcrowded shelf is harder. Allow at least 4-6 inches between plant groupings for breathing room. This principle comes from professional photography and design.
Use Shelf Risers for Built-In Layers
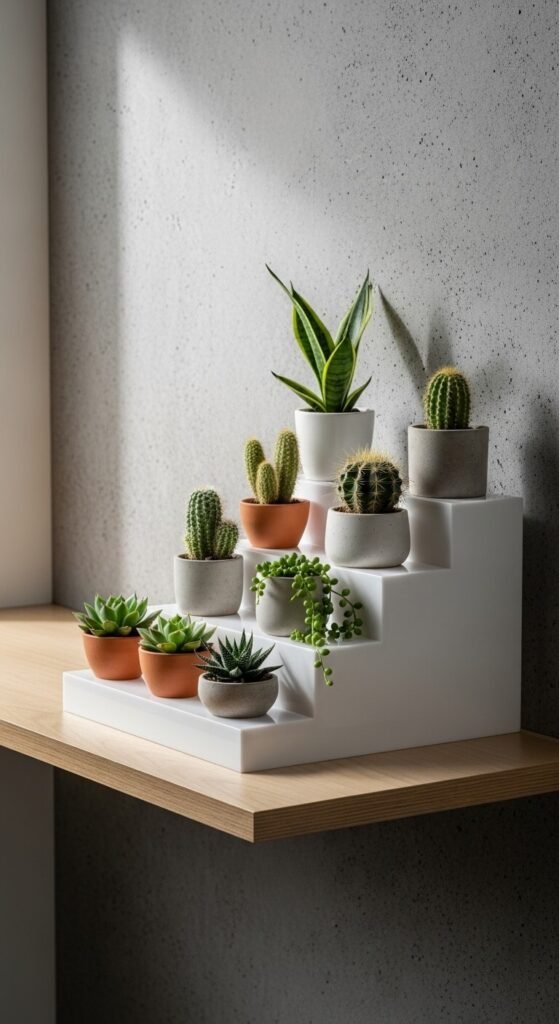
Install small shelf risers or tiered organizers. These create instant elevation without DIY skills. The built-in steps make layering foolproof.
Acrylic or bamboo risers cost $10-20 and work on any shelf. Place plants on different tiers so nothing hides behind something else. This works especially well for smaller plants like succulents or herbs. You can also use them to display watering cans, plant food, or decorative objects alongside plants. The clear acrylic versions disappear visually, letting plants take center stage while providing the structure you want for a polished look.
Add a Focal Point Plant
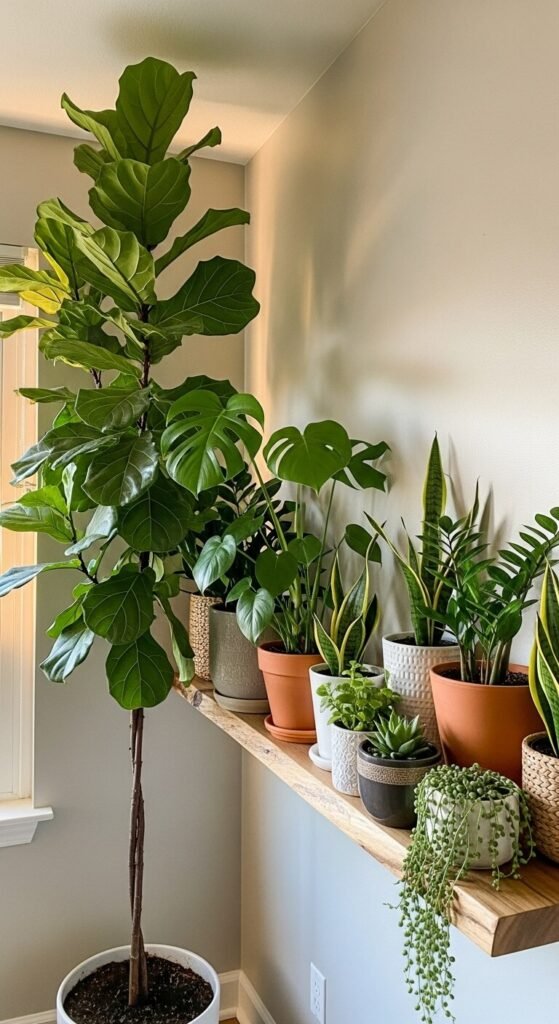
Choose one standout plant as your anchor. This could be a large monstera, a dramatic snake plant, or a flowering orchid. Everything else should support and complement this star.
Place your focal plant at one end or in the center, depending on your shelf length. Keep surrounding plants smaller and simpler so they don’t compete. Your eye should go to the focal plant first. This creates a clear visual hierarchy. The anchor plant can be your most expensive piece—then fill in with budget options. This approach works better than buying many medium-sized plants that all blend together without making a statement.
Style With Seasonal Rotations

Swap plants seasonally to keep your shelf feeling fresh. Spring bulbs in March, bright tropicals in summer, warm-toned foliage in fall, and evergreens in winter.
You don’t need different plants—just rotate what you already own. Move your most colorful plants forward in summer, then bring in richer tones for autumn. Add a seasonal object or two like pinecones, shells, or small pumpkins. This keeps your display from feeling stagnant. Many seasonal plants are affordable at grocery stores. A $5 mum in October or a $6 bulb in spring completely refreshes your shelf without a full redesign.
Create Symmetry for Formal Spaces
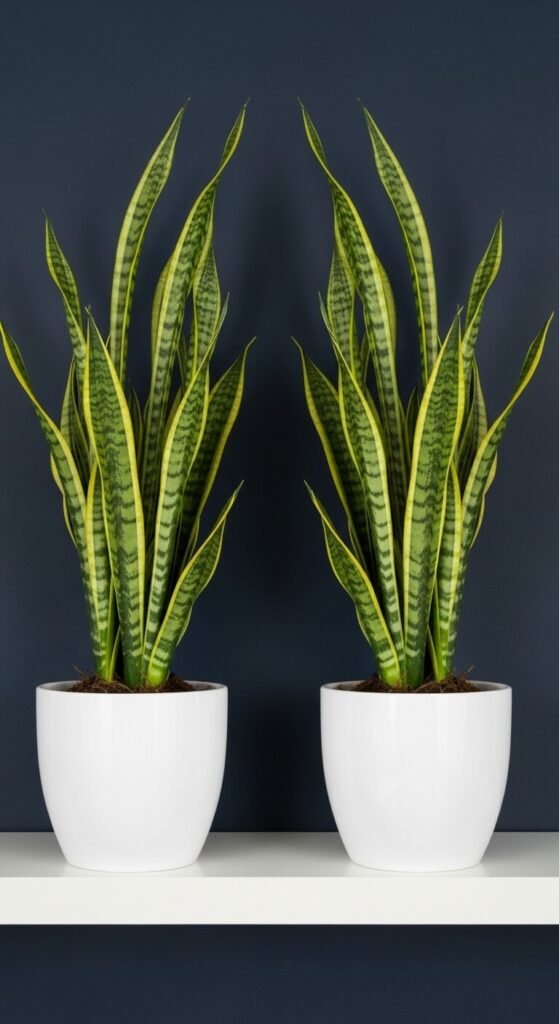
Use matching plants on either end for a formal, balanced look. Mirror your arrangement from left to right. This works well in traditional spaces or rooms with architectural symmetry.
Choose two identical plants and pots for the ends. Place a centerpiece in the middle—perhaps a larger plant or decorative object. Fill remaining space with matched pairs. This approach feels calming and orderly. Buy plants in pairs when stores have sales. The symmetrical style works particularly well in entryways, dining rooms, or formal living spaces where you want polish over eclectic charm. The predictability creates visual rest in busy rooms.
Incorporate Vertical Elements With Moss Poles
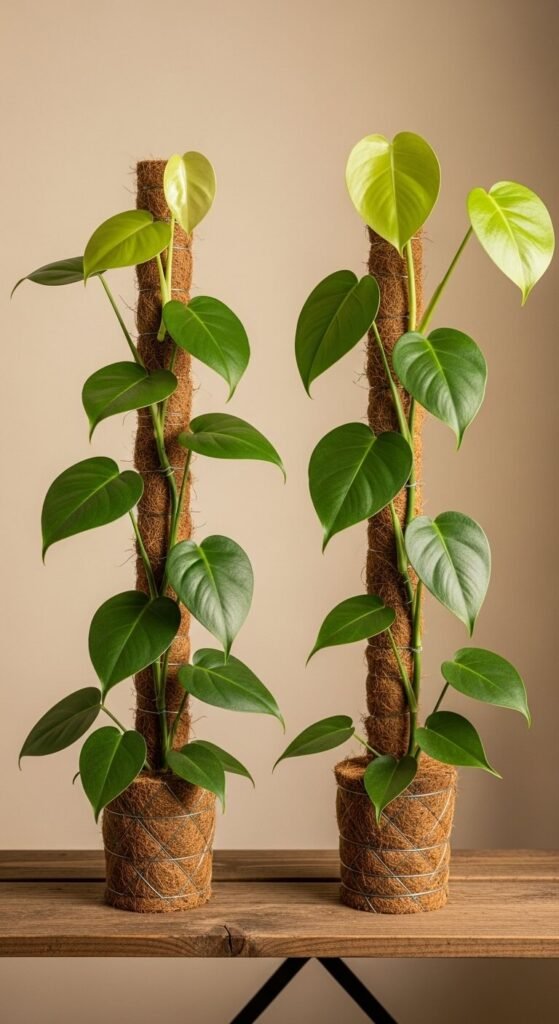
Add moss poles or trellises to support climbing plants. This creates dramatic height and makes your shelf feel taller. Vertical growth draws the eye upward and adds architectural interest.
Coir poles cost $8-15 and last years. Secure them in pots with bamboo stakes. Train pothos, monstera, or philodendron to climb by gently tying stems with soft plant ties. The vertical element breaks up the horizontal lines of shelving. This works especially well on lower shelves where you want to fill vertical wall space. Climbing plants naturally look fuller and healthier when growing upward rather than trailing, giving you more green per plant.
Display Plants in Matching Heights
For a modern look, choose plants that sit at the same height. This creates a clean horizontal line that feels contemporary and organized.
Select plants with similar growth habits or trim them to match. Place them evenly spaced along your shelf. This works best with 5-7 plants rather than just 2-3. The repetition creates rhythm. Use identical pots to strengthen the effect. This style suits minimalist or Scandinavian spaces where simplicity rules. The uniformity feels intentional rather than boring when plant varieties differ—same height, different textures and leaf shapes keep it interesting.
Mix Real and Faux Strategically
Use faux plants in spots where real ones won’t survive. Combine them with real plants so everything looks intentional. High-quality artificial plants have come far and fool most people.
Place real plants where light is best. Fill darker corners or higher shelves with faux options. Mix them together rather than segregating real from fake. Look for faux plants without obvious gloss or plastic sheen. Dust them monthly to keep them realistic. This lets you fill your entire shelf without fighting plant biology. Many renters use this approach in bathrooms or windowless spaces where growing conditions are poor but greenery still looks great.
Add Trailing Plants Behind the Shelf
Place trailing plants on the wall behind your shelf. Let vines grow down to create a living backdrop. This technique adds depth and makes your shelf feel like part of a larger green installation.
Use command hooks or a small floating shelf mounted higher. Plant pothos or string of hearts in containers attached to the wall. The vines will cascade behind and around your main shelf. This works beautifully when your shelf sits 8-12 inches from the wall. The layered effect makes everything feel more lush without cramping your main shelf space. Water carefully to avoid wall damage or use self-watering pots mounted with proper waterproofing.
Create a Learning Display With Labels
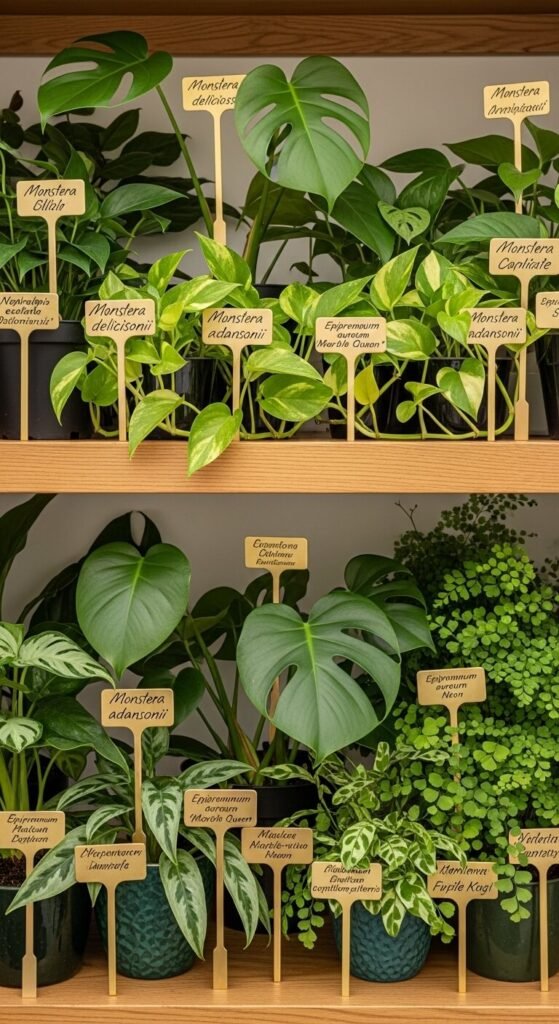
Add plant labels with botanical names or care instructions. This creates a botanical garden feel while helping you remember what you own. It also makes your collection feel curated and intentional.
Use wooden popsicle sticks and permanent marker for free labels. Or buy brass tags on Etsy for $2-3 each. Write both common and scientific names if you want an educational element. This works particularly well if you propagate and share plants—guests can easily identify what they want. Kids love reading labels and learning plant names. The simple addition makes your display feel like a thoughtful collection rather than random greenery.
Style Based on Shelf Material

Match your styling to your shelf’s material. Wood shelves pair with earthy pots and natural textures. Metal shelves look great with industrial concrete planters. White shelves work with minimalist ceramics.
Let your shelf guide your pot choices. Rustic wood calls for terracotta, wicker, or wooden containers. Sleek floating shelves want clean lines and modern materials. Industrial pipe shelves pair with galvanized metal, concrete, or wire baskets. This creates cohesion between architecture and styling. Fighting your shelf’s inherent style makes everything feel disjointed. Work with what you have for the most harmonious result that feels like it belongs in your space.
Conclusion
Your plant shelf tells a story about how you live and what you care about. These styling ideas work whether you’re starting with two plants or twenty, renting or owning, working with a tiny budget or ready to invest. The best displays grow organically over time—rearrange as plants mature, swap things seasonally, and trust your instincts about what looks right.
Start with one or two techniques that speak to you. Maybe it’s grouping in odd numbers or adding that focal point plant you’ve been eyeing. As you water and tend your plants, you’ll naturally see what works and what should shift. Your plant shelf will keep evolving, and that’s exactly how it should be. Now grab a few pots and start creating your own living art.