You know that feeling when you walk into a boutique hotel or a designer’s home and stop dead in your tracks because the gallery wall is just so good? The frames are perfectly arranged, the artwork tells a story, and somehow it all just works. Well, here’s the secret: creating that magazine-worthy gallery wall isn’t about luck or an expensive interior designer—it’s about following a few key principles that anyone can master.
Whether you’re starting from scratch or rescuing a frame collection that’s been gathering dust, this guide will walk you through exactly how to create a gallery wall that looks intentionally designed every single time.
Start With a Cohesive Theme
Before you hammer a single nail, you need a vision. The most common mistake people make is mixing too many styles without a unifying element. Your gallery wall should tell a cohesive story.
Choose one of these approaches:
- Color palette: Limit your artwork to 2-3 main colors
- Subject matter: All botanical prints, all black and white photography, or all abstract art
- Frame style: Mix frame sizes but keep the finish consistent (all black, all natural wood, or all white)
- Personal narrative: Family photos from different eras with a consistent editing style
The key is picking one element that ties everything together while allowing variety in other aspects.
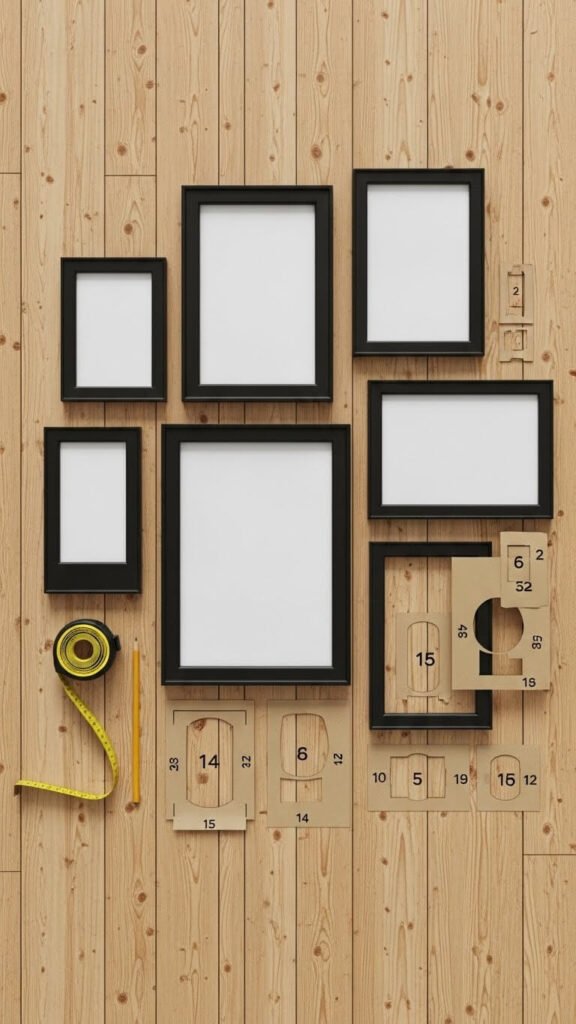
Create a Template Layout on the Floor
This is the game-changing step that professionals swear by. Never start by putting holes in your wall—that’s amateur hour.
Lay all your frames on the floor and play with different arrangements until you find “the one.” Here’s how:
- Start with your largest piece as an anchor
- Build around it with medium and smaller frames
- Maintain 2-3 inches of space between frames for visual breathing room
- Step back frequently to view the overall shape from a distance
- Take a photo once you’re happy with it (trust me, you’ll need this reference)
Try to create an overall shape that’s balanced—whether that’s a grid, a salon-style cluster, or a horizontal line. The arrangement should feel intentional, not random.
Use Paper Templates Before Committing
Once you’ve finalized your floor layout, trace each frame onto kraft paper or newspaper and cut out the shapes. This lets you tape the arrangement to your wall and live with it for a day or two before making permanent decisions.

While the templates are up:
- Check the arrangement from your couch, dining table, or wherever you’ll view it most
- Make sure it’s at the right height (center of the grouping should be at eye level, around 57-60 inches)
- Adjust spacing if anything feels cramped or too spread out
- Mark your nail points directly on the paper templates
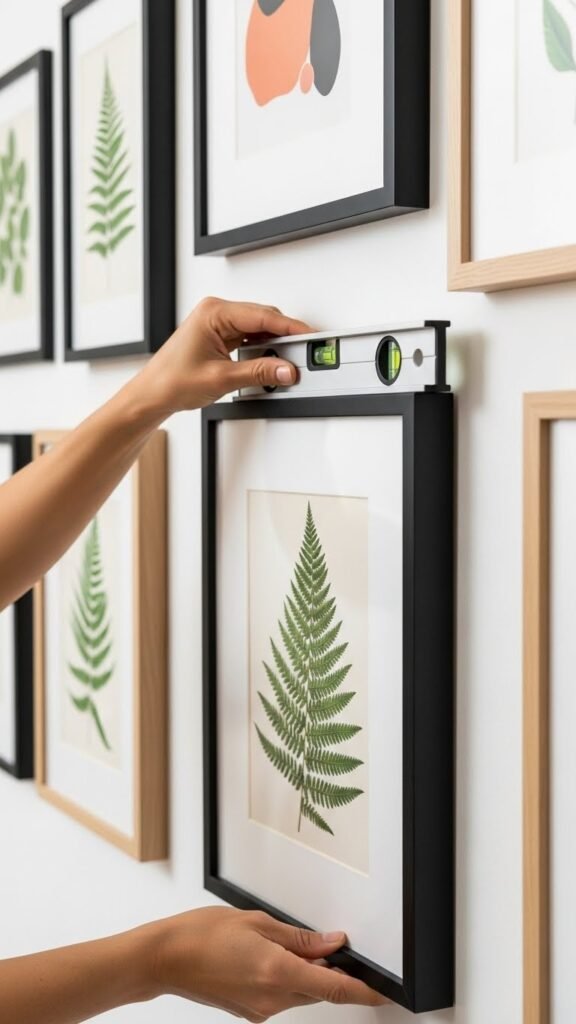
Master the Hanging Process
Now comes the satisfying part. Work methodically to avoid the frustration of crooked frames.
The golden rules:
- Always start with the center or largest piece first
- Use a laser level or level app on your phone to keep frames straight
- For heavier pieces, use proper wall anchors—not just nails
- Hang one piece, step back, adjust if needed, then move to the next
- Keep your reference photo nearby
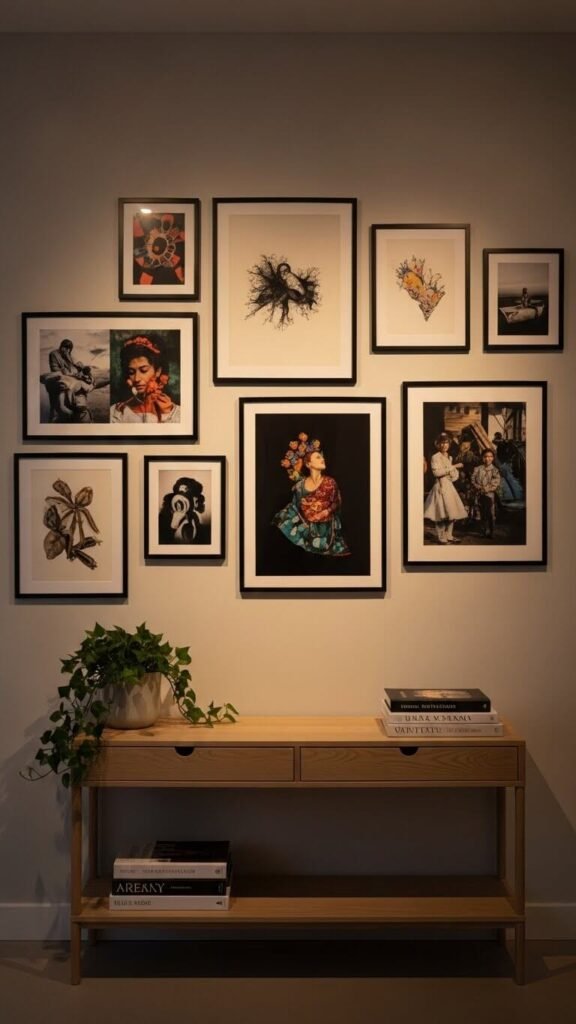
Add Depth With Varied Frame Styles
Even within your cohesive theme, you can create visual interest by varying frame depths and styles slightly. Mix thin modern frames with chunkier vintage-inspired ones. Include a few pieces with mat boards to add dimension. Consider adding a small shelf to display a 3D object alongside your frames.
The professional touch comes from this layering—it keeps the wall from looking too flat or predictable.
The Final Touch: Lighting Matters
Gallery walls shine (literally) with proper lighting. If possible, add picture lights or position a floor lamp to highlight your arrangement in the evening. Natural light works beautifully during the day, but dedicated lighting takes your wall from good to gallery-quality.
Your Turn to Create Something Beautiful
Creating a professionally curated gallery wall isn’t about perfection—it’s about thoughtful choices and proper planning. With these steps, you’ll avoid the common pitfalls of crooked frames, awkward spacing, and that “something’s off” feeling that comes from winging it.
Take your time with the planning phase, trust the process, and remember that even designers rearrange things multiple times before committing. Save this guide for when you’re ready to transform that blank wall into your home’s next showstopper!
Pin this article for later and share your gallery wall creations with us—we’d love to see how yours turns out!