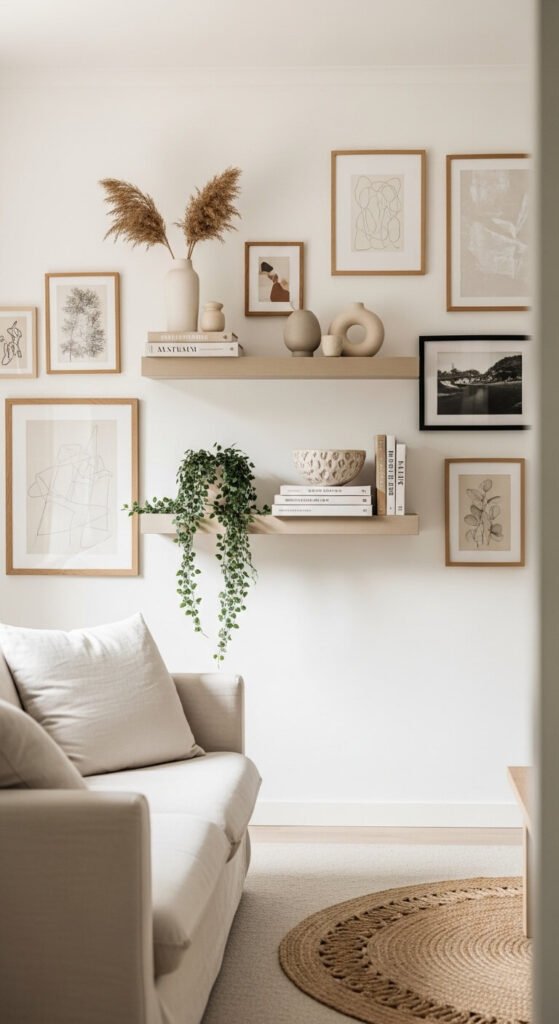
Here’s the truth nobody tells you about shelf styling: it has nothing to do with how many pretty things you own. It’s about how you arrange them. That one shift in thinking — from “what do I put up there?” to “how do I place it?” — is what separates a shelf that looks curated from one that looks like a storage unit with good lighting.
Enter the High-Low-Middle method. It’s the quiet little formula that interior stylists use on every single project, and once you see it, you genuinely cannot unsee it.
The Idea Behind the Method
Before we get into the steps, here’s the core concept in one sentence:
Your shelf should have at least one tall element, one medium element, and one low element — and they should never all be the same height.
That’s it. That’s the whole framework.
Why does it work? Because our eyes love a journey. When objects vary in height, the eye travels up, across, and down the shelf naturally — the same way it moves across a landscape or a skyline. When everything sits at the same height, the eye gets bored and moves on. And a boring shelf is a forgettable one.
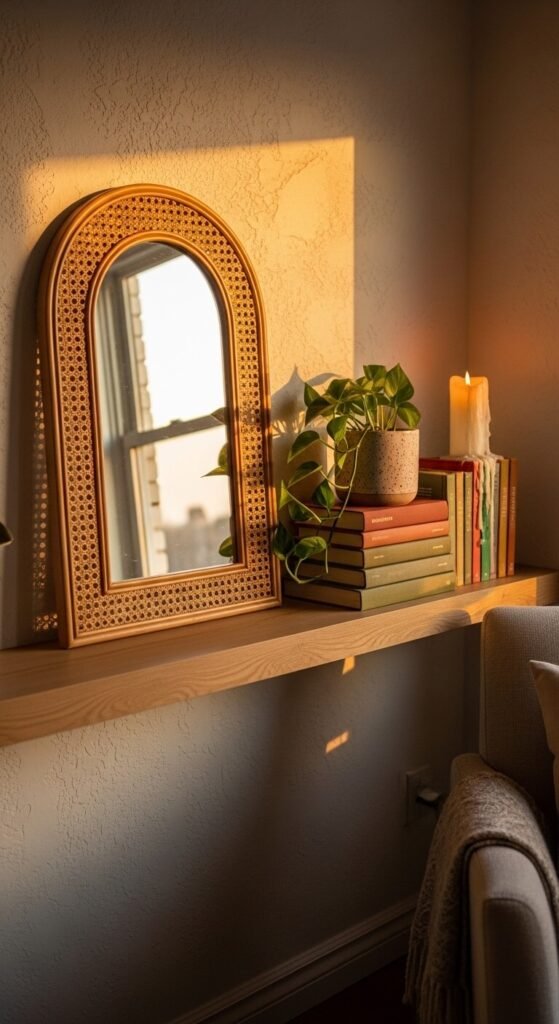
Step 1: Anchor With Your “High” Piece First
Always start tall. Your high piece is the backbone of the whole composition — everything else gets built around it.
What works well as a “High” element:
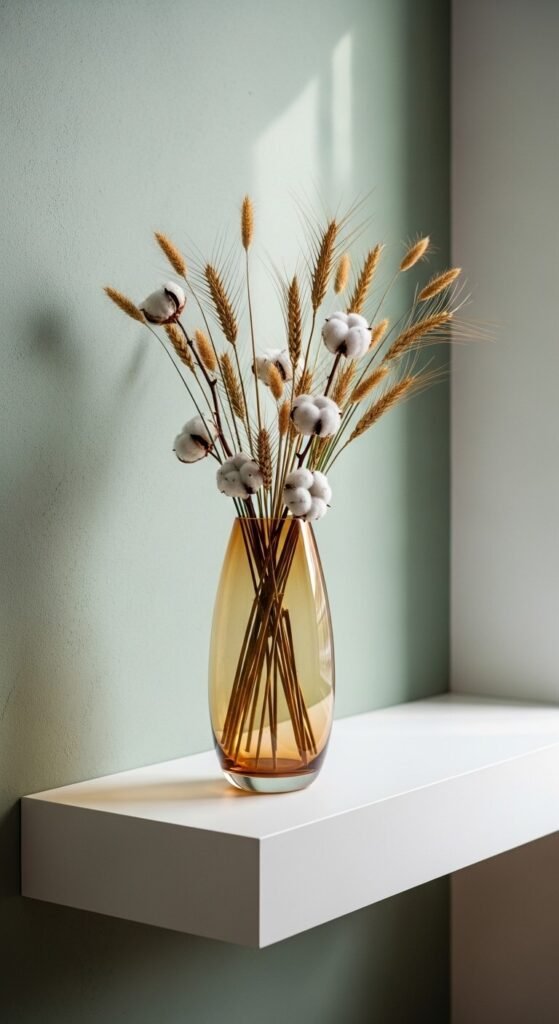
- A tall, slender vase holding dried botanicals, pampas grass, or long stems
- A piece of art or a framed print leaned against the wall at the back
- A woven wall hanging or macramé panel
- A tall lantern, candlestick, or sculptural floor object scaled for a shelf
One rule: don’t center it. Sliding your tall piece to the left or right of center immediately gives your shelf a more relaxed, editorial feel — like it was styled effortlessly, not arranged obsessively.
Step 2: Ground It With Your “Low” Element
Now bring in something that hugs the shelf surface and keeps the composition from floating upward with no anchor. Your low element creates visual weight at the base and gives the eye somewhere to land.
Great “Low” choices:
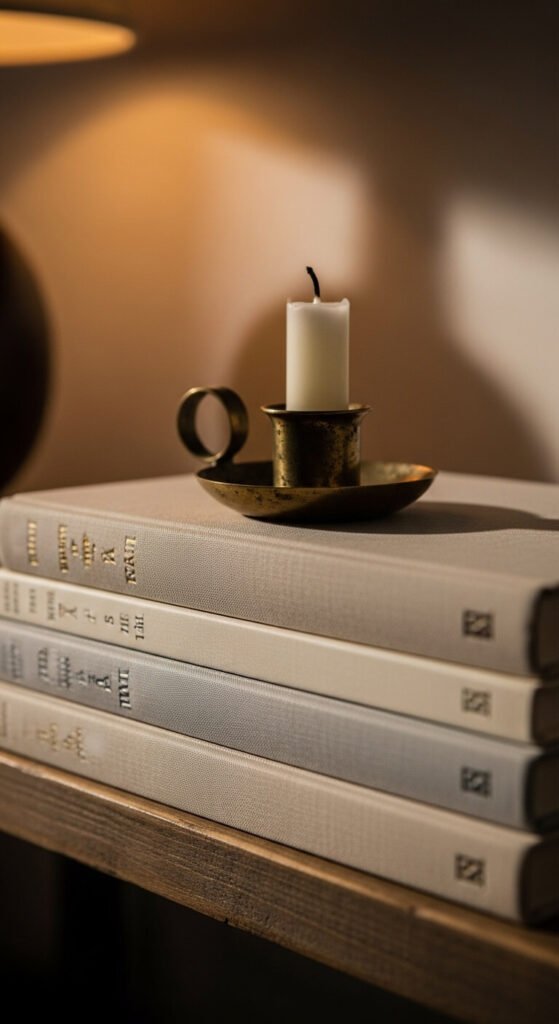
- A horizontal stack of books — remove the dust jackets for a cleaner, more cohesive look
- A wide ceramic dish, shallow bowl, or decorative tray
- A low, spreading plant like a succulent, cactus, or squat fern
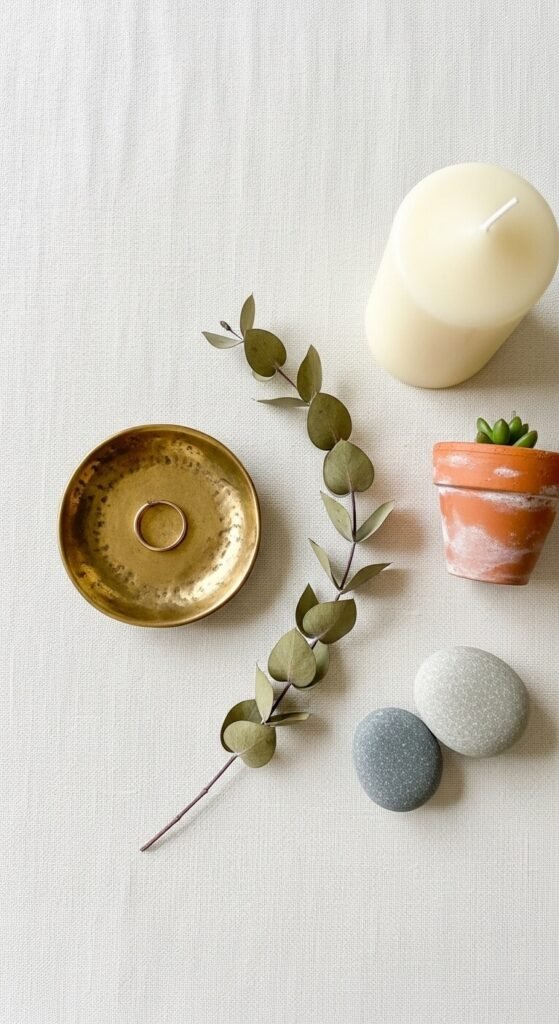
- A smooth stone, a candle in a low vessel, or a small decorative box
The book stack trick: Stack 3–5 books horizontally, then set a small object on top. You’ve just created both a “low” element and a little layered moment — two things for the price of one.
Step 3: Connect Everything With Your “Middle” Piece
This is your bridge. The middle element lives between your tall and low pieces in height, and it’s where you inject the most personality into the shelf.
Strong “Middle” picks:
- A medium vase in a contrasting shape or finish to your tall piece
- A small framed photo, postcard, or art print propped loosely
- A decorative object with sentimental value — a souvenir, a vintage find, a handmade piece
- A glass cloche, small terrarium, or sculptural candle
Texture is your best tool here. If your High piece is organic and your Low piece is smooth, choose a Middle piece with tactile contrast — hammered metal, ribbed ceramic, woven rattan, or frosted glass. The mix of surfaces is what makes a shelf feel rich and layered rather than matchy-matchy.
Step 4: Layer in the Small Details
With your trio locked in, now you can add supporting details without tipping into clutter. The key is keeping them close to the grouping and thinking of them as punctuation, not additional sentences.
Easy layering additions:
- A dried floral stem or sprig of eucalyptus tucked casually behind the vase
- A small crystal, shell, or river stone placed in front of the book stack
- A single taper candle in a thin brass holder to one side
- A folded cloth napkin or linen swatch for softness and texture
What to Avoid (Because These Are So Common)
A few habits that silently sabotage even the most thoughtful shelf styling:
- ❌ Pushing everything to the back wall — bring pieces forward at different depths to create dimension
- ❌ Matching all your materials — cohesion comes from a color palette, not identical finishes
- ❌ Filling every inch — intentional negative space makes a shelf look confident, not empty
- ❌ Symmetry — balanced doesn’t mean mirrored; an asymmetric shelf almost always looks more sophisticated
Trust Your Eye — Then Step Back
Once everything is placed, step back to the other side of the room and look. Does your eye move? Does the shelf feel like it has a beginning, middle, and end? If one area feels heavy or one area feels bare, swap a single piece and reassess.
Most shelves get there with just one small adjustment.
Now Go Fix That Shelf
You don’t need a shopping trip. You need this method and the things already sitting around your home. Grab something tall, something short, something in between — and place them with intention.
Save this article for your next shelf refresh, and share it with the friend whose shelves are crying out for a little help. The High-Low-Middle method works every time, on every shelf, in every room. Go prove it.