Transform your bedroom into a sanctuary of warmth and wonder with fairy lights. These tiny luminous strands do more than illuminate—they create ambiance, add personality, and turn ordinary spaces into magical retreats. Whether you’re working with a tight budget or ready to splurge, fairy lights offer endless creative possibilities. From cascading canopies to minimalist accents, each arrangement brings its own charm. The best part? Most setups take minutes to install and cost less than a dinner out. Ready to discover arrangements that’ll make bedtime your favorite part of the day? Let’s explore 29 enchanting ways to light up your nights.
Canopy Dreams Above Your Bed
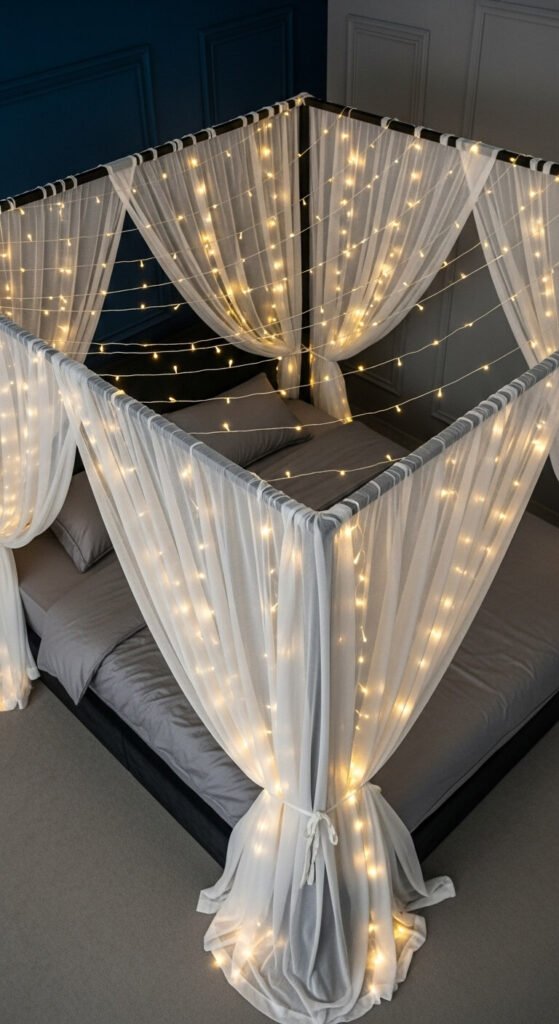
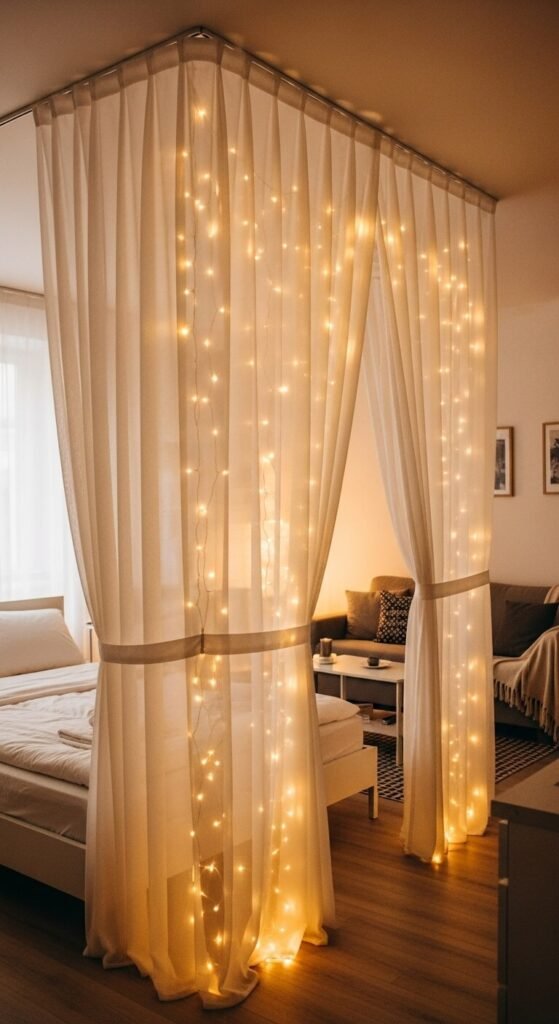
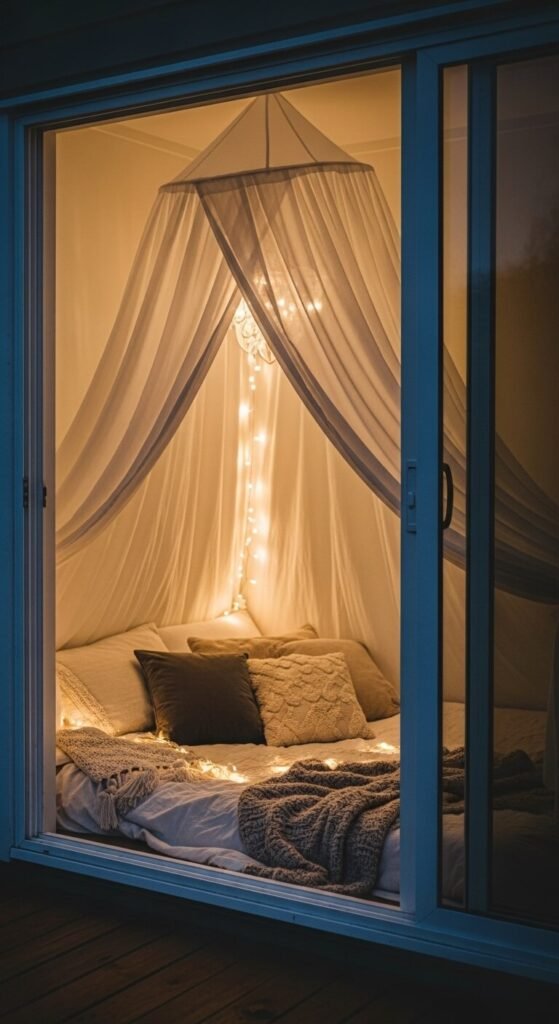
Drape sheer fabric from your ceiling and weave battery-operated fairy lights through the material. This creates a floating canopy that feels like sleeping under stars.
Use a simple ceiling hook as your anchor point. White tulle costs about $5 per yard at craft stores. Thread 20-foot light strands through the fabric before hanging.
The lights add depth and dimension to the flowing material. Choose warm white bulbs for a cozy feel or cool white for modern vibes.
This works beautifully in rental apartments since you only need one small hook. Remove everything in minutes when moving out.
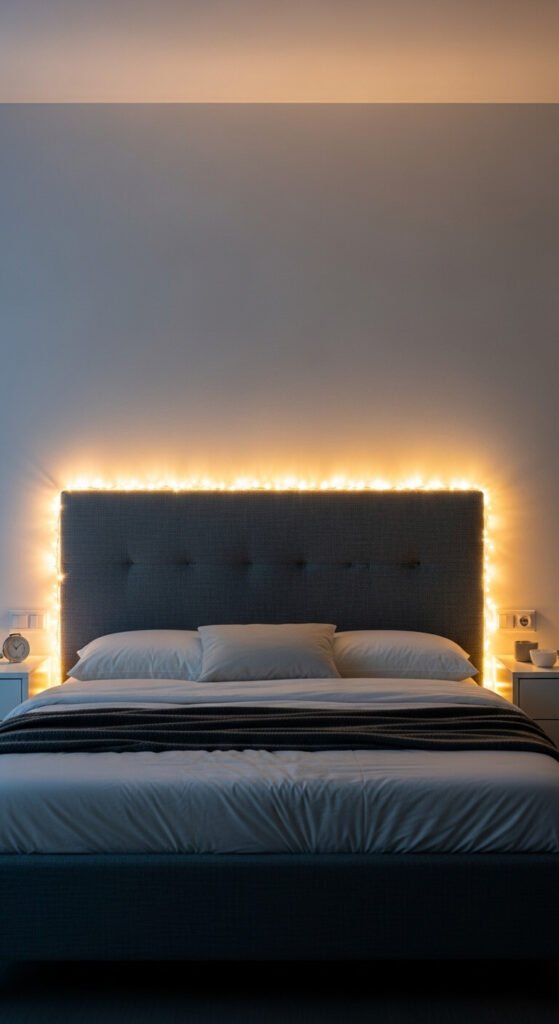
Headboard Halo Effect
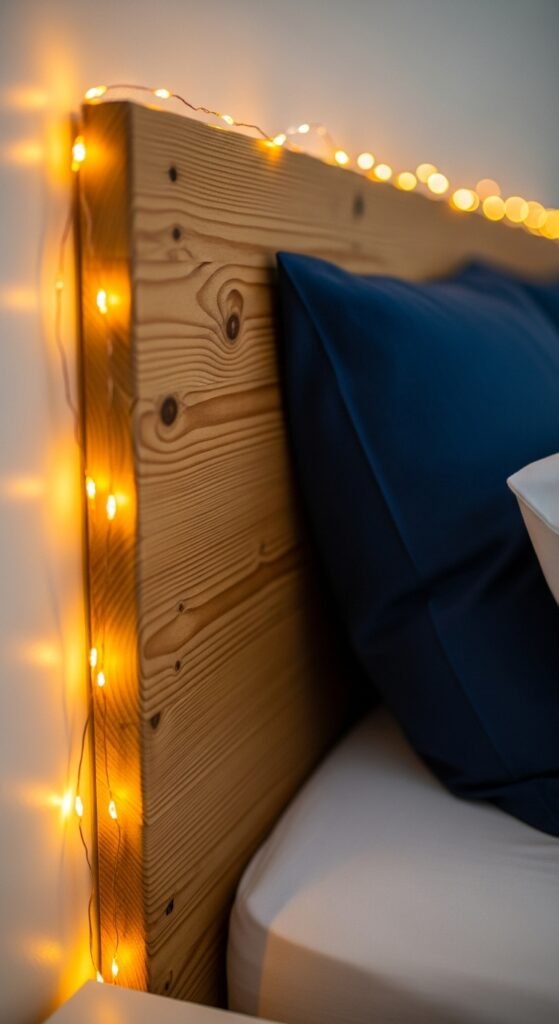
Outline your headboard with thin copper wire lights. This frames your bed and creates a subtle glow for reading.
Use removable adhesive clips to secure the strand along the edges. Space clips every 12 inches for even distribution.
Copper wire lights bend easily around curved headboards. They’re thinner than traditional bulbs and nearly invisible during daytime.
A 33-foot strand covers most queen headboards and costs under $15. Add a timer so lights turn off automatically after an hour.
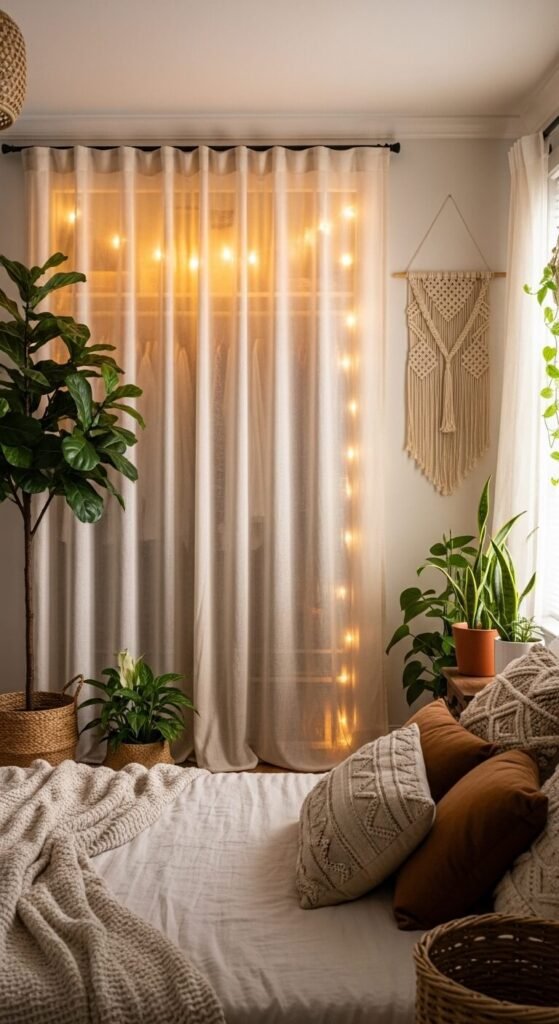
Window Frame Wonderland
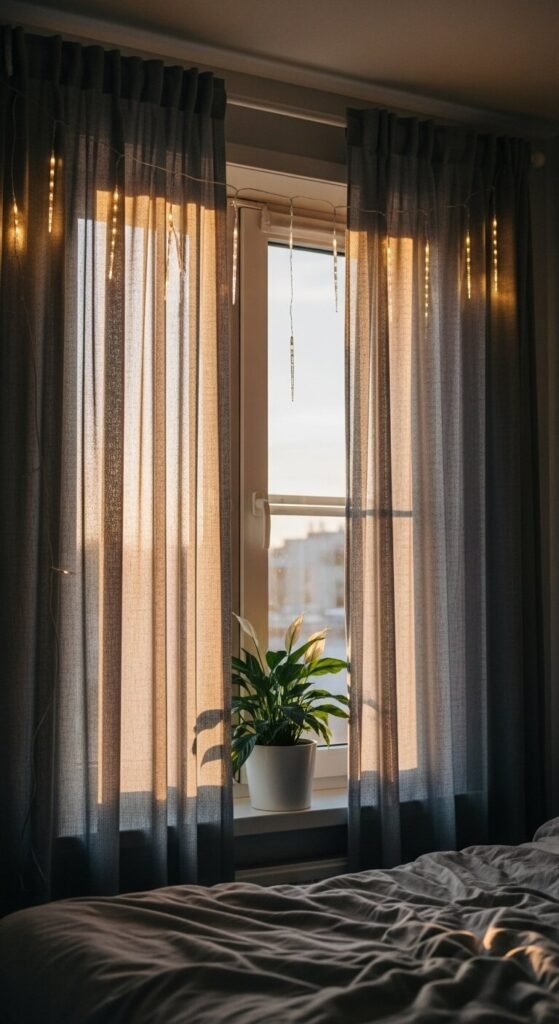
Line your window frame with icicle-style lights that cascade down like frozen waterfalls. This amplifies natural light during the day and glows softly at night.
Attach lights to your curtain rod using twist ties or clear command hooks. Let strands hang at varying lengths for organic flow.
This arrangement looks stunning from both inside and outside your home. Choose solar-powered options if your window gets direct sunlight.
Layer sheer curtains behind the lights to diffuse the glow. The effect resembles gentle rainfall made of light.
Floating Shelf Accent

Hide battery-powered lights behind floating shelves for indirect ambient lighting. This creates a floating effect and highlights your displayed items.
Run lights along the back edge before mounting the shelf. The wall reflects light outward, creating a soft halo.
This technique works with any shelf depth. Deeper shelves hide the lights completely while casting wider glows.
Use this trick to illuminate book collections, plants, or decorative objects. Change colored bulbs seasonally for different moods.
Photo Wall Galaxy
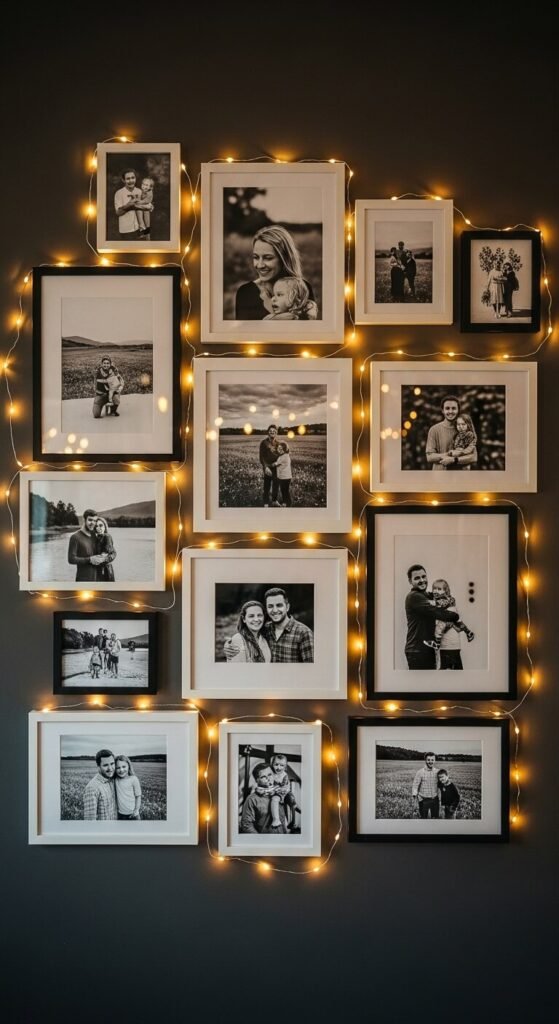
Weave fairy lights between framed photos to create a glowing memory wall. This adds warmth to personal photographs and draws attention to your gallery.
Arrange frames first, then snake lights around and between them. Use small adhesive clips to hold strands against the wall.
Mix frame sizes and orientations for visual interest. The lights connect separate images into one cohesive display.
Battery packs hide easily behind larger frames. This costs about $20 total and transforms blank walls into storytelling spaces.
Under-Bed Glow
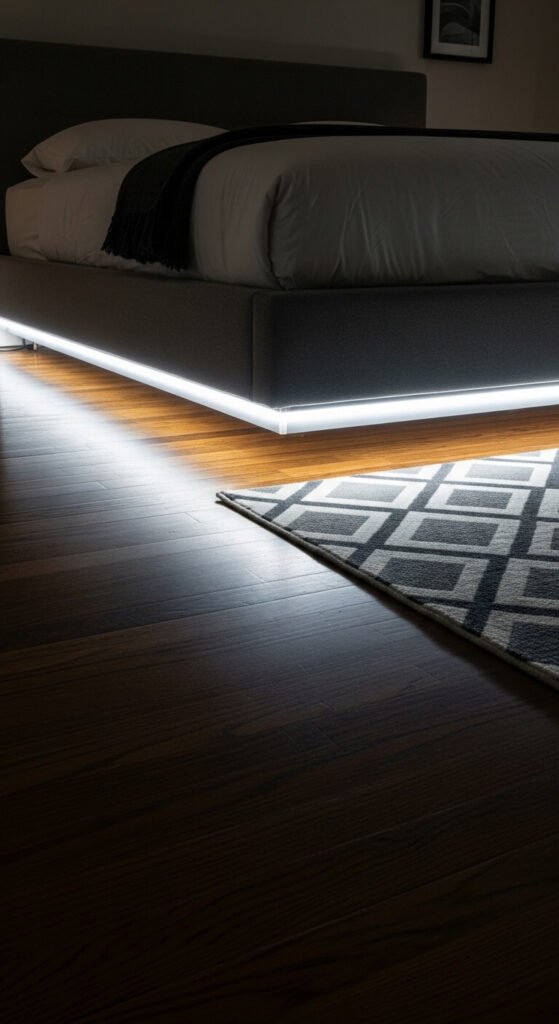
Install lights underneath your bed frame for a floating platform effect. This creates subtle nighttime navigation lighting without harsh overhead bulbs.
Stick LED strips or rope lights along the bottom edge of your bed frame. Most strips come with adhesive backing.
This works brilliantly with platform beds and frames with clearance underneath. The floor reflects light upward for gentle ambient glow.
Use motion-activated strips that turn on when you step out of bed. These run on rechargeable batteries and last weeks between charges.
Mason Jar Nightstands
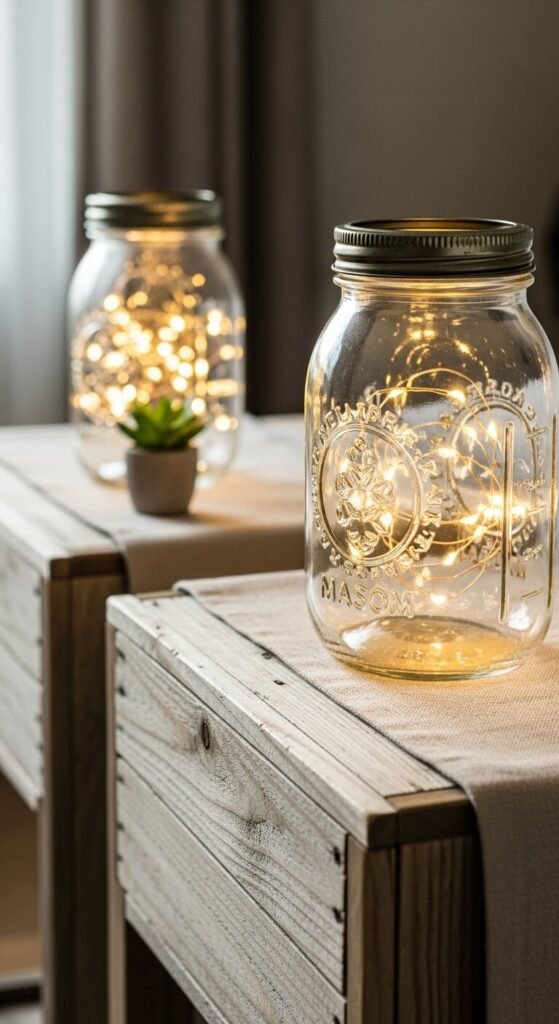
Fill mason jars with coiled fairy lights for charming bedside lamps. These provide reading light without taking up much space.
Buy battery-operated lights that fit entirely inside quart-size jars. The glass diffuses light beautifully and stays cool to touch.
Customize jars with ribbon, twine, or paint for personal flair. Stack different sizes for varied height.
This costs under $10 per jar and creates warm ambient light. Perfect for renters who can’t install permanent fixtures.
Closet Door Curtain
Replace your closet door with a curtain interwoven with lights. This saves space and adds a boutique feel to your clothing area.
Install a tension rod across your closet opening and hang lightweight curtains. Weave battery lights through the fabric before hanging.
This solution works perfectly in small bedrooms where swinging doors consume valuable floor space. The lights make morning outfit selection easier.
Choose curtains slightly longer than your doorway for elegant pooling. The whole setup costs about $25 and installs in 30 minutes.
Mirror Border Magic
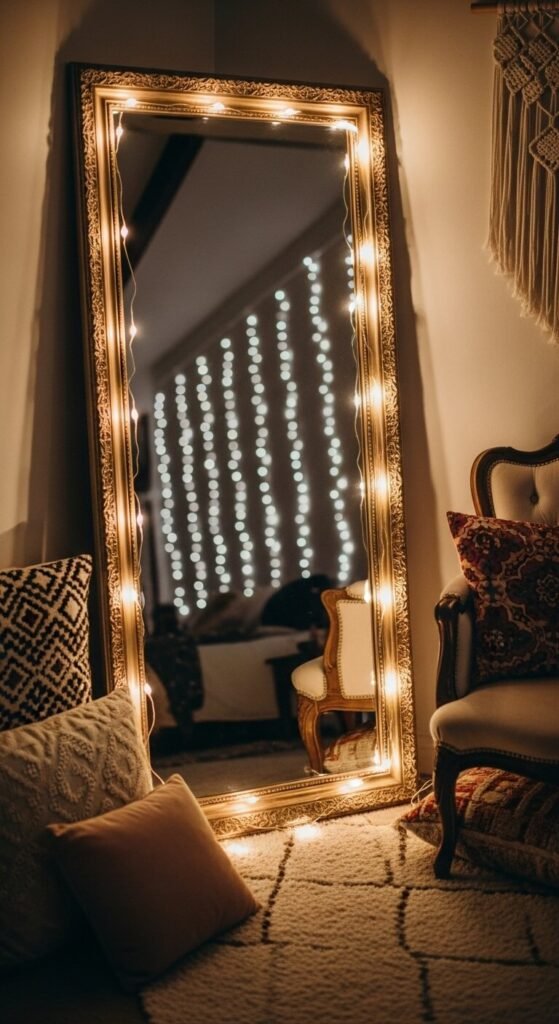
Frame your full-length mirror with lights to create a Hollywood-style vanity effect. The reflection doubles your light output and creates beautiful depth.
Use adhesive clips to attach lights around your mirror’s perimeter. Space them evenly for balanced illumination.
This setup provides perfect lighting for getting ready while adding decorative flair. Mirrors amplify the cozy atmosphere throughout your room.
Dimmable lights let you adjust brightness for different times of day. The reflection creates an infinity effect that makes rooms feel larger.
Ceiling Constellation
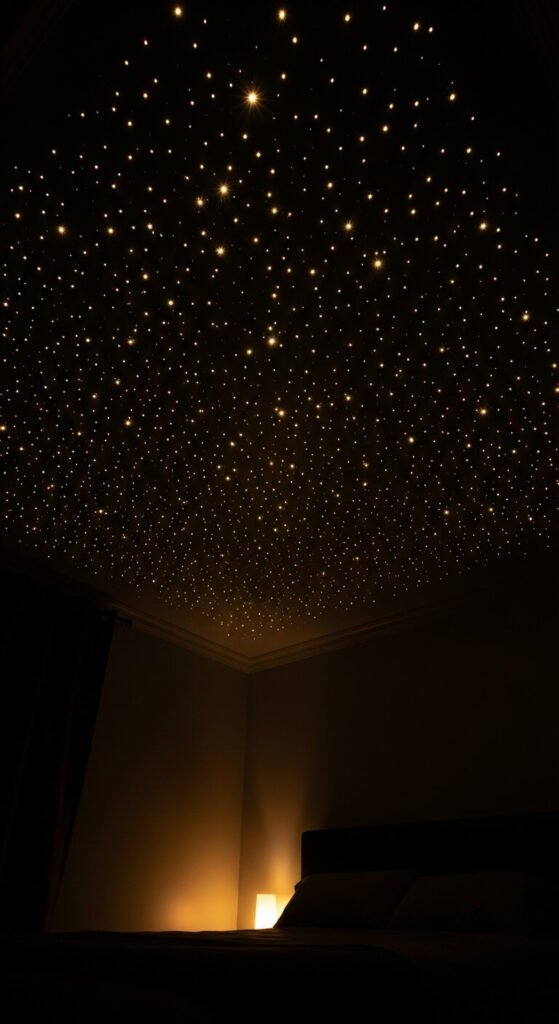
Create a starry sky by installing micro-lights across your ceiling. This transforms your bedroom into a planetarium for peaceful sleep.
Use removable adhesive hooks spaced randomly across your ceiling. Drape lights in loose patterns rather than rigid lines.
Battery-powered micro-lights stay lightweight and won’t damage ceiling paint. Focus clusters in certain areas to mimic real constellations.
This project takes about an hour and costs $30 for quality lights. Add glow-in-the-dark star stickers between lights for layered effect.
Bookshelf Backdrop
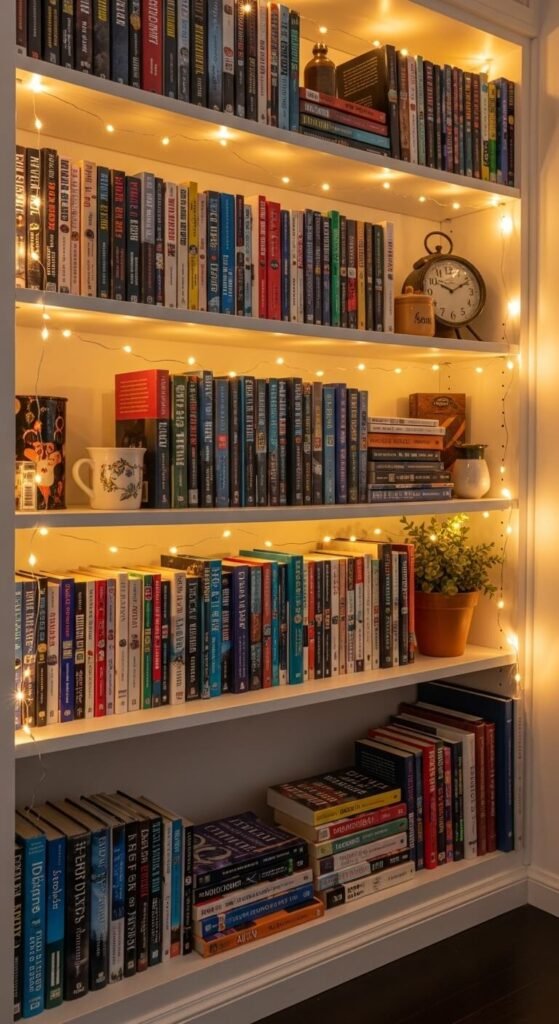
Run lights along the back of your bookshelf to backlight your collection. This turns books into decorative elements and creates atmospheric reading nooks.
Attach lights to the rear panel using clear tape or small hooks. Position them behind books for filtered glow through gaps.
This highlights book spines while providing gentle task lighting. Adjust book positions to control how much light filters through.
Works beautifully with both built-in and freestanding shelves. Use warm white lights to enhance the cozy reading vibe.
Draped Wall Tapestry
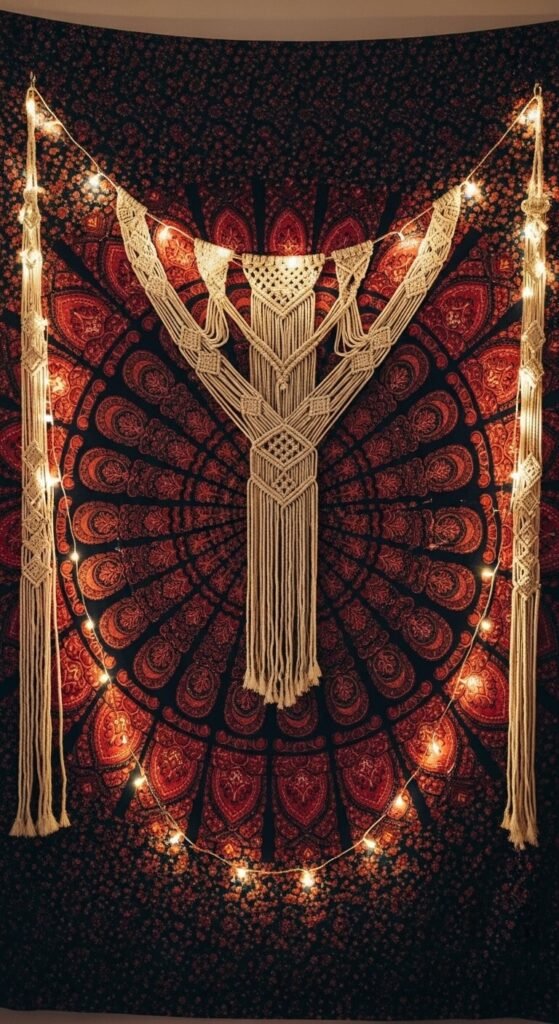
Hang lights over a wall tapestry to add dimension and shadow play. This combines textile art with lighting for maximum visual impact.
Secure lights along the top edge of your tapestry and let them cascade down. The fabric creates depth as lights rest at different distances from the wall.
This works with any decorative fabric or large scarves. Move lights around to find the most flattering arrangement.
The combination costs about $35 total and creates a striking focal point. Change tapestries seasonally while keeping the same light strands.
Desk Workspace Glow
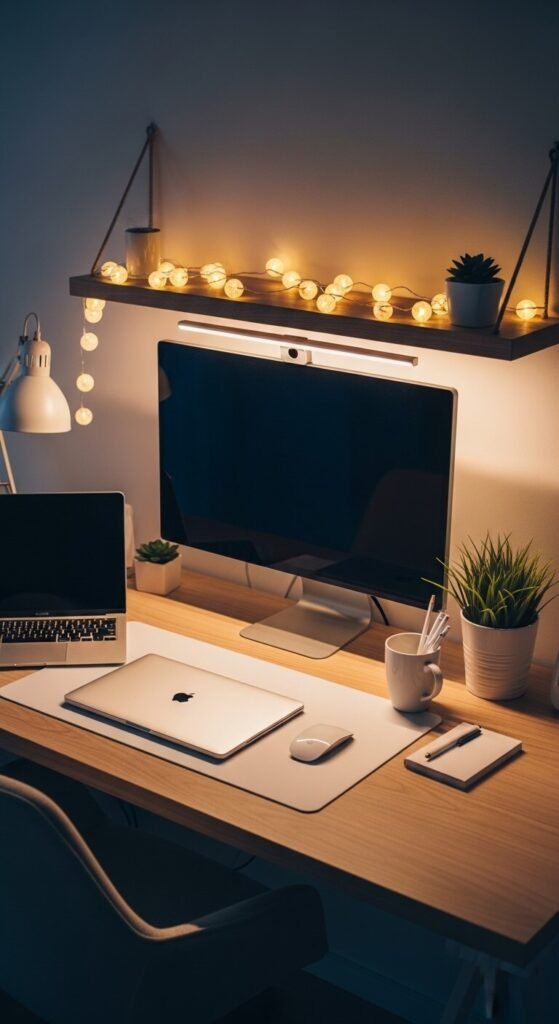
String lights above your desk for focused work lighting that doesn’t strain eyes. This creates a dedicated workspace zone in your bedroom.
Attach lights to a shelf or wall directly above your desk area. Position them behind or above your screen to avoid glare.
This separates your sleep space from your work area visually. The warm glow reduces eye fatigue during evening computer use.
Add a desk lamp for task lighting and use fairy lights for ambient fill. This layered approach costs under $20 and improves productivity.
Plant Corner Highlight

Weave lights through your plant collection to create an enchanted garden corner. This highlights foliage and brings life to darker bedroom corners.
Thread lights through hanging planters and around larger plant bases. The leaves diffuse light naturally and create interesting shadows.
This setup looks magical while helping you spot plants that need watering. Choose waterproof lights rated for humid conditions.
Start with one 20-foot strand and expand as your plant collection grows. The combination improves air quality while adding ambiance.
Ladder Display Stand
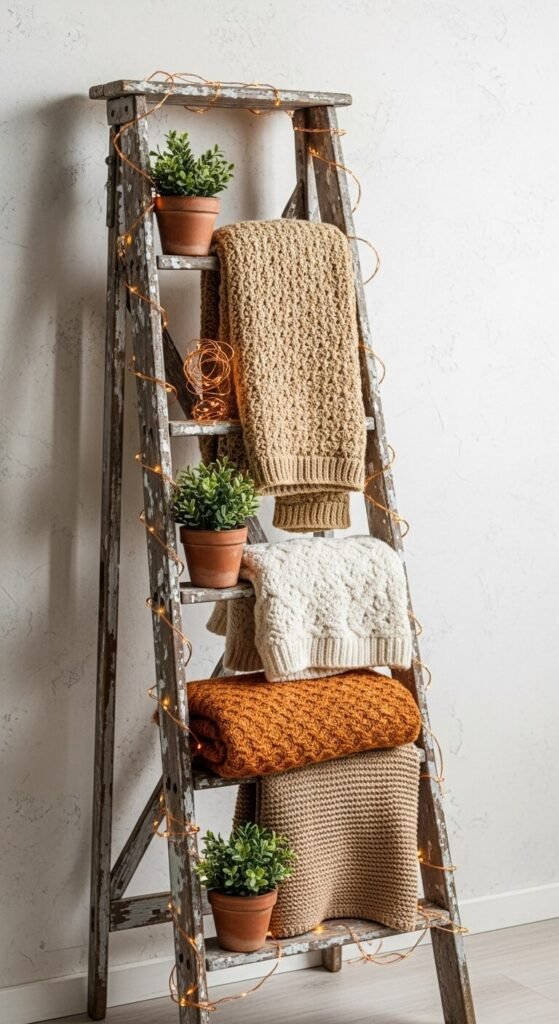
Lean a decorative ladder against your wall and wrap it with lights. Use the rungs to display blankets, plants, or decorative items.
Find vintage ladders at thrift stores for $10-20. Wrap lights around each rung in spiral patterns.
This creates vertical visual interest and functional storage. The lights make the ladder a statement piece rather than just storage.
Switch out displayed items seasonally while keeping lights in place. This flexible arrangement adapts to changing decor styles.
Bed Frame Perimeter
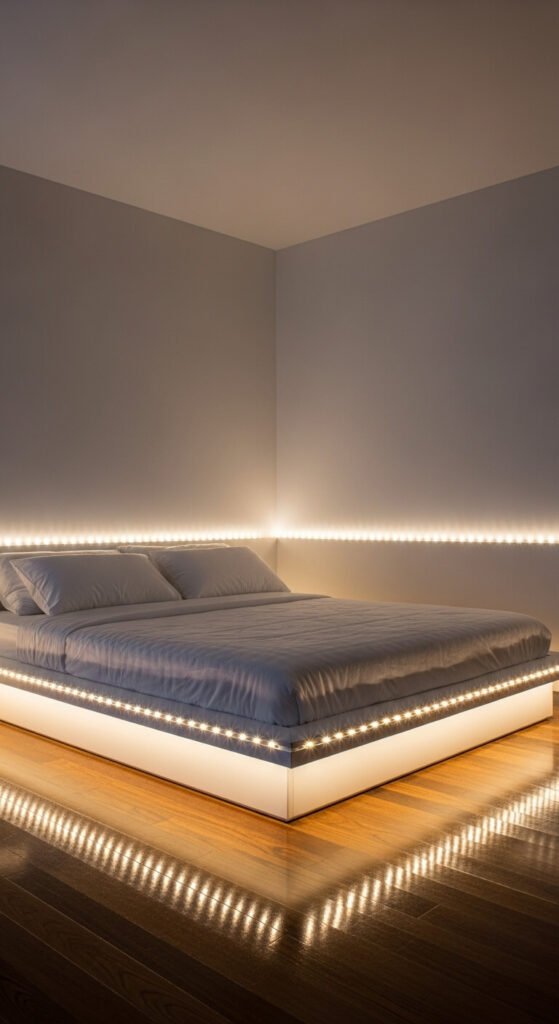
Outline your entire bed frame with lights for a defined sleep zone. This creates a floating platform effect and subtle nighttime orientation.
Run lights along all four sides of your bed frame using adhesive clips. Ensure even spacing for professional appearance.
This technique works with any bed frame style. The lights create a boundary between your sleep area and the rest of the room.
Use smart lights that dim automatically on a schedule. This helps signal bedtime routines and supports better sleep habits.
Corner Cascade Waterfall
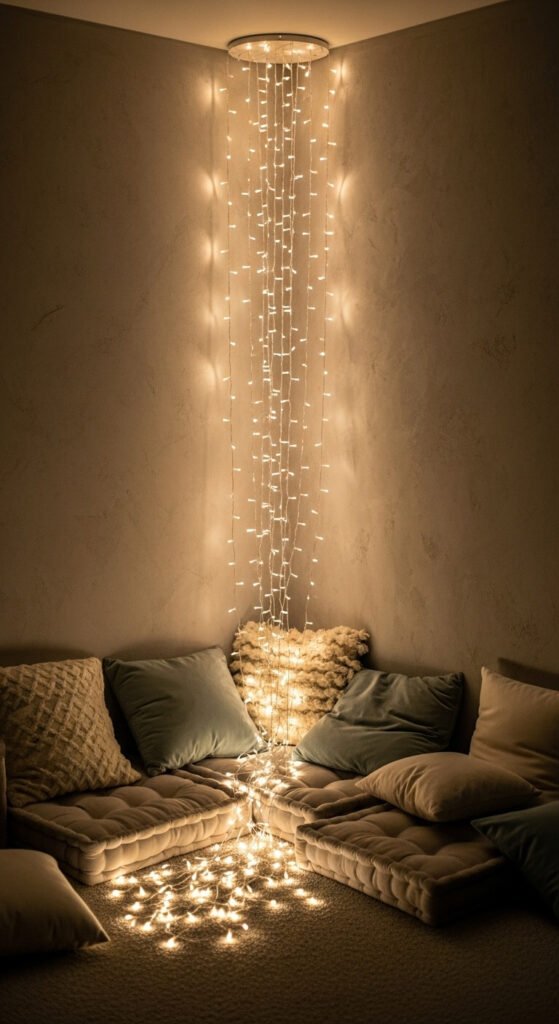
Install lights in a corner and let them cascade down like a waterfall. This unused space becomes a cozy reading nook or meditation area.
Use a ceiling hook to hang multiple light strands at different lengths. Let them pool on the floor naturally.
Place floor cushions or a bean bag in the corner to create a retreat. The lights provide perfect reading illumination.
This transforms dead space into functional area for about $25. Add sheer fabric behind lights for enhanced waterfall effect.
Geometric Wall Patterns
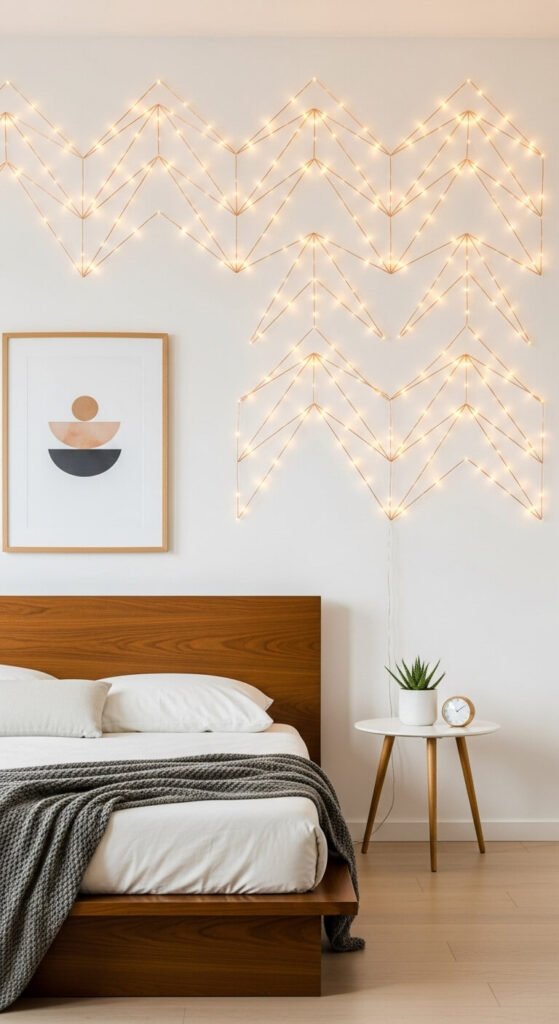
Arrange lights in geometric patterns on your wall for modern art installations. This combines lighting with visual design principles.
Use removable adhesive hooks to map out your pattern before installing lights. Common shapes include chevrons, hexagons, or zigzags.
Copper wire lights work best for crisp geometric lines. Their flexibility allows sharp angles and precise positioning.
This creates custom wall art for under $30. Change patterns seasonally or when you want to refresh your space.
Sheer Panel Divider
Create a room divider with sheer panels and embedded lights. This separates sleeping areas in studios while maintaining open feel.
Hang ceiling-mounted curtain track or tension rod. Weave lights through panels before hanging.
The lights provide ambient illumination for both sides of the divider. Sheer fabric maintains light flow while creating visual separation.
This solution costs about $40 and installs without drilling. Perfect for renters needing flexible space division.
Vintage Frame Repurpose
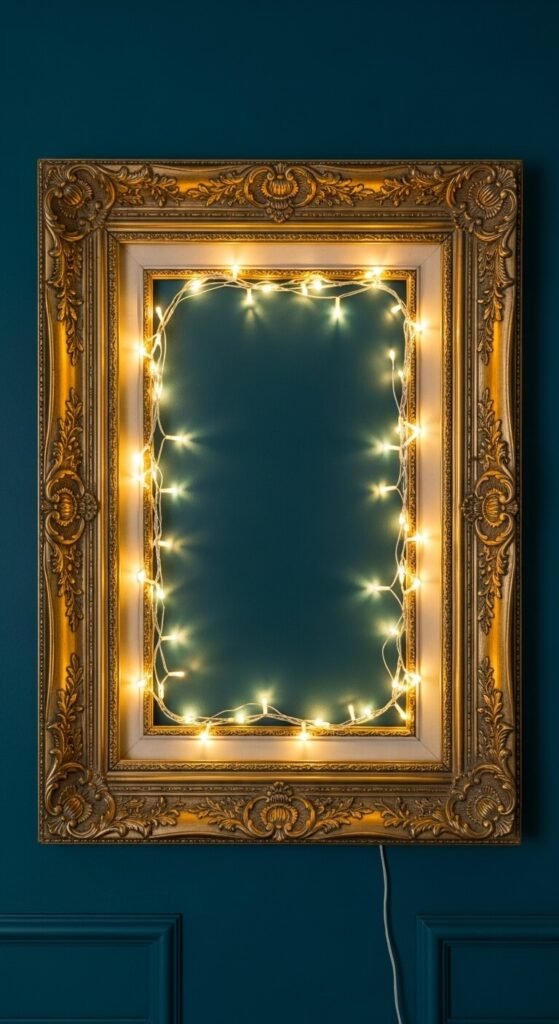
Mount empty vintage frames on walls and fill them with lights. This turns thrift store finds into unique light fixtures.
Secure lights inside the frame using small nails or hot glue. Arrange them in patterns or let them flow organically.
This works with frames of any size or style. Hang the frame first, then add lights for easier installation.
Thrift store frames cost $5-10. This creates one-of-a-kind wall art that also provides ambient lighting.
Behind Headboard Drop
Hide lights behind your headboard for subtle wall uplighting. This creates a floating effect and sophisticated ambiance.
Position lights between your headboard and wall before pushing furniture into place. The gap allows light to escape upward and sideways.
This technique works best with headboards that don’t sit flush against walls. The hidden source creates mystery and elegance.
Use LED strips with remote controls for easy operation. This permanent installation provides nightly ambiance without visible hardware.
Fabric Canopy Tent
Build a fabric canopy tent in your bedroom corner and line it with lights. This creates a room within a room.
Use ceiling hooks to suspend fabric from a central point. Drape material outward to create tent walls.
String lights along the inside perimeter and across the ceiling. This makes the space feel magical and private.
Perfect for reading, meditation, or just escaping. The whole project costs under $50 and provides a personal sanctuary.
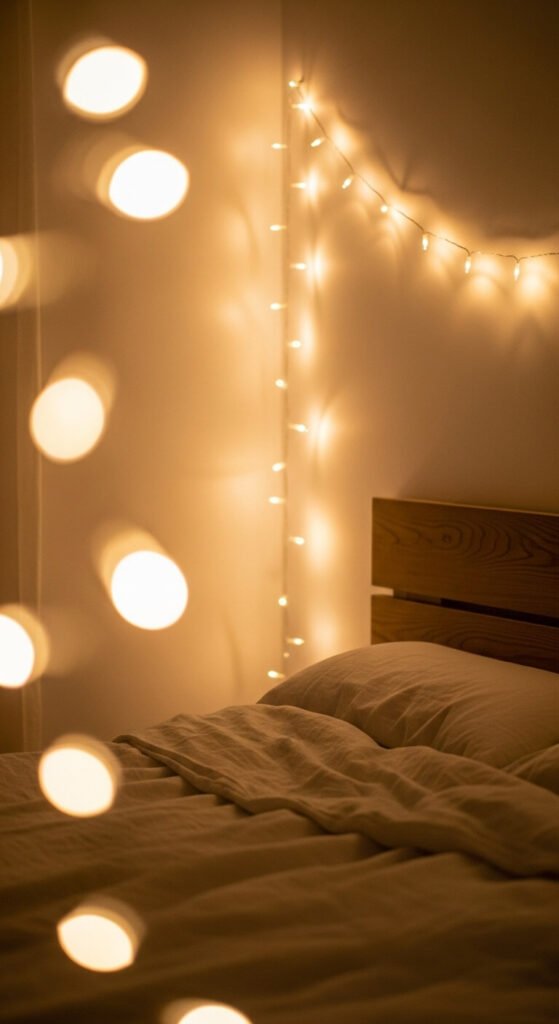
Minimalist Single Strand
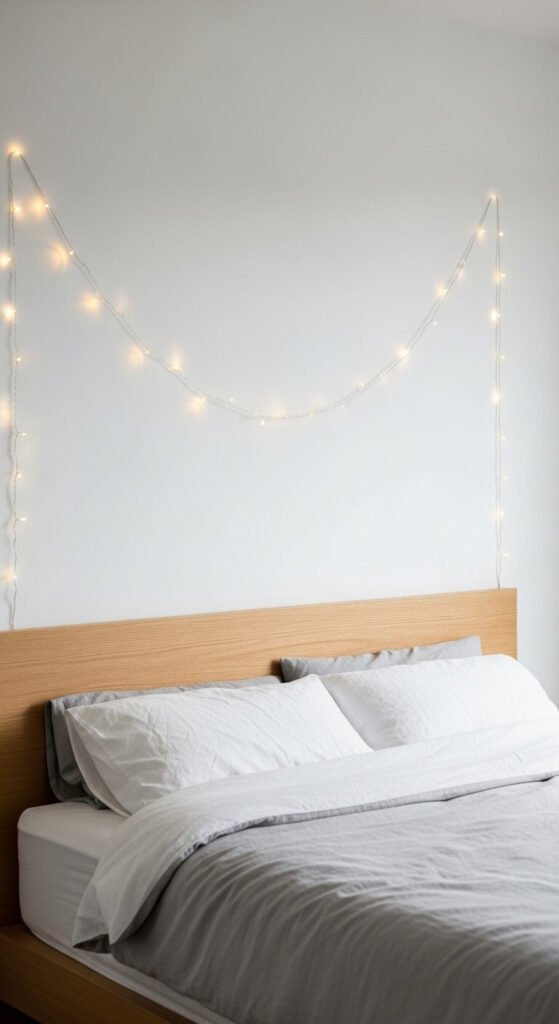
Sometimes one simple strand makes the biggest impact. Drape a single light string in a gentle curve above your bed.
Secure both ends with adhesive hooks and let the strand hang naturally. The dip creates visual interest through simplicity.
This approach suits minimalist aesthetics and small spaces. The restraint keeps focus on the quality of light rather than quantity.
One good strand costs $12-15. This proves you don’t need elaborate setups to create atmosphere.
Woven Basket Lanterns
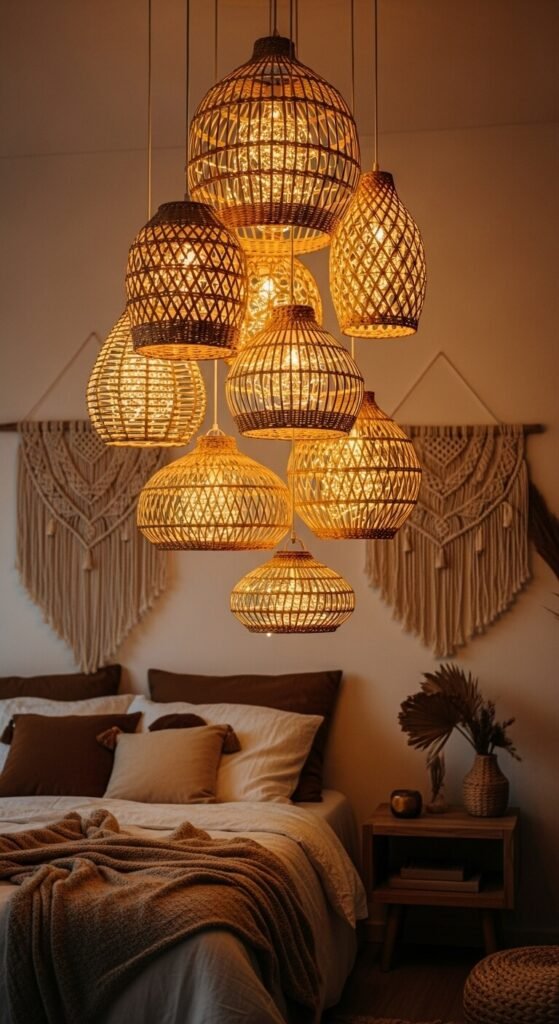
Place coiled lights inside woven baskets to create hanging lanterns. This adds texture and natural materials to your lighting scheme.
Find inexpensive baskets at craft stores or thrift shops. Coil battery-operated lights inside and hang baskets at varying heights.
The woven material creates beautiful light patterns on walls and ceilings. Different basket sizes add visual rhythm.
Hang using plant hooks or ceiling hooks. This organic approach costs about $30 and brings nature indoors.
Color-Changing Mood Lighting
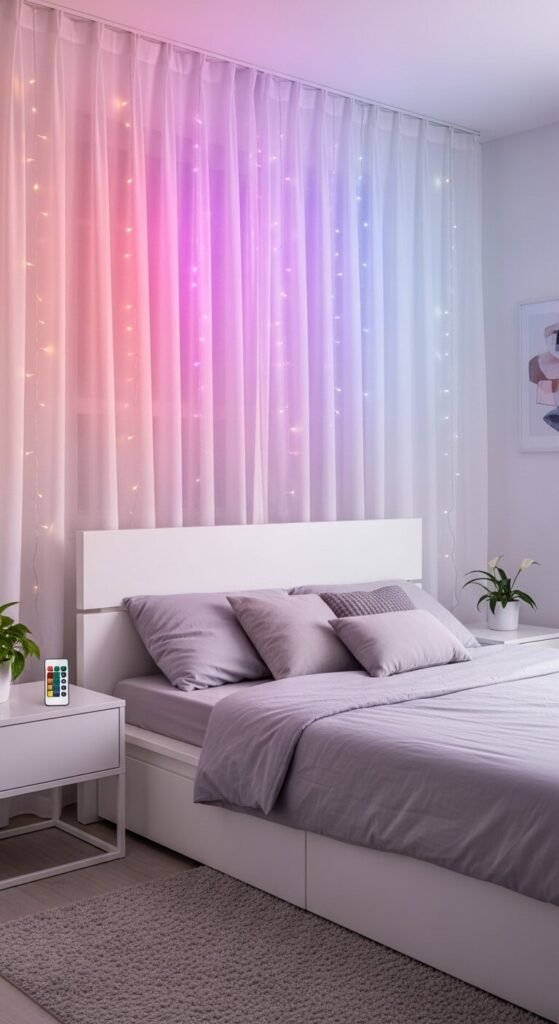
Invest in color-changing lights that adapt to your mood. Program different colors for various activities or times of day.
Smart fairy lights connect to phone apps for custom color selection. Set schedules so lights transition automatically.
Use cool blues for focused work, warm ambers for relaxation, or soft pinks for romantic ambiance. The versatility justifies the slightly higher cost.
Quality color-changing strands cost $25-40 but replace multiple single-color options. Control everything without leaving your bed.
Fabric Swag Garland
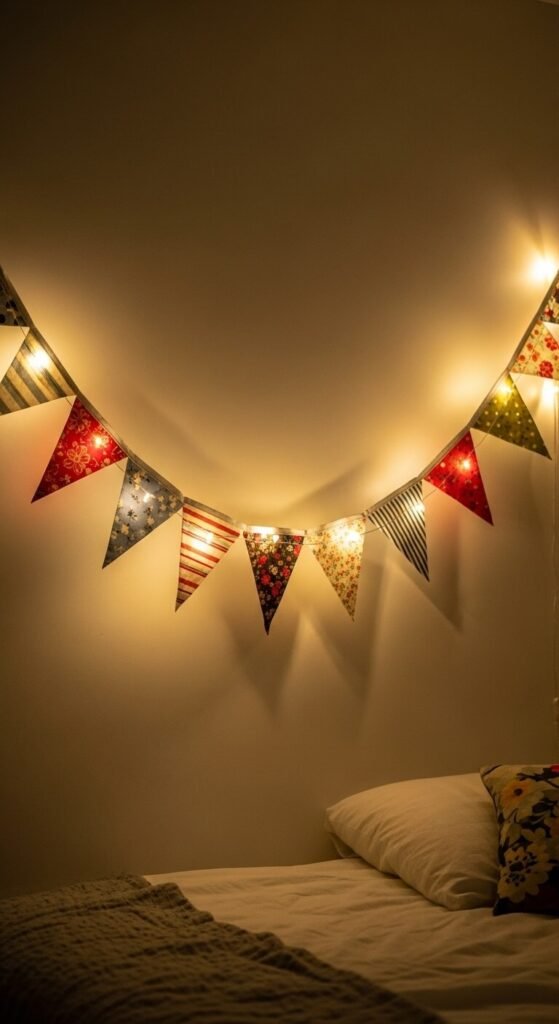
Create fabric garland swags and weave lights through them. This combines textile crafts with lighting for personalized decor.
Make simple triangle pennants from fabric scraps or buy pre-made garland. Thread lights through the connecting string.
This allows seasonal decoration changes while maintaining the same light base. Switch fabrics for holidays or mood changes.
The combination costs about $20 and looks custom-made. Perfect for adding personality without permanent installation.
Conclusion
Your bedroom deserves lighting that reflects your personality and supports peaceful rest. These 29 fairy light arrangements prove you don’t need big budgets or major renovations to create magic. Start with one simple idea that speaks to you—maybe the mason jar nightstands or the single minimalist strand.
Test different placements before committing to adhesive hooks. Remember that battery-operated options offer flexibility while plug-in lights provide consistent brightness. Most importantly, choose warm white bulbs for the coziest atmosphere.
Your perfect dreamy bedroom is just one strand of lights away. Pick your favorite arrangement and transform your space tonight.