Wooden beams overhead do something no paint color or furniture piece can do — they change how a room feels. Whether you live in a converted barn, a suburban home, or a city loft, adding rustic wooden beams to your ceiling creates instant warmth, depth, and a sense of history. You don’t need a massive budget or a contractor on speed dial. Many of these installations are surprisingly DIY-friendly. From faux beams to salvaged wood, this guide walks you through 25 real-world ways people are using wooden beams to add serious character overhead — with tips you can actually use.
1. Salvaged Barn Wood Ceiling Beams
Salvaged barn wood is the real deal. It comes with built-in character — weathered grain, old nail holes, and natural color variation you simply can’t fake. Many salvage yards sell these beams by the linear foot, often cheaper than new lumber. Look for local barn demolition projects — farmers sometimes give wood away for free. Sand lightly to remove loose debris, but don’t over-finish. The rough, imperfect look is exactly the point. A simple ledger board mount works well for most ceiling spans.
2. Faux Wood Beam Wraps for Low Ceilings
Not every ceiling can handle heavy solid beams. Faux beam wraps solve this beautifully. These are hollow shells — typically made from high-density polyurethane — that slip over a thin wood nailer screwed into the ceiling. They look shockingly real up close and weigh almost nothing. You can find them online or at home improvement stores starting around $30 per linear foot. Paint or stain them to match your space. This is a great weekend DIY project that anyone with a drill and a level can handle.
3. Whitewashed Pine Beams in Coastal Rooms
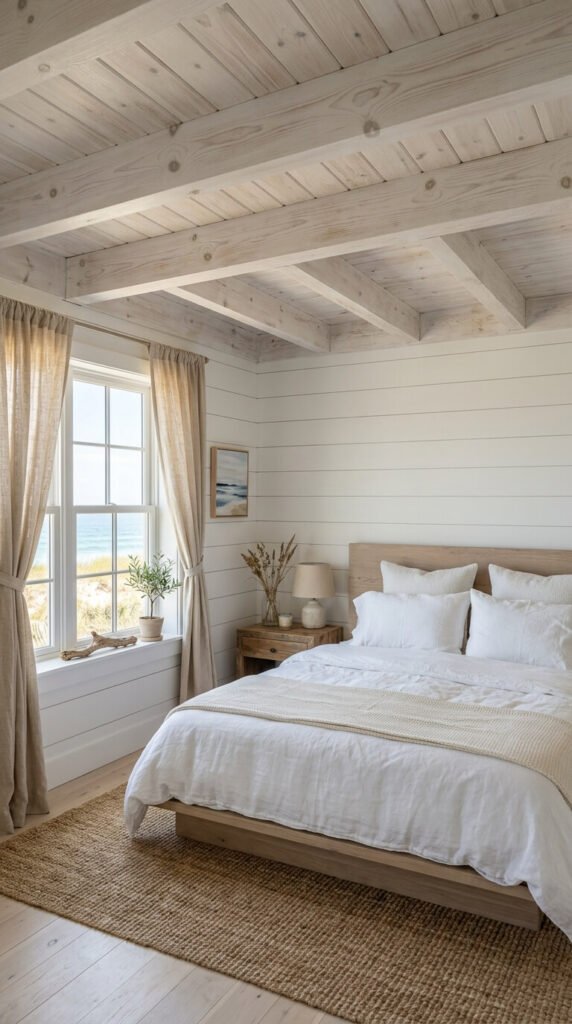
Whitewashing takes raw pine beams and softens them into something light and airy. Mix one part white latex paint with one part water, brush it on, then wipe off the excess. The wood grain still shows through, which keeps it from looking painted. This works especially well in coastal, Scandinavian, or farmhouse-style rooms. Pine is one of the most affordable beam options — often available at big-box stores for a few dollars per linear foot. Space beams 24 to 36 inches apart for a balanced look without overcrowding the ceiling.
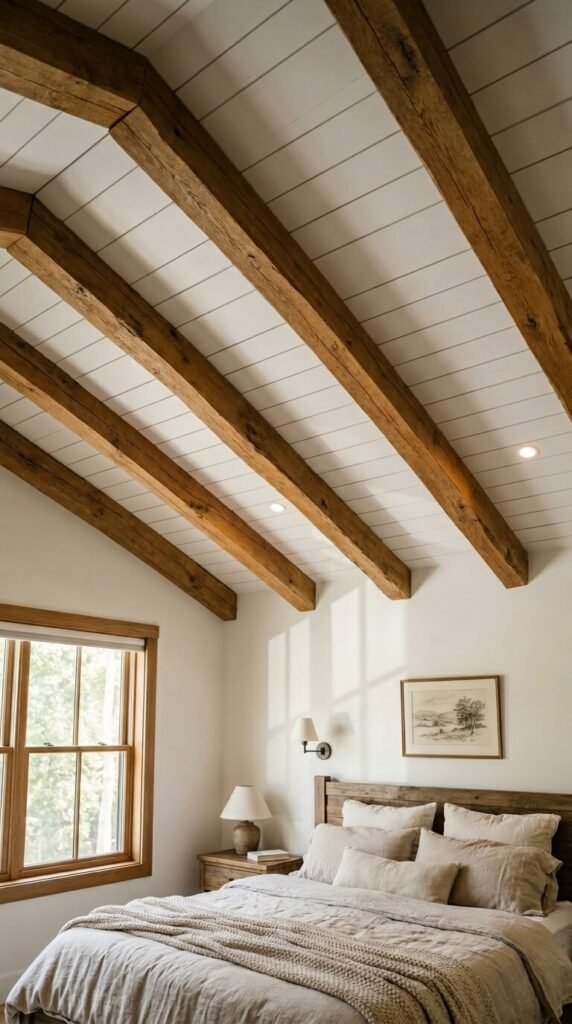
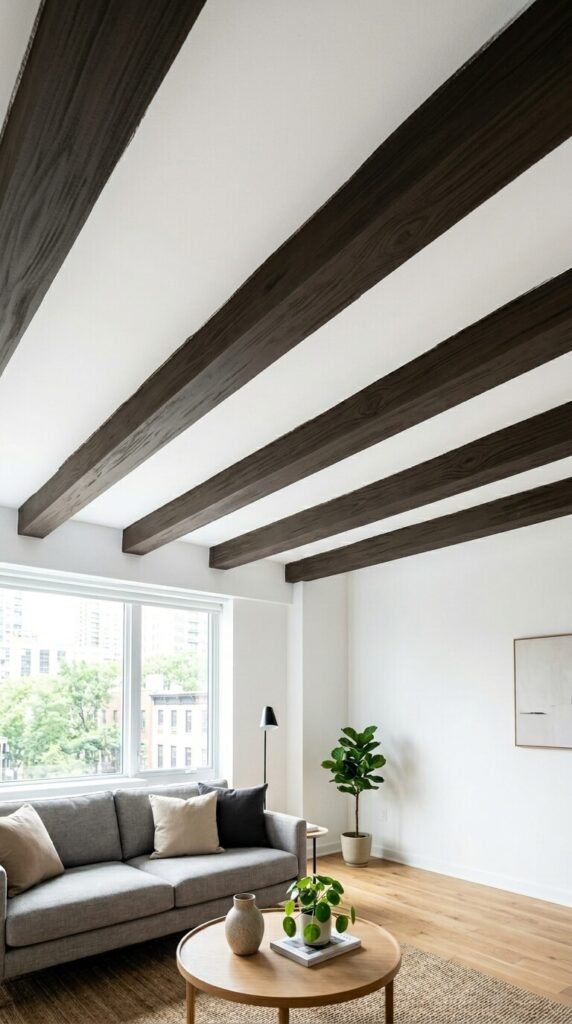
4. Dark Walnut Beams Against White Ceilings

Dark wood against a white ceiling is one of the most dramatic ceiling combinations you can do. The contrast draws the eye up and makes the ceiling feel intentional and designed. Walnut-stained beams work in both rustic and modern spaces. You don’t need actual walnut — pine or poplar stained with a dark walnut gel stain delivers the same look for far less money. Apply two coats of stain, let it dry fully, and seal with a matte polyurethane. The result looks expensive and purposeful.
5. Exposed Rough-Cut Douglas Fir Beams
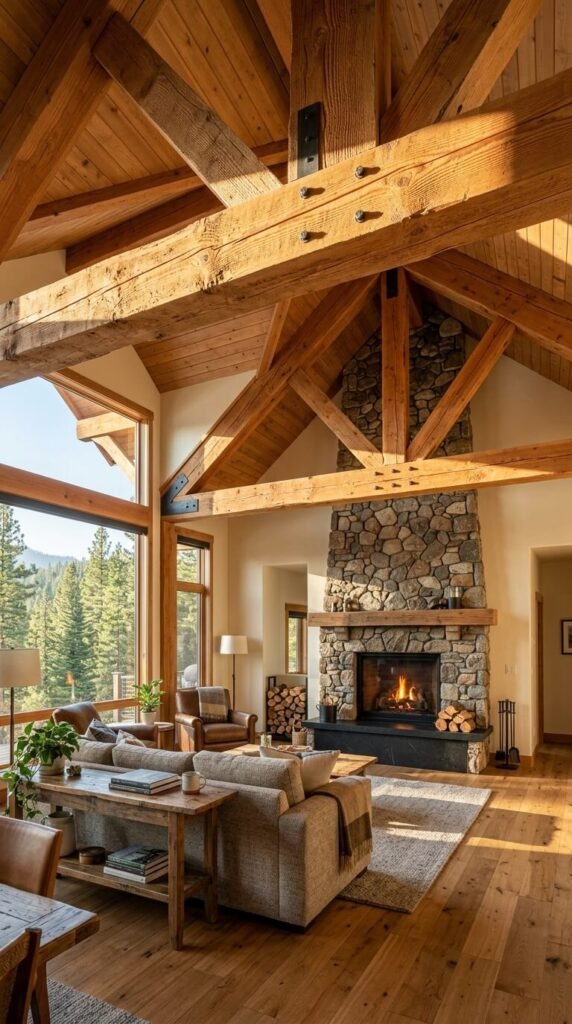
Douglas fir has a straight grain and warm amber tone that looks stunning left mostly raw. Many lumber yards sell rough-cut Douglas fir, which skips the smooth planing process — meaning more texture, more character, and usually a lower price. Seal with a simple clear matte coat to protect it without covering the natural beauty. These beams work especially well on vaulted or cathedral ceilings where they can span long distances. If you’re working with existing structural beams, exposing and cleaning them is often cheaper than adding new decorative ones.
6. Box Beam Grid Ceiling in a Dining Room
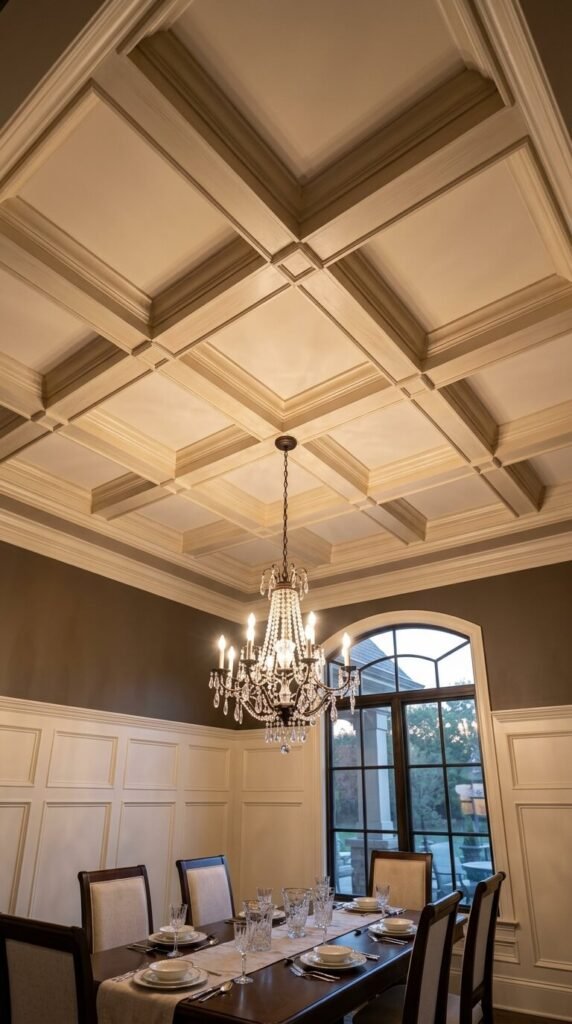
A box beam grid turns an ordinary flat ceiling into a striking architectural feature. Box beams are hollow frames — typically built from three boards nailed together in a U-shape. This keeps them lightweight while creating a substantial, solid appearance. Install a grid pattern across the ceiling using ledger boards as guides. Paint them to match the ceiling for a subtle coffered effect, or stain them dark for contrast. The dining room is a great place to try this — the overhead interest replaces the need for much other ceiling décor.
7. Single Statement Beam Above a Bed Headboard
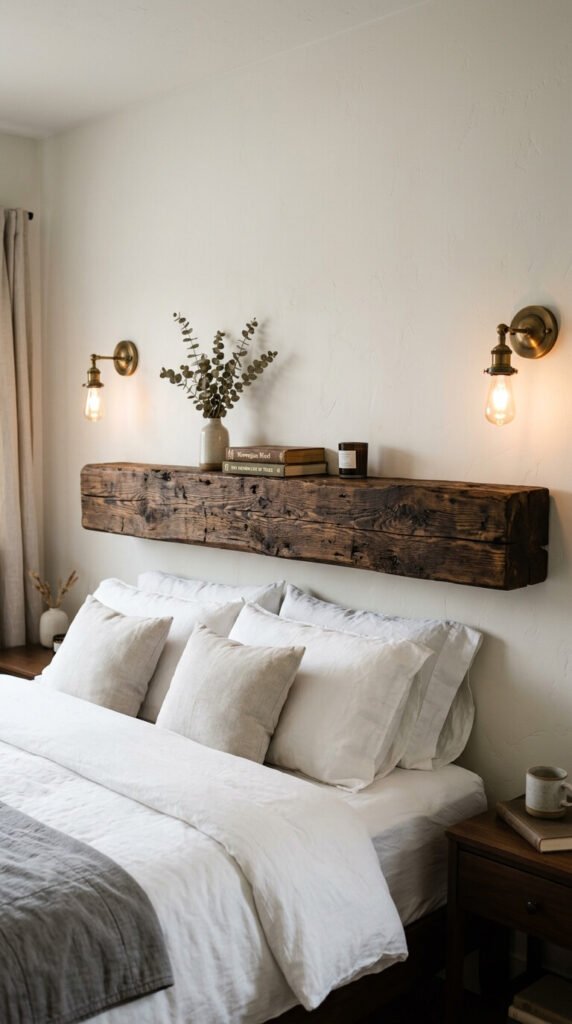
You don’t need a whole ceiling renovation to get the beam effect. One thick beam mounted above the headboard creates a grounding focal point in a bedroom without major construction. Mount a chunky piece of reclaimed wood directly to the wall using heavy-duty lag bolts into studs. Add small hooks underneath for hanging plants or lights. This works in apartments where ceiling modifications aren’t allowed. Budget-wise, a single 6-foot section of reclaimed wood typically runs between $40 and $80 at salvage yards or online.
8. Ceiling Beams with Integrated Edison String Lights
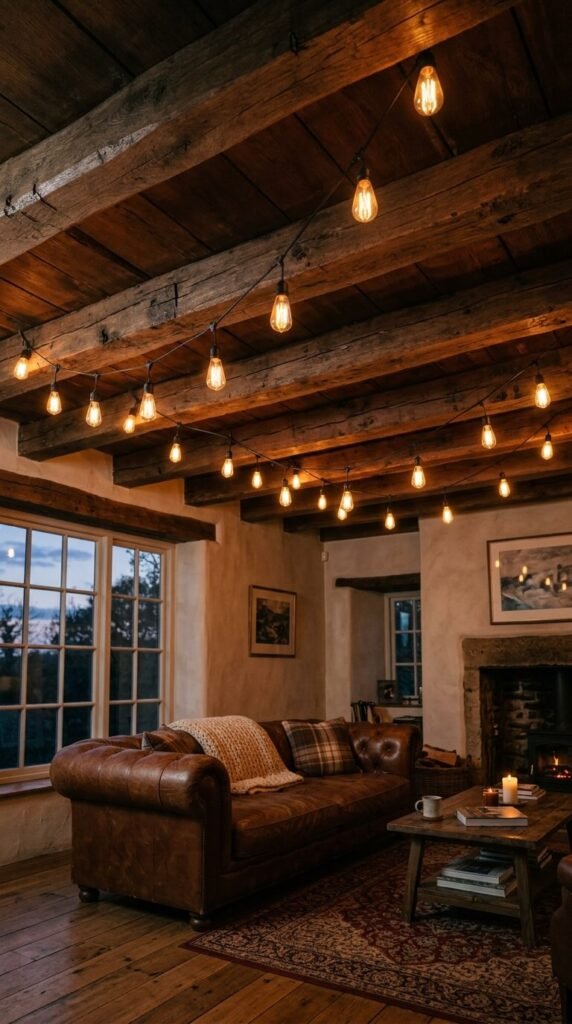
Wrapping or draping Edison string lights along ceiling beams is one of the easiest ways to add ambiance without an electrician. Clip the lights directly to the beam underside using small cup hooks screwed in every 12 inches. Swag them between beams in gentle loops or run them straight along the beam length. Battery-powered or plug-in LED string lights keep this project code-friendly and renter-safe. The warm bulb glow against rough wood grain creates a restaurant-quality atmosphere at home for under $30.
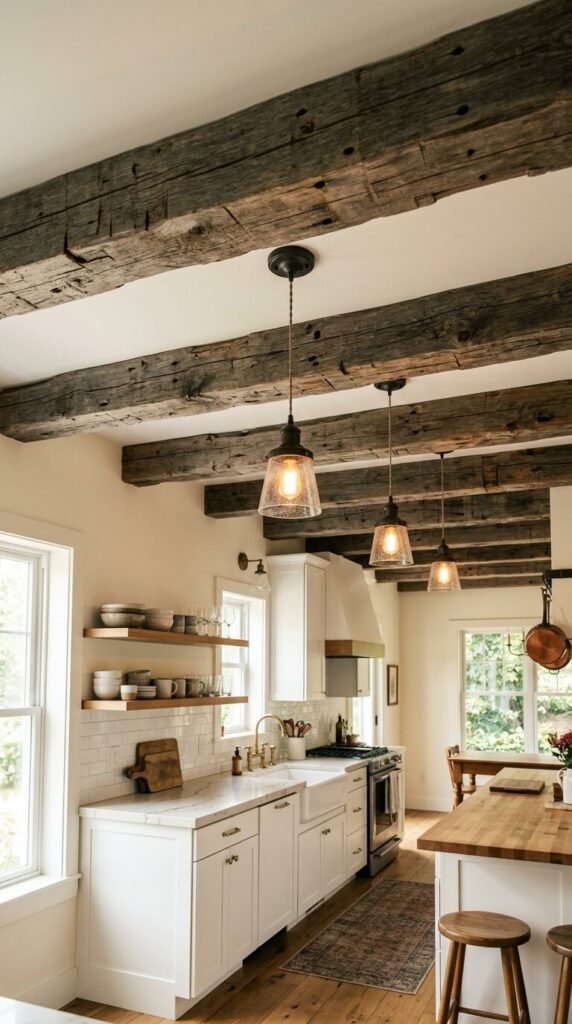
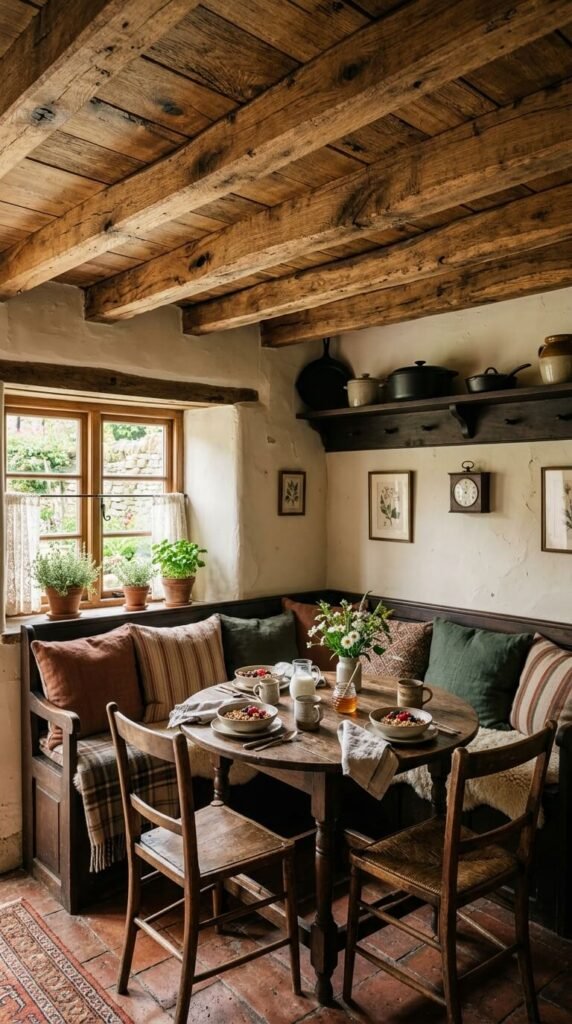
9. Reclaimed Oak Beams in a Kitchen Breakfast Nook

Low ceiling spaces like breakfast nooks actually benefit from beams — they turn what feels cramped into something intentionally cozy. Reclaimed oak adds deep grain and warmth that lighter woods can’t match. For small areas, you only need a few short beams, making this a very affordable project. A 10-square-foot nook might only require three or four 4-foot beam sections. Sand lightly, apply a Danish oil finish, and mount using a simple ledger board system. The whole project can come in under $200.
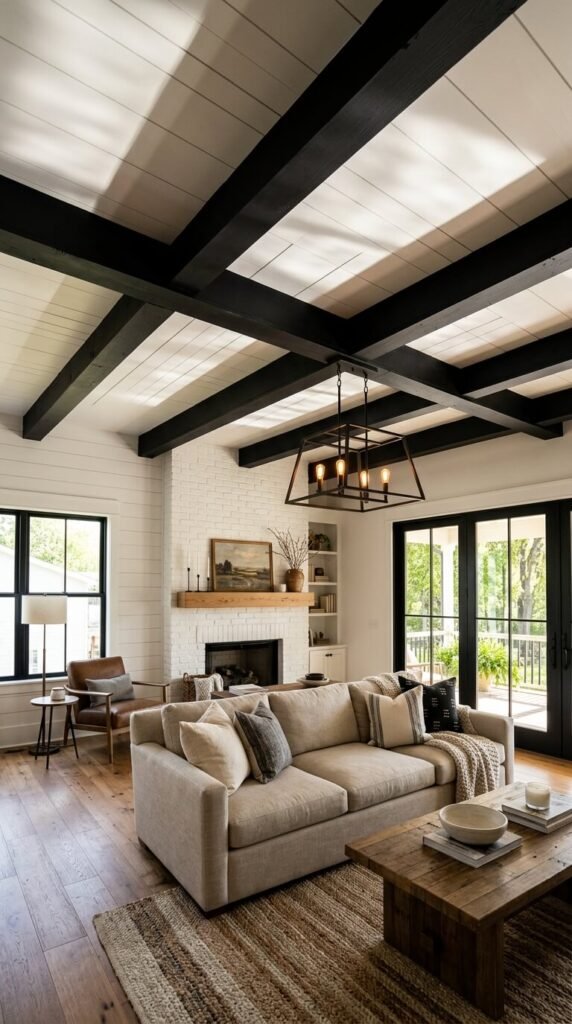
10. Painted Black Beams in a Modern Farmhouse Space
Black-painted beams are having a major moment in modern farmhouse design. The matte black finish reads as architectural and bold — especially against an all-white ceiling. Use faux polyurethane beams pre-primed, then paint with matte black cabinet paint for best adhesion. Two coats usually do it. Space beams evenly across the ceiling — odd numbers (3 or 5) tend to look more balanced than even. This look pairs well with black window frames and metal fixtures for a cohesive, pulled-together feel.
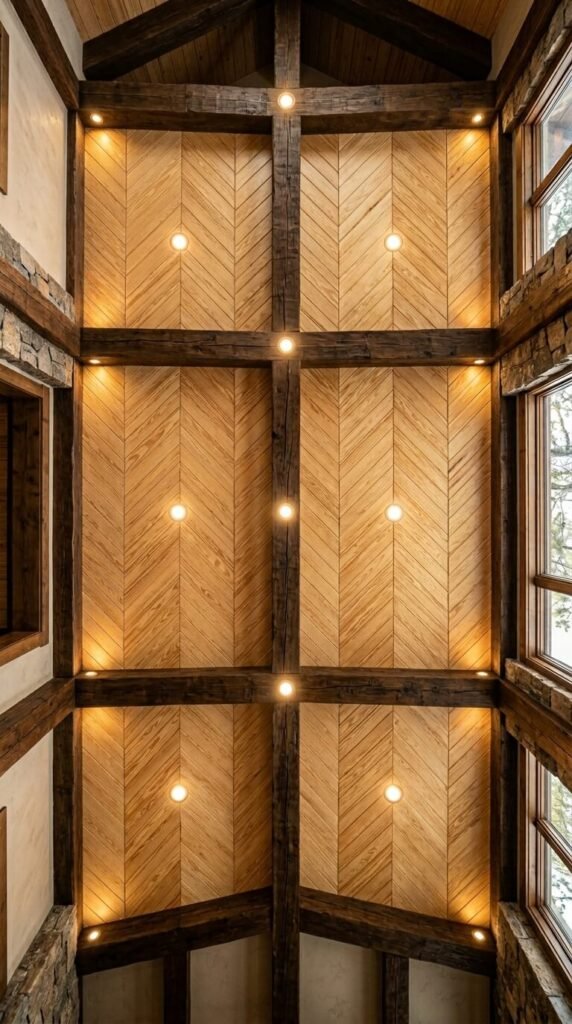
11. Chevron-Pattern Plank Ceiling Framed by Beams
Pairing a chevron or herringbone plank ceiling with framing beams takes ceiling design to a new level. The beams define the sections where the pattern lives, making the installation look intentional and structured. Use 1×4 or 1×6 tongue-and-groove pine boards for the planks — they’re inexpensive and easy to cut at angles. Frame each section with a surrounding beam, then fill it with the diagonal planks. This is an advanced DIY project but completely achievable over a weekend with a miter saw and a nail gun.
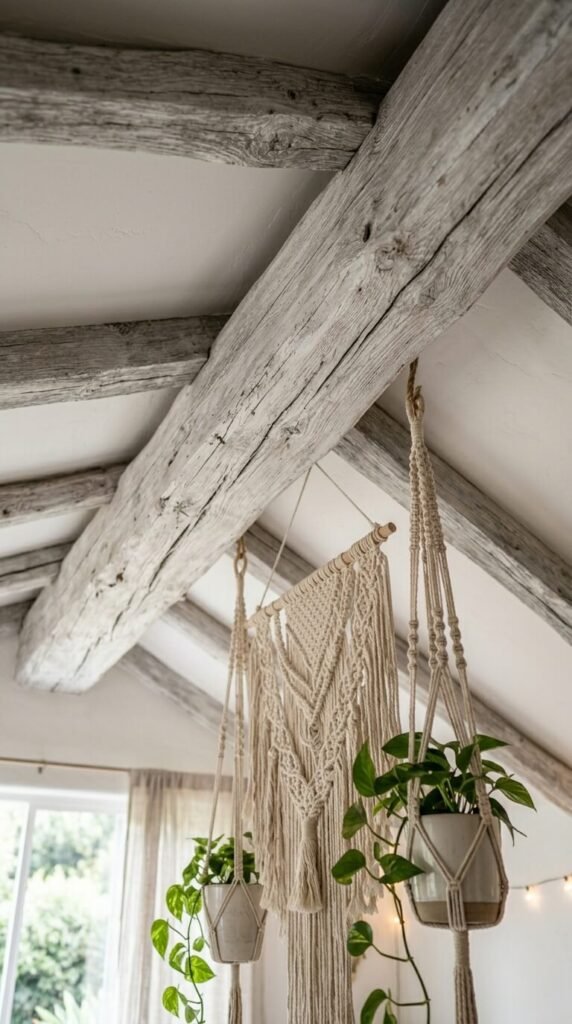
12. Driftwood-Style Bleached Beams for Boho Spaces
Bleached or driftwood-finished beams bring a relaxed, sun-faded look that fits boho and coastal spaces perfectly. You can create this finish yourself by applying a wood bleaching solution or a 50/50 mix of gray and white chalk paint, wiped back while wet. The goal is faded, not painted. Pine, poplar, or even construction-grade 4×6 lumber takes this finish well. Mount these beams loosely spaced — you want breathing room between them. Add trailing plants or macramé between the beams to lean into the organic, layered aesthetic.
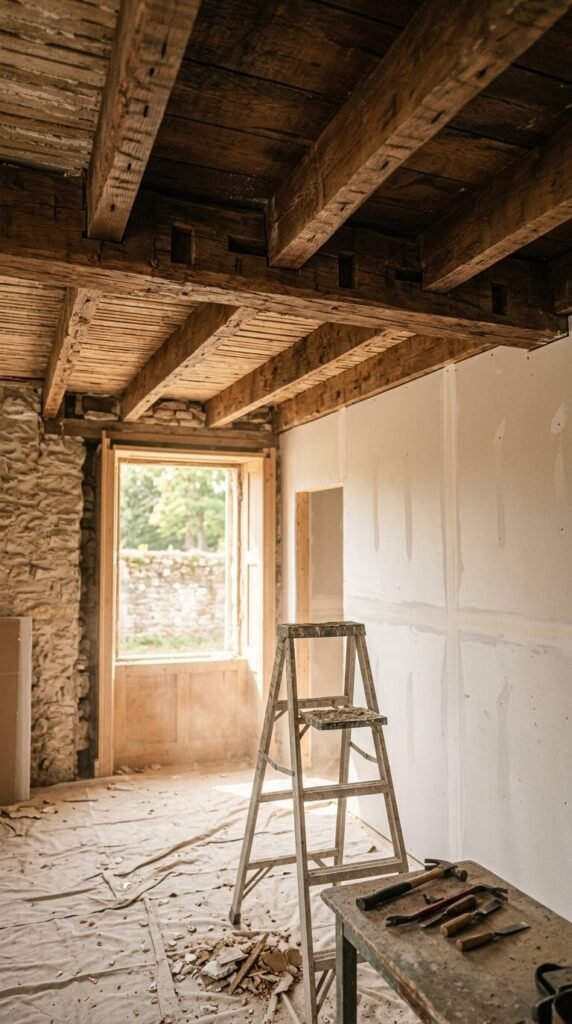
13. Structural Beam Exposure in a Renovation
If you’re doing a renovation, pause before covering up those old ceiling joists. Exposing original structural beams is often the most authentic and affordable beam installation possible — because they’re already there. Clean them up with a wire brush to remove old plaster residue, sand lightly, and apply a clear oil finish or dark stain. In older homes, these beams may be hand-hewn with visible axe marks — that’s living history. Always consult a contractor before removing drywall to confirm which beams are structural before exposing them.
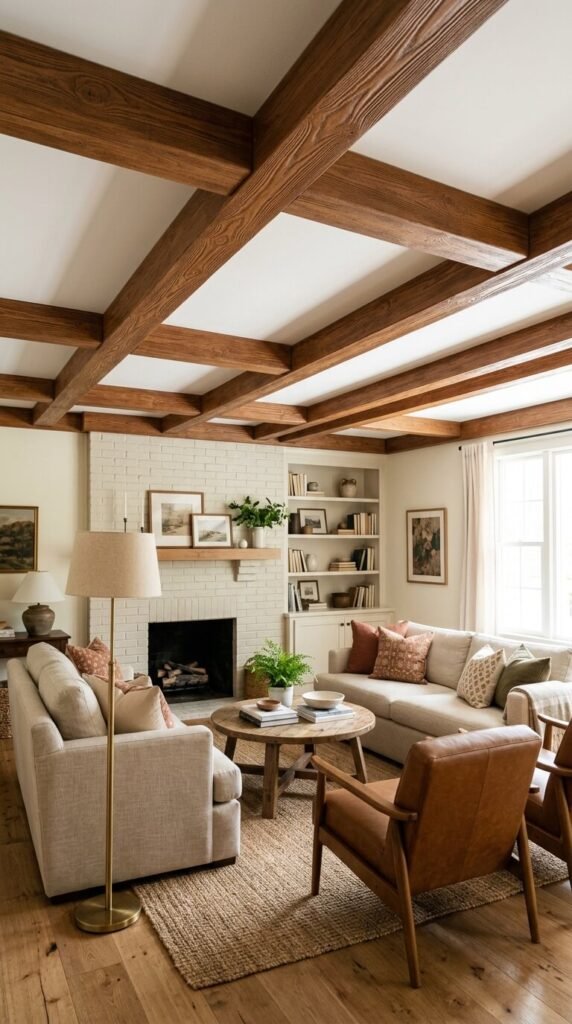
14. Thin Decorative Beams in a Small Living Room
Not every beam needs to be chunky and massive. Thin beams — 2 to 4 inches wide — work beautifully in smaller rooms where thick beams would feel oppressive. Use 1×3 or 1×4 poplar or pine boards, stained and mounted directly to the ceiling with construction adhesive and finish nails. Space them 16 to 24 inches apart for rhythm without heaviness. This is one of the most budget-friendly ceiling updates you can do — a small living room might only need $80 worth of lumber and a free Saturday afternoon to complete.
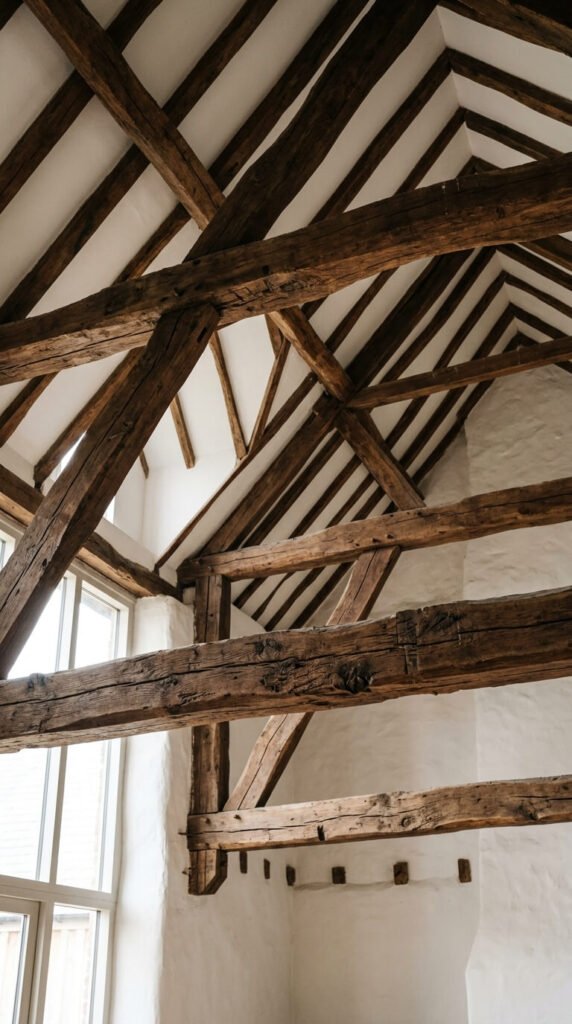
15. Hand-Hewn Timber Beams in a Vaulted Entry Hall
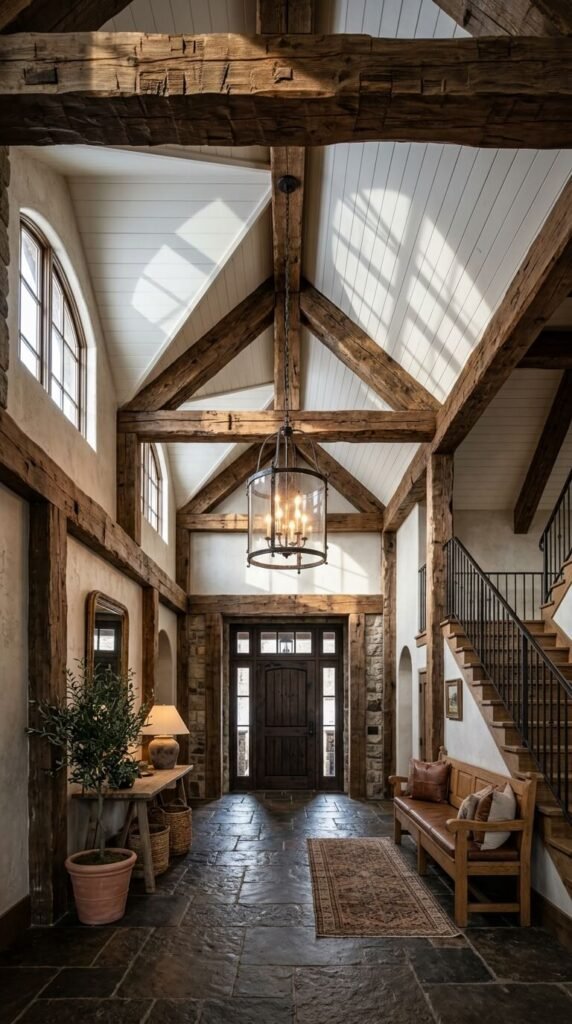
A vaulted entryway is one of the best places to go big with beams. Massive hand-hewn timbers here make a lasting first impression. Hand-hewn beams (shaped by axe rather than mill) are available from specialty lumber suppliers and salvage dealers. They’re heavier and pricier, but the visual payoff is enormous. For vaulted installations, you’ll likely need structural engineering input and professional installation for large timbers. That said, the beams themselves are often the main cost — labor for a simple parallel installation is modest compared to the material impact.
16. Cedar Beams with Visible Knots and Natural Edge
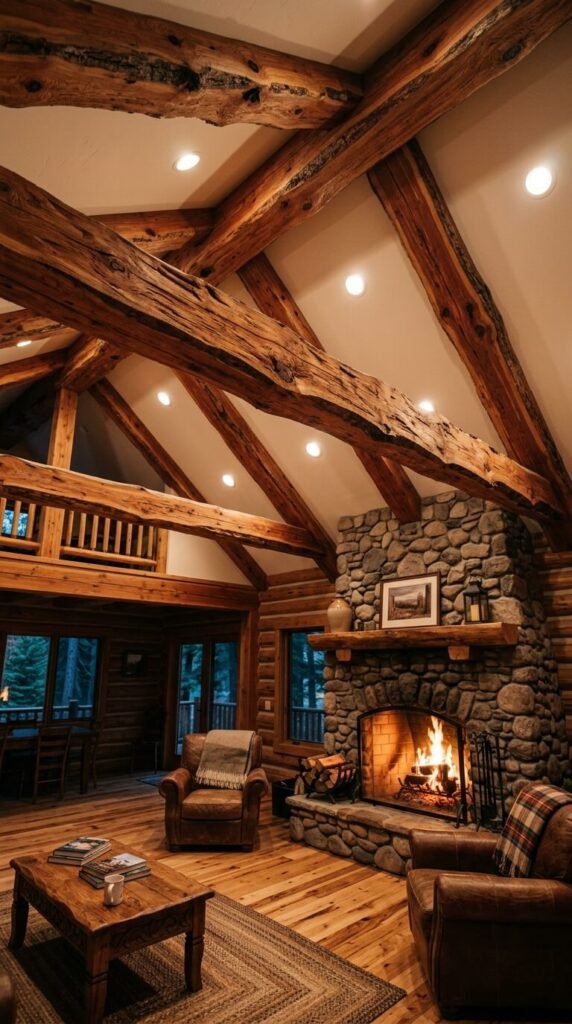
Cedar is naturally aromatic, lightweight, and rot-resistant — and it looks incredible overhead. Live-edge cedar beams have irregular, bark-following edges that make each one completely unique. These can be sourced from local sawmills, sometimes cut fresh to your length specifications. Cedar is soft enough to work with basic woodworking tools. The reddish tones deepen over time with a simple tung oil finish applied every few years. This is a great choice for cabins, mountain homes, or any room that leans into the outdoors.
17. Painted Ceiling Medallion Framed by a Single Beam
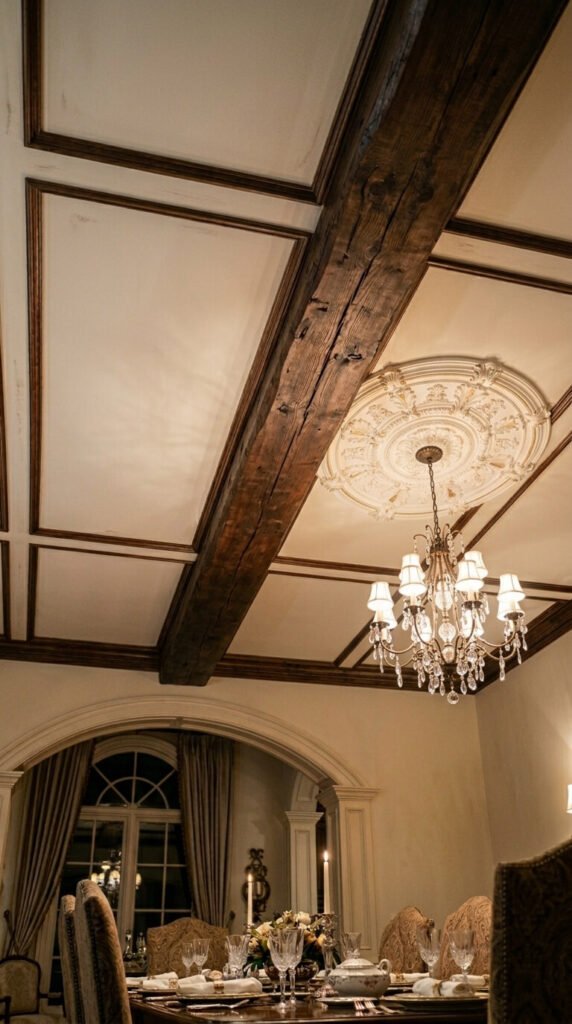
One beam + one ceiling medallion = a lot of visual interest for very little investment. Run a single wide beam down the ceiling’s centerline and center a plaster or polyurethane medallion in one of the flanking panels. The contrast between rustic wood and refined medallion detailing creates an intentional “collected over time” look. A single 8-foot beam section runs $40–$90, and ceiling medallions start around $20. This is a great approach for renters or homeowners who want impact without committing to a full beam grid.
18. Beam and Shiplap Ceiling Combination
Shiplap and beams together is a farmhouse ceiling power move. The shiplap goes up first as the ceiling surface, then the beams are mounted perpendicular on top, creating a layered, paneled effect. Use 1×6 or 1×8 tongue-and-groove boards for the shiplap, painted white or left natural. Then add 4×6 or 4×4 beams over the top, spaced evenly. This combo adds so much texture and warmth that rooms often need less furniture and fewer accessories to feel complete. Budget for both materials — but the DIY labor savings are significant.
19. Beam Canopy Above an Outdoor Dining Patio
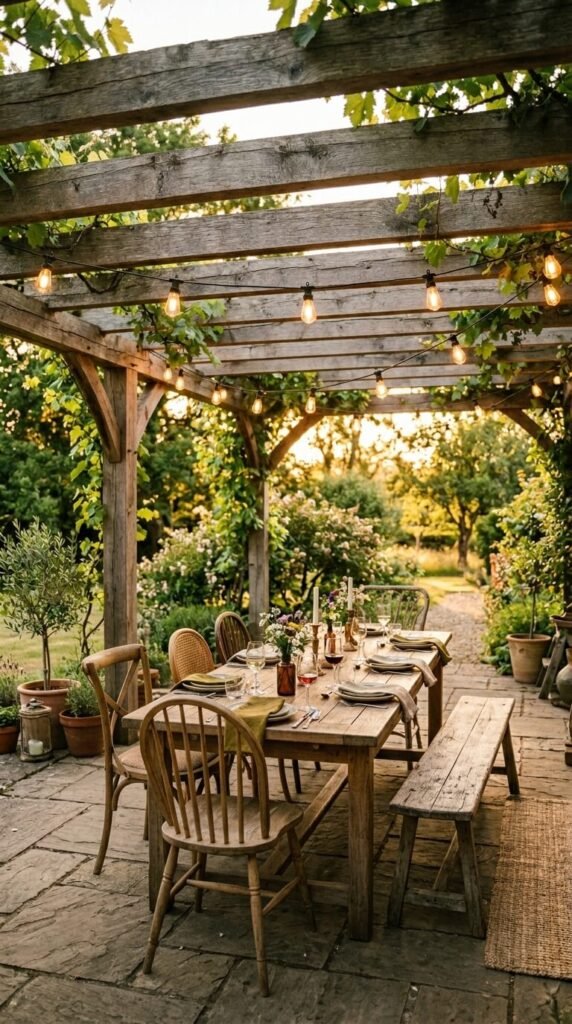
Wooden beams aren’t just for indoor ceilings. A simple beam pergola over an outdoor dining area creates shade, structure, and a sense of enclosure that makes the patio feel like a room. Use pressure-treated or cedar lumber for weather resistance. A basic four-post pergola with three to five spanning beams can be built for under $400 in materials. Leave gaps between beams for airflow and light. Add string lights and climbing plants over time and the structure improves every season. No permits needed in most areas for open-top pergolas under a certain size.
20. Tongue-and-Groove Plank Ceiling with Beam Accents
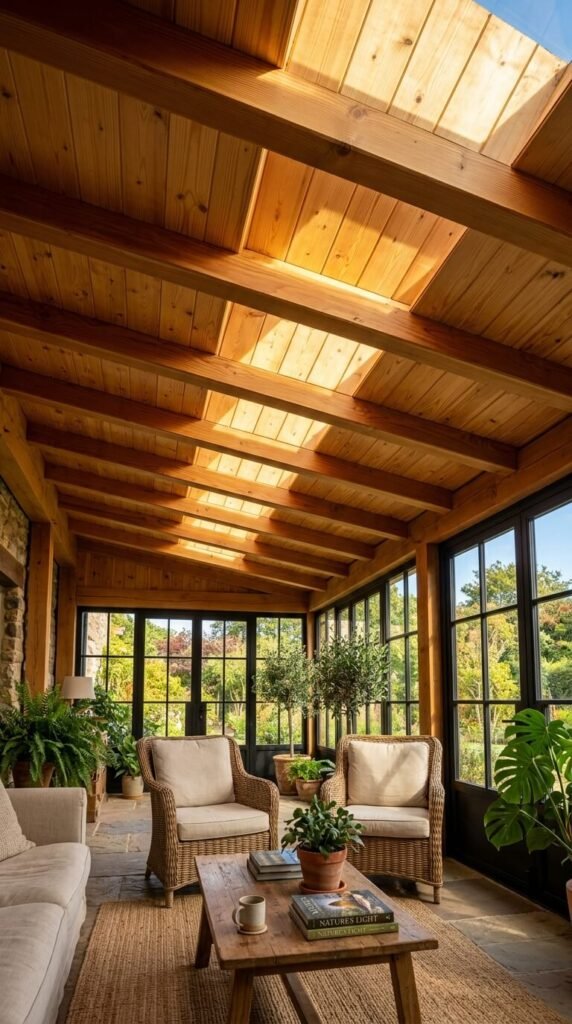
Tongue-and-groove plank ceilings are warm, inviting, and widely used in sunrooms, porches, and bedrooms. Adding beam accents on top of the plank field creates a layered ceiling that looks custom and finished. Run the planks first in one direction, then mount beams perpendicular at 48- or 60-inch intervals. The beams hide seams, add depth, and give the eye something to travel across. This is a great project for an enclosed porch where you want to make the space feel more like a real room with structure and intention.
21. Antique Chestnut Beams Salvaged from Old Mills
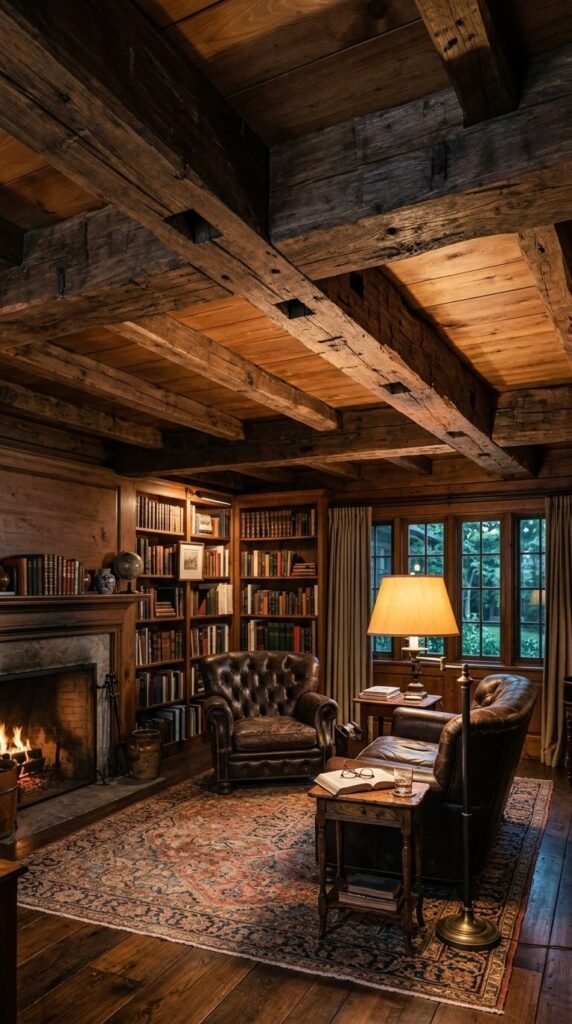
American chestnut was nearly wiped out by blight in the early 1900s, making salvaged chestnut beams from old mills genuinely rare and historically significant. Antique chestnut has an unmistakable dark, dense character no modern wood can replicate. These beams come from carefully dismantled 19th-century industrial buildings. They’re not cheap — expect $15 to $30 per linear foot — but they’re irreplaceable. If you find them, buy what you need plus 10% extra for cuts and waste. A room with authentic chestnut beams overhead holds a piece of American history.
22. Crisscross Beam Pattern for a Cottage Ceiling
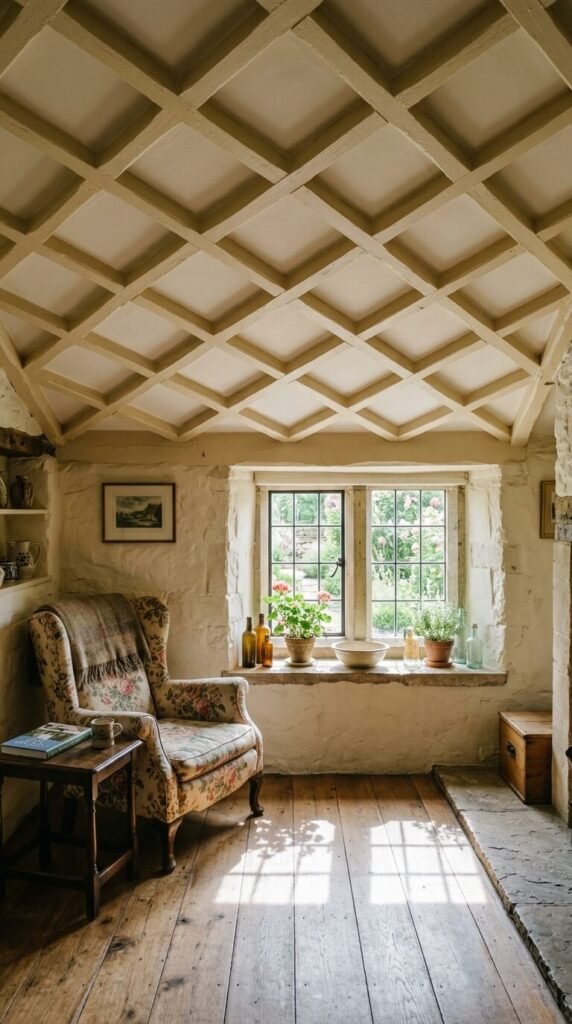
A crisscross or diagonal beam layout creates a cottage or Tudor-inspired ceiling that’s full of personality. Instead of parallel beams, run two sets at roughly 45-degree angles to each other, forming a diamond or square grid across the ceiling. Use narrow boards (1×4 or 1×6) for this — thick beams in a diagonal pattern can feel visually chaotic. Paint them the same color as the ceiling for a subtle, textured effect, or go slightly darker for more definition. This style looks especially good in low-ceiling rooms where the pattern creates interest without adding visual weight.
23. Industrial Steel and Wood Hybrid Beam Look
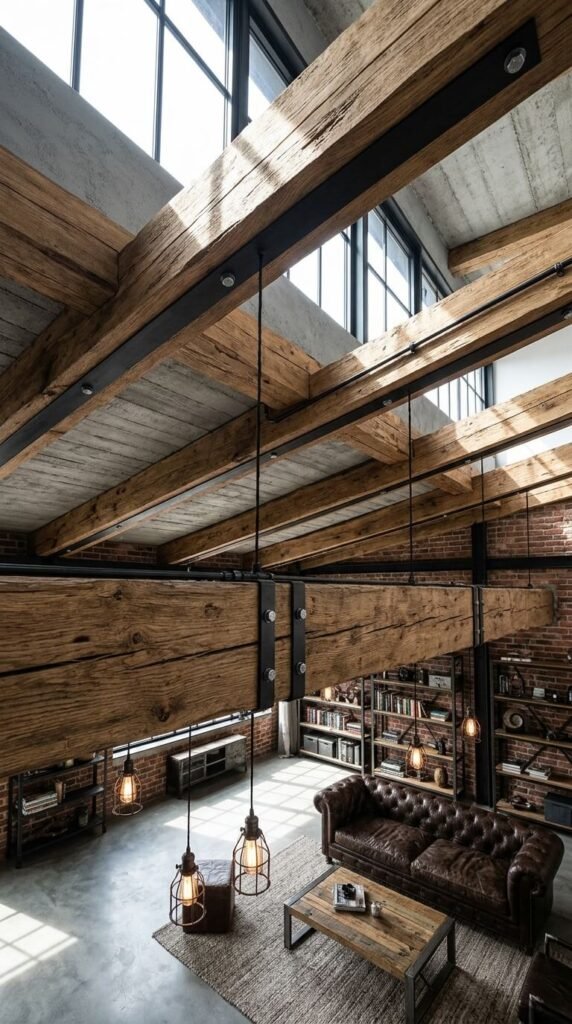
Wood and steel together create an industrial-rustic hybrid that works beautifully in lofts, converted spaces, and modern homes. Add flat steel bar accents to the underside or sides of wooden beams using visible hex bolts. The contrast between the warm wood grain and cold matte black steel is immediately striking. Source flat steel bar stock from a metal supplier — it’s inexpensive and easy to drill and bolt. This detail is relatively small but shifts the entire feel of a beam installation from purely rustic to something more edgy and architectural.
24. Rustic Beams with Rope or Leather Wrap Accents

Adding rope or leather wraps to beams turns a standard ceiling installation into something handmade and distinctive. Wrap sections of the beam with thick jute rope, leather cord, or rawhide lacing at connection points or intervals along the span. Secure with a strong adhesive or tuck ends under adjacent wraps. This technique is popular in coastal, ranch, and boho interiors. It costs almost nothing — a roll of jute rope is $10 to $15 — and adds a crafted, organic detail that makes the beams look truly custom rather than store-bought.
25. Painted Beam Stencil Effect for Renters
Can’t mount anything? Paint your beams on. This trompe l’oeil technique uses dark paint applied in clean, evenly spaced stripes on a white ceiling to simulate the look of real wood beams. Use painter’s tape to create crisp edges, apply a base coat of dark brown or walnut tone, then dry-brush a lighter grain texture over it while still slightly wet. From standing height, the effect is surprisingly convincing. This is completely renter-friendly, costs under $20 in paint and tape, and takes one afternoon to complete in most rooms.
Conclusion
Rustic wooden beams are one of the few design changes that genuinely transform a room — not just update it. Whether you go with salvaged century-old chestnut or painted-on faux beams in a rental apartment, the effect overhead is the same: warmth, character, and a ceiling that actually earns your attention. Start small if you’re unsure. One beam above a headboard or a single box beam in a dining room is enough to see how the look works in your space. From there, scaling up is easy. The ceiling is the one surface in your home most people never think about — which means it’s also the one with the most untapped potential. Pick one idea from this list and start this weekend.