Herringbone has stayed in design conversations for centuries — and it has earned that staying power. The angled, interlocking zigzag gives any surface an instant sense of direction and energy. Whether you’re working with wood, tile, brick, or wallpaper, the pattern does something flat layouts simply cannot: it pulls the eye through a space. This article walks you through 28 real, practical ways to apply herringbone — from major renovations to weekend DIY projects — with honest tips on what it costs, what it takes, and where it makes the biggest visual payoff.
1. Classic Oak Hardwood Floors
Oak herringbone floors are the standard-bearer. They work in period homes and modern spaces equally well. Pre-engineered oak boards make this more affordable than solid wood — expect $8–$15 per sq ft installed. The key is plank width: narrower boards (2–3″) create a finer, more traditional look. Wider boards feel contemporary. Lay them at 45° to the room’s longest wall for maximum impact. If you’re DIYing, rent a pneumatic flooring nailer. Start from the center of the room and work outward for a balanced result.
2. Subway Tile Backsplash in the Kitchen
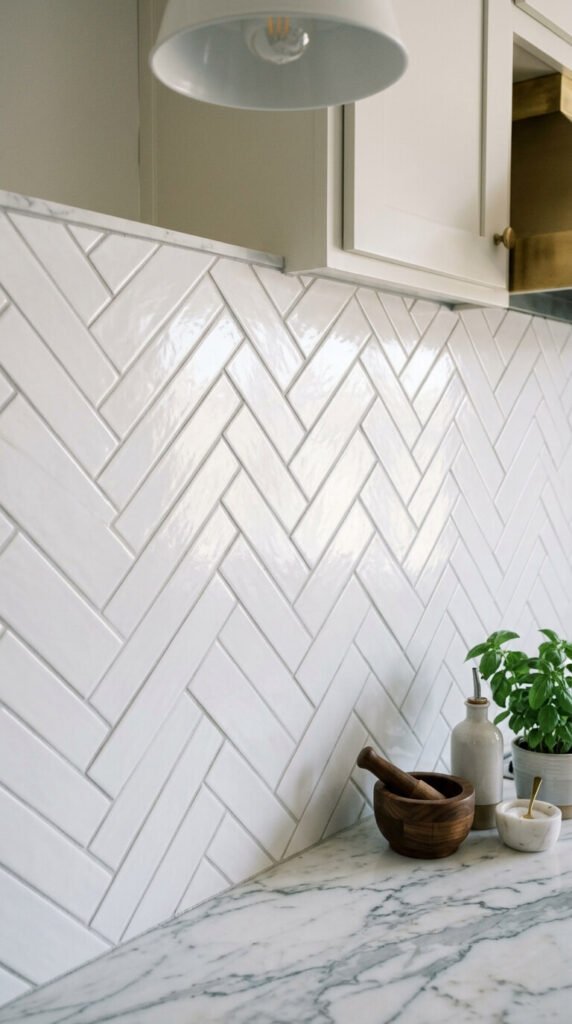
A herringbone subway tile backsplash takes a standard kitchen from ordinary to considered. 3×6 white ceramic subway tiles cost as little as $1.50–$3 per sq ft — one of the most budget-friendly upgrades possible. The herringbone layout does the design work so the tile doesn’t have to be fancy. Use a dark grout, like charcoal or warm gray, to make the pattern pop without adding color. This is a manageable DIY weekend project. Buy a $25 tile cutter and watch a few tiling videos before you start.
3. Entryway Floor Statement
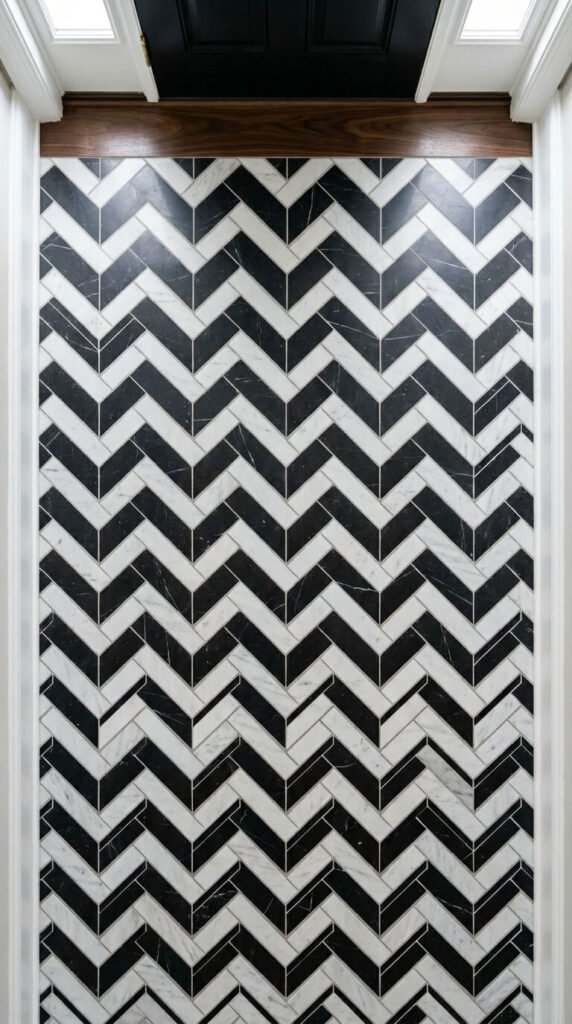
The entryway is the first thing people see. A herringbone floor here makes an immediate impression without requiring a large space. Porcelain tiles in marble-look finishes cost $2–$6 per sq ft and are far more durable than real stone. A 5×8 entry area uses very little material, keeping the project affordable. Black and white is the most striking combination. Contrast-colored grout (white tile, black grout) sharpens every angle. If you want real marble on a budget, look for offcuts and remnants at tile suppliers.
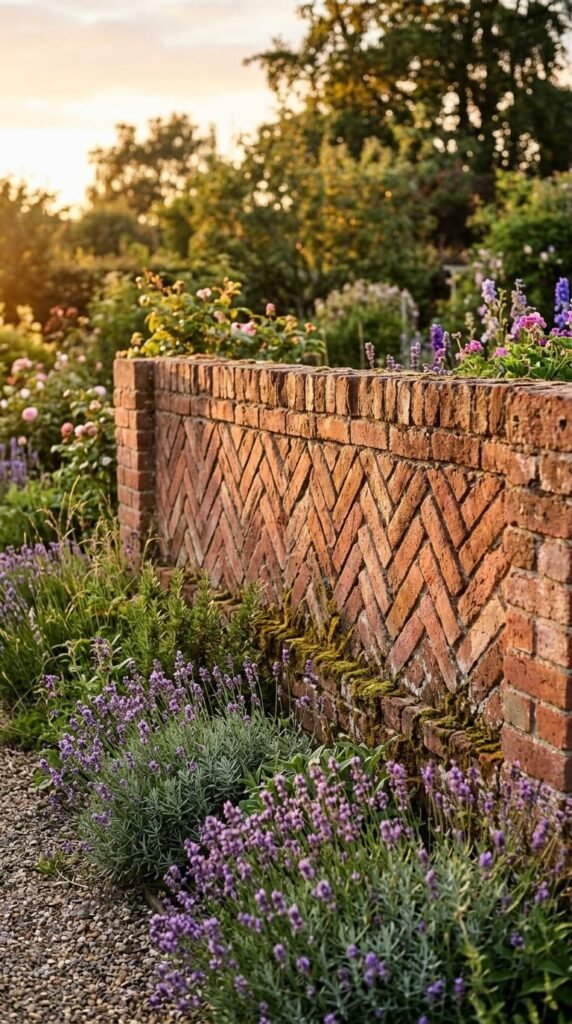
4. Brick Pathway in the Garden
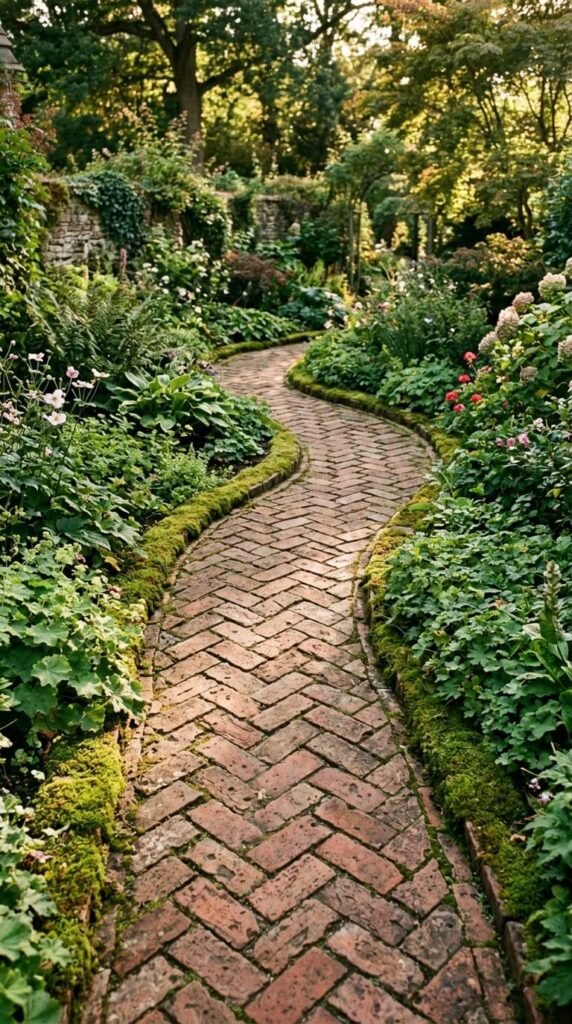
Herringbone is one of the strongest layouts for brick paving — and that’s not an accident. The interlocking angle distributes weight evenly, meaning the path holds up better over time without mortar. Reclaimed bricks often cost less than new ones and look far better. Source them from demolition yards or Facebook Marketplace for $0.25–$0.75 per brick. You can lay a basic garden path dry (no mortar) over compacted sand in a weekend. Mark your center line first and build outward symmetrically for clean edges.
5. Herringbone Wallpaper as an Accent Wall

Wallpaper is one of the fastest ways to add herringbone to a room. Peel-and-stick herringbone wallpaper starts at around $25–$40 per roll — one accent wall typically needs 2–3 rolls. It’s renter-friendly and fully removable. Textured options that mimic woven fabric or grasscloth add dimension. Dark colorways — navy, forest green, charcoal — work especially well in living rooms and home offices. Measure carefully, work from the center of the wall outward, and use a squeegee to smooth out air bubbles as you go.
6. Bathroom Floor in Small Tiles
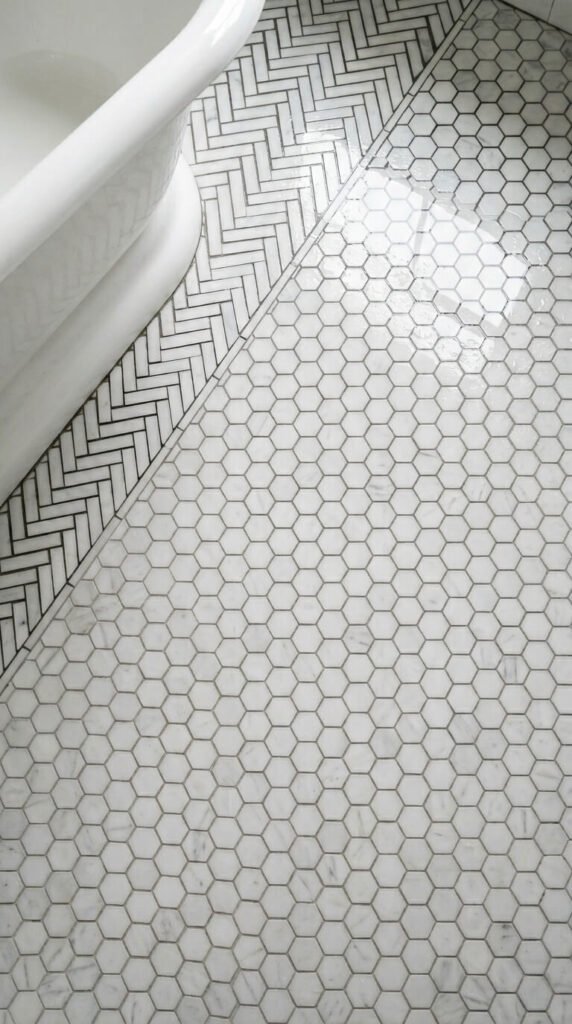
Small mosaic tiles in a herringbone layout are perfect for bathrooms because the increased number of grout lines improves grip underfoot. Pre-mounted mosaic sheets (usually 12×12″) make installation much faster — no need to place individual tiles. Budget around $5–$15 per sq ft for ceramic or porcelain options. White with white grout reads clean and spa-like. White with charcoal grout reads graphic and bold. Keep the rest of the bathroom simple so the floor pattern has room to breathe.
7. Wood Plank Ceiling Treatment
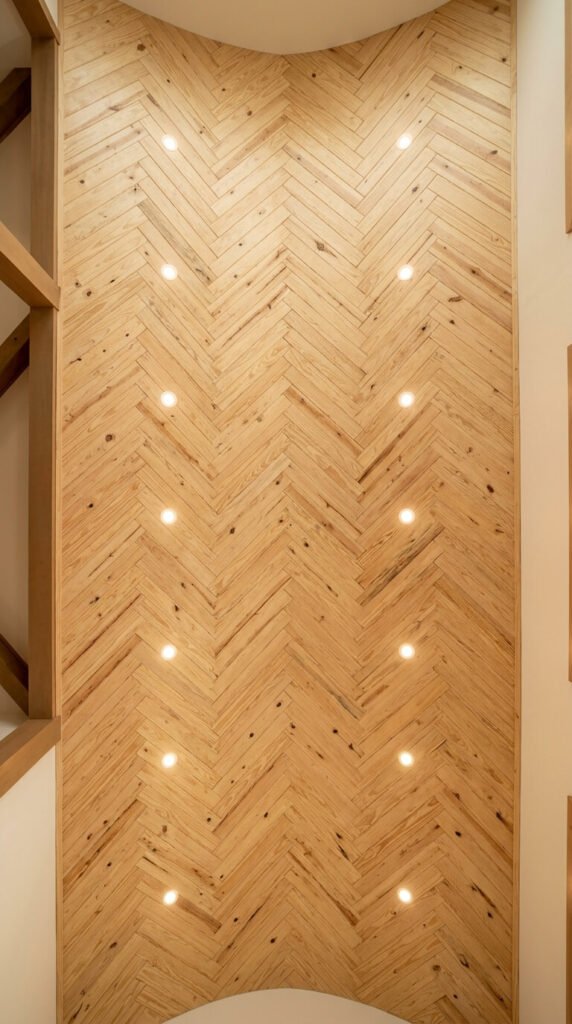
A herringbone wood ceiling is unexpected and memorable. It adds warmth to rooms that feel cold or cavernous — particularly basements, living rooms, and home offices. Shiplap tongue-and-groove pine planks are the most affordable choice, starting around $1–$2 per linear foot. The ceiling herringbone requires precise cutting at angles — a miter saw is non-negotiable here. Plan your layout on paper first. Stain the planks before installation so every cut edge is already finished. This project takes a weekend but pays off for years.
8. Fireplace Surround Tile
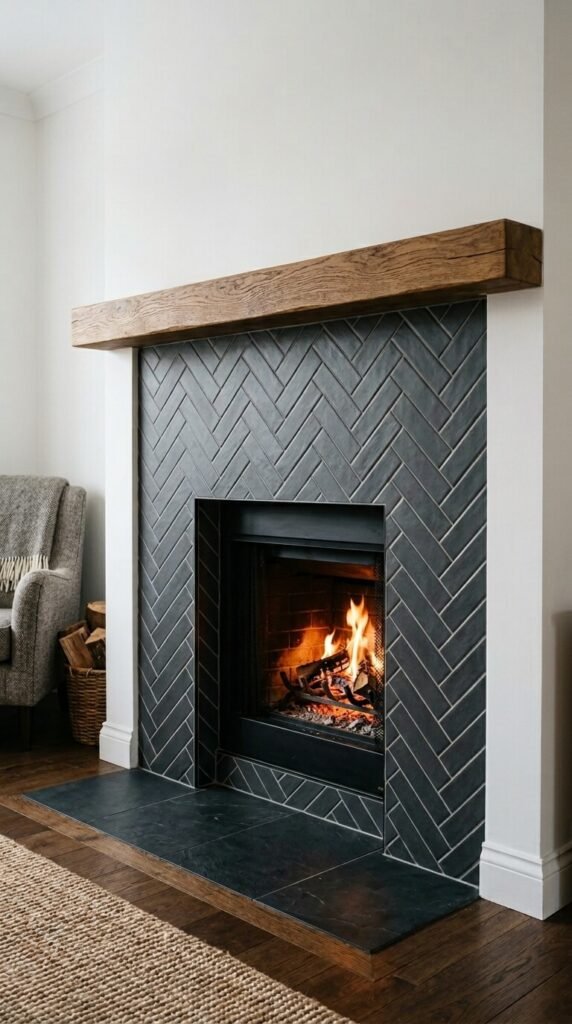
The fireplace surround is one of the highest-impact spots in a living room, and herringbone tile makes it feel considered and deliberate. Slate, ceramic, or porcelain tiles all work here. Slate adds natural texture; glazed ceramic reflects firelight beautifully. The average surround needs only 10–15 sq ft of tile, keeping material costs low. Use a heat-resistant adhesive rated for fireplaces. Vertical orientation of the herringbone pattern draws the eye upward toward the mantel, making the whole fireplace feel taller.
9. Stair Runner in a Woven Herringbone
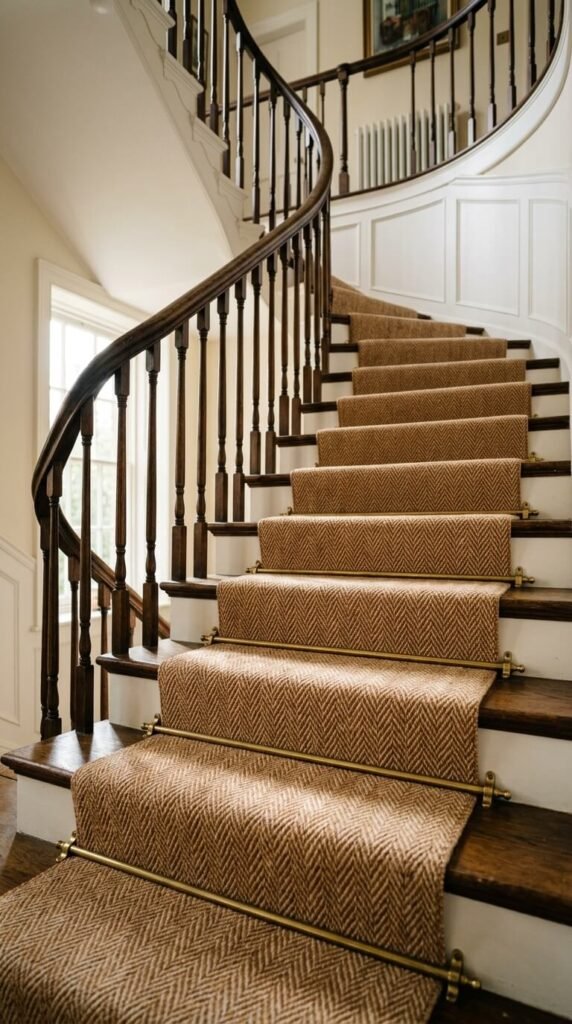
A herringbone wool runner on a staircase looks like it belongs in a Georgian townhouse — even if your stairs are standard builder-grade pine. Woven herringbone runners in wool-blend start around $15–$30 per linear foot, including the pattern. Budget for brass or iron stair rods ($3–$6 each) — they hold the runner and add a finishing detail. Lighter colorways (oatmeal, cream) brighten dark stairwells. Darker ones (navy, charcoal) hide wear. Measure every tread and riser before ordering, and add 15% overage for fitting.
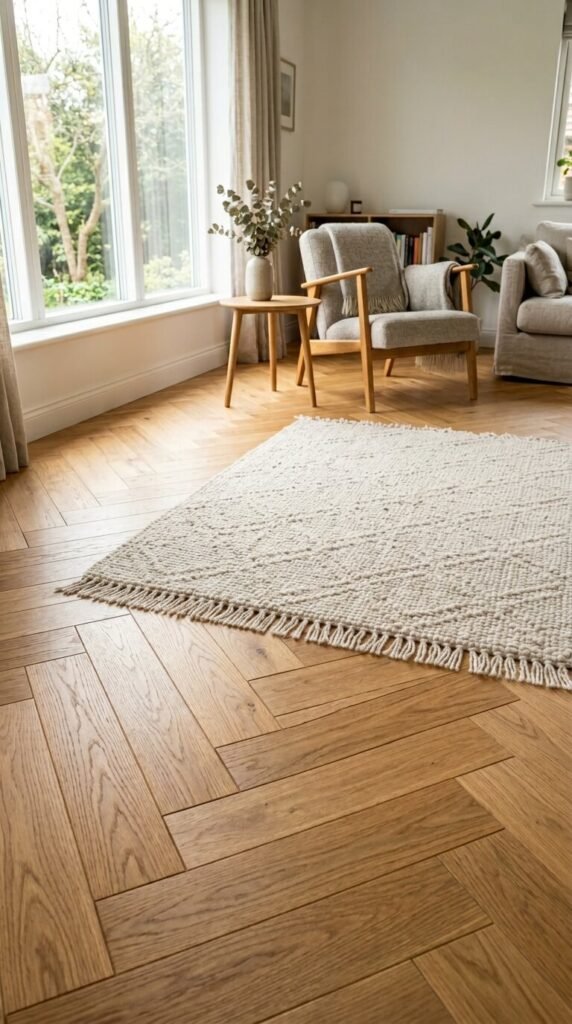
10. Herringbone Parquet in a Home Office
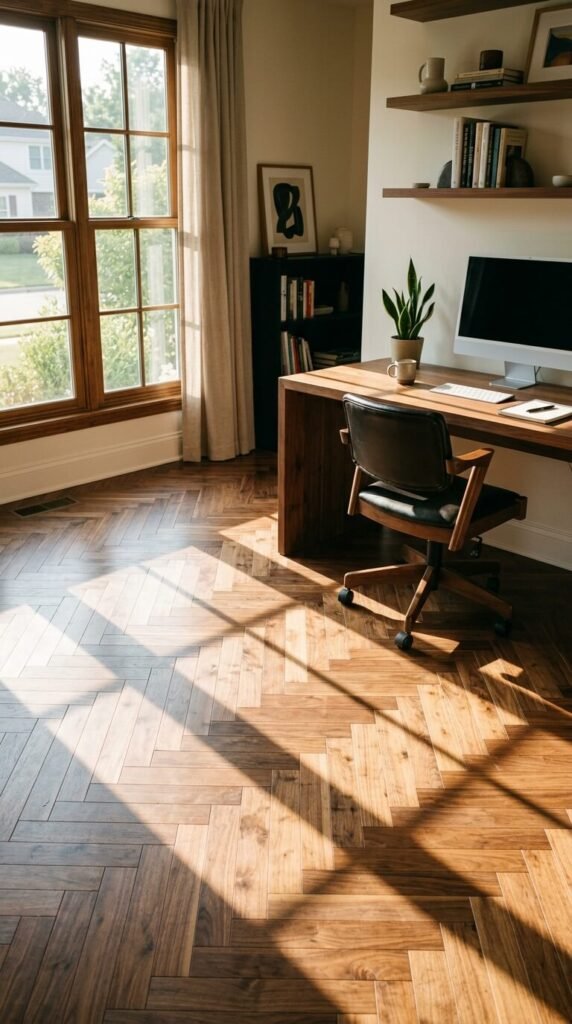
A herringbone floor in a home office signals that the space is intentional. It’s a room meant for serious work. Walnut or dark oak parquet tiles create a rich, grounded feel. Engineered parquet tiles (usually 12×12″ or 18×18″ modular panels) are easier to install than individual strip flooring and start around $4–$10 per sq ft. Self-adhesive versions work well on flat, smooth subfloors. Keep the rest of the room calm — neutral walls, simple furniture — so the floor remains the focal point without distraction.
11. Outdoor Patio in Concrete Pavers
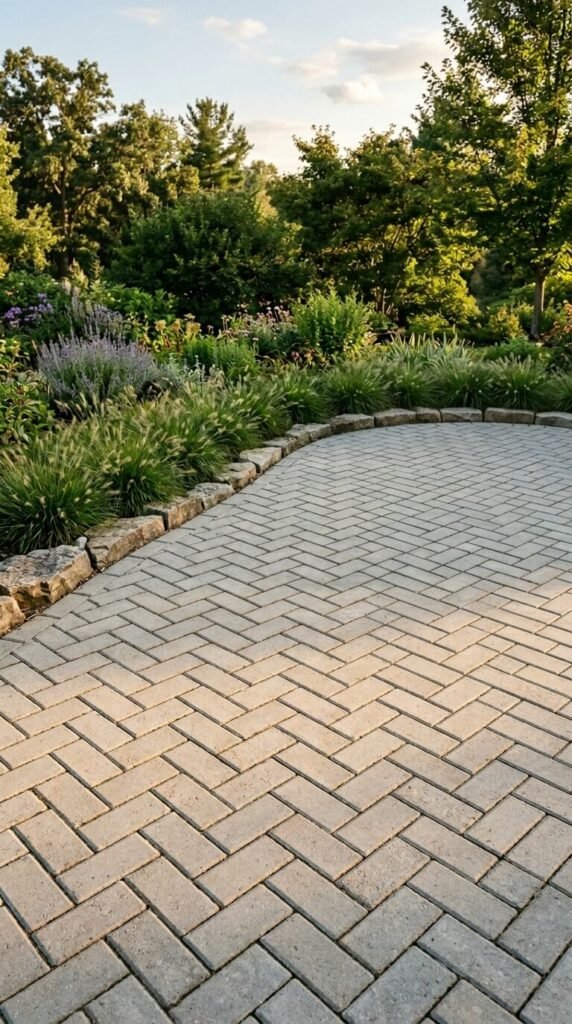
Herringbone is the most common professional paving layout for patios — and for good reason. The interlocking angles resist shifting without requiring mortar. Concrete pavers cost $1.50–$4 per sq ft at most home improvement stores. Sand-set installation (no concrete base) is achievable for most confident DIYers over a long weekend. Rent a plate compactor to lock the sand base before laying. Use a rubber mallet to set each paver without cracking. Polymeric sand for the joints resists weeds and locks everything in place.
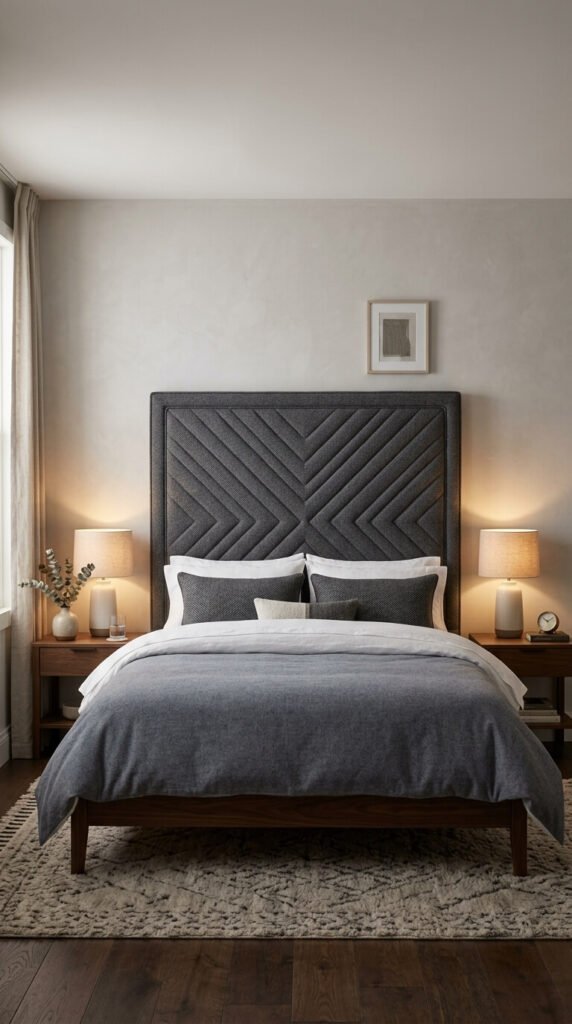
12. Chevron vs. Herringbone in a Bedroom
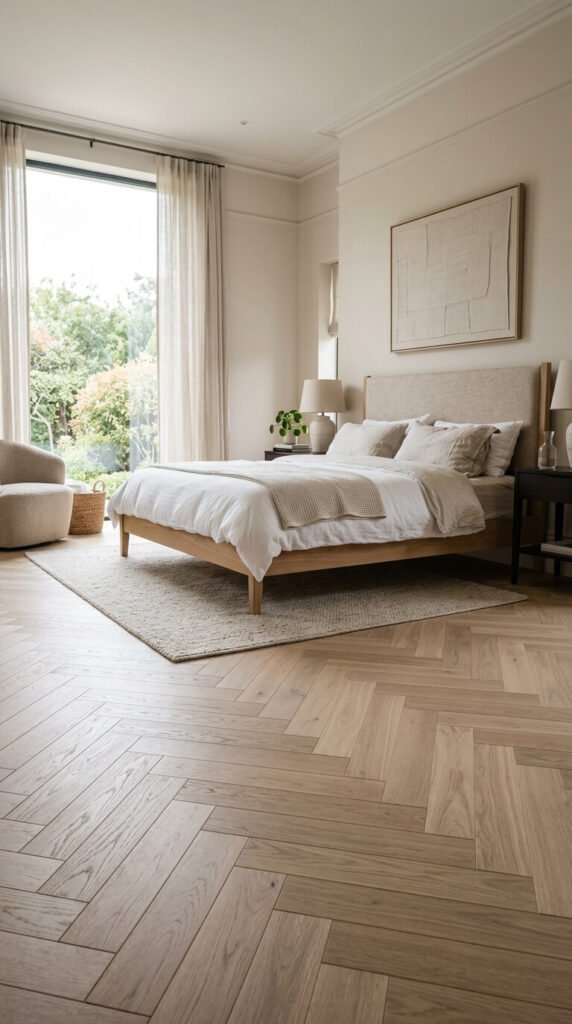
Many people confuse chevron and herringbone — they’re related but different. Herringbone has a staggered, zigzag joint where planks meet end-to-mid. Chevron has planks cut at angles that meet in a perfect point. Herringbone is more forgiving to install (less precision cutting). For bedrooms, herringbone in light ash or whitewashed oak softens the look and avoids the heaviness of darker woods. Lay the pattern so it runs away from the bed’s headboard wall — this draws the eye through the room and makes the space feel longer.
13. Kitchen Island Tile Base

Cladding the base of a kitchen island in herringbone tile is an underused idea. It takes very little tile — usually under 20 sq ft — but adds enormous texture and personality. Terracotta, zellige, or handmade ceramic tiles suit this treatment best. The uneven surfaces and slight color variation catch light in ways that factory-perfect tiles cannot. Budget $50–$150 in materials depending on tile type. Apply to a cement board backing with mosaic adhesive. Unsealed terracotta will absorb stains — apply a penetrating sealer before use.
14. Herringbone in a Mudroom
Mudrooms take serious punishment. Dirt, water, dog paws, sports equipment. Porcelain herringbone tiles in darker colorways handle all of this better than almost any other material. They’re scratch-resistant, waterproof, and easy to mop. Dark grout hides soil between cleans. Choose a matte or textured finish over glossy — gloss shows every scuff. At $3–$8 per sq ft, this is a mid-range upgrade that lasts decades. Keep grout joints thin (1/8″) for a tighter, cleaner look that’s also easier to clean.
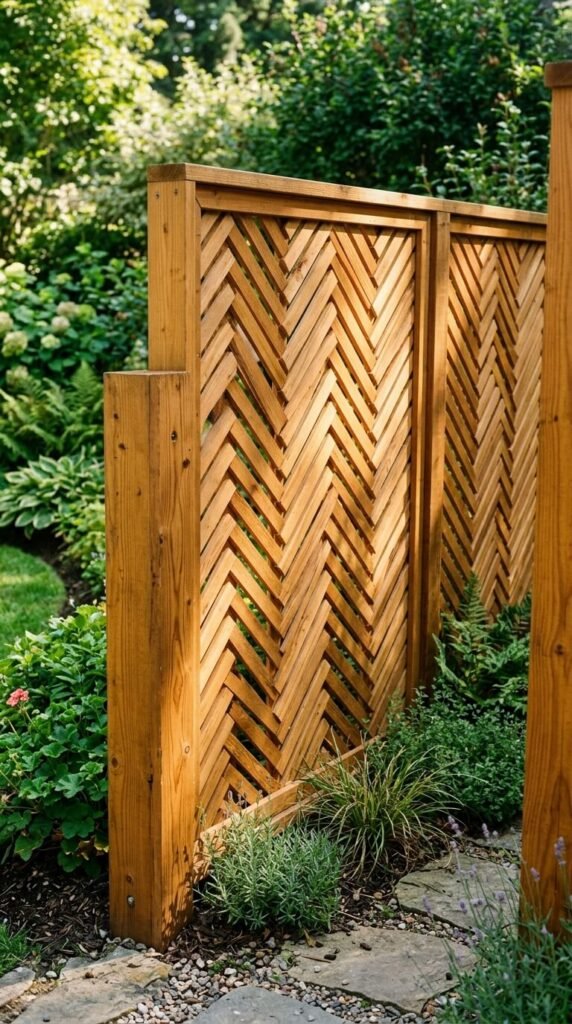
15. Herringbone Fence Panel Design
A herringbone fence panel is a DIY woodworking project that looks far more complex than it is. Cedar laths (1×2″ or 1×3″) are light, weather-resistant, and affordable at $0.80–$1.50 per linear foot. Build a simple rectangular outer frame from thicker lumber, then fill the interior with diagonal lath strips alternating direction. Pre-drill to avoid splitting. Finish with an exterior wood oil or stain. The finished panel can serve as a garden screen, a trellis backing, or a decorative feature on a plain fence line.
16. Upholstered Headboard in Herringbone Fabric
A herringbone-upholstered headboard adds texture and pattern to the bedroom without paint or wallpaper. Herringbone tweed or wool-blend fabric costs $15–$40 per yard — a king headboard takes 2–3 yards. This is a straightforward DIY: cut plywood to your desired shape, layer foam and batting, then staple the fabric tightly over the back. A dark charcoal or camel herringbone reads especially well against white or neutral bedding. The woven texture also adds a subtle acoustic softness that works well in rooms with hard floors.
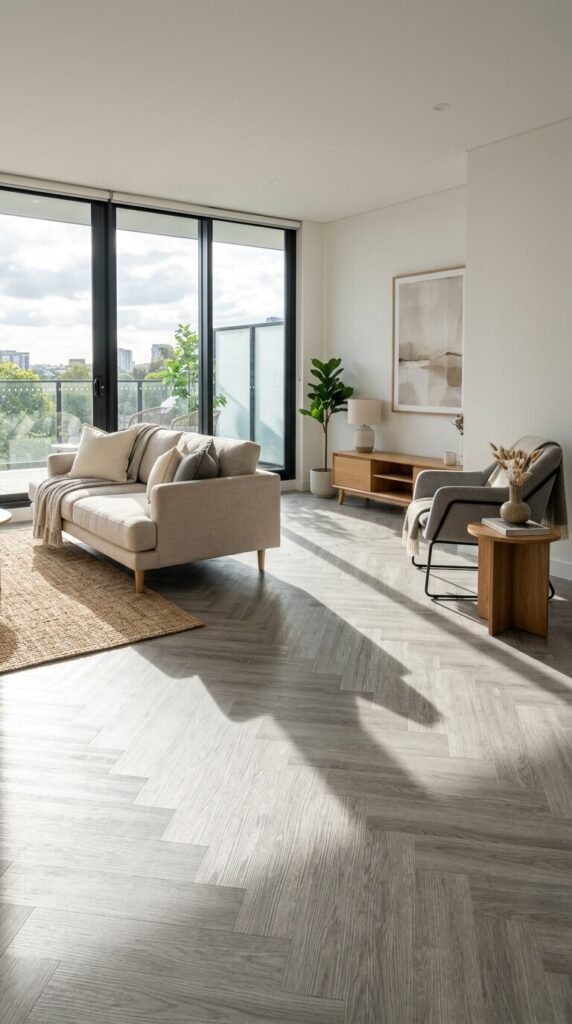
17. Vinyl Plank Flooring in Rental Apartments
Renters who want herringbone don’t have to miss out. Luxury vinyl plank (LVP) in herringbone layout is floating-floor-compatible in most cases — no glue, no nails, no landlord confrontation. LVP starts at $2–$5 per sq ft. It handles moisture better than real wood and resists scratches from pets and furniture. The herringbone layout does require more cuts and slightly more waste — budget 10–15% extra material. Use a utility knife and straight edge for clean cuts. The floor can go right back up when you move out.
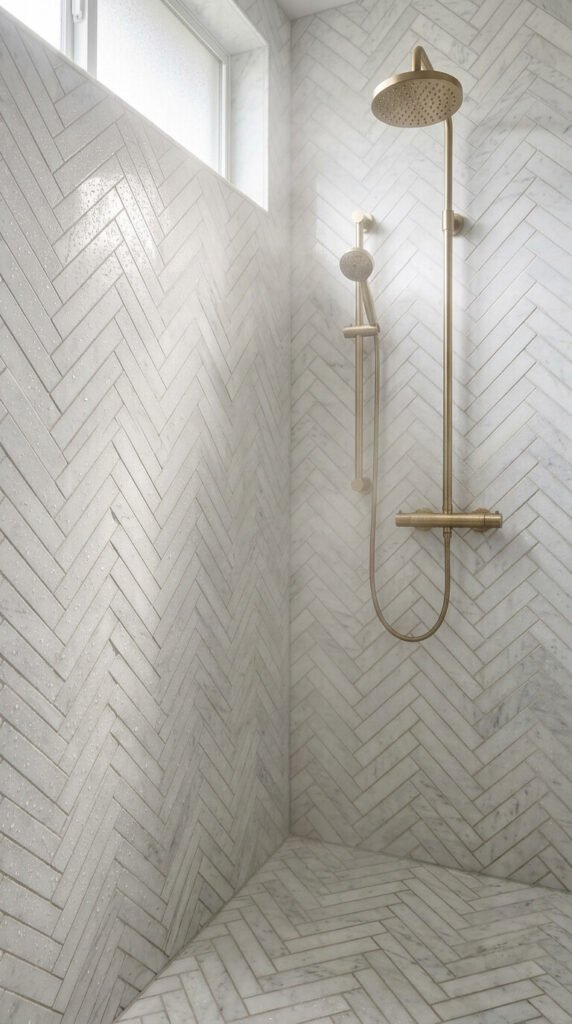
18. Herringbone Tile in a Wet Room Shower
A herringbone tile shower looks expensive because it is — but it’s more achievable than people expect. Marble-look porcelain or ceramic tiles give the same visual result for a fraction of real stone’s cost. Expect $8–$20 per sq ft installed. In a shower, the pattern should run floor to ceiling on at least one wall to create maximum impact. Use epoxy grout rather than standard cement grout — it resists mold and staining far better in wet environments. Keep the fixtures simple: brushed brass or matte black against white tile is a hard combination to beat.
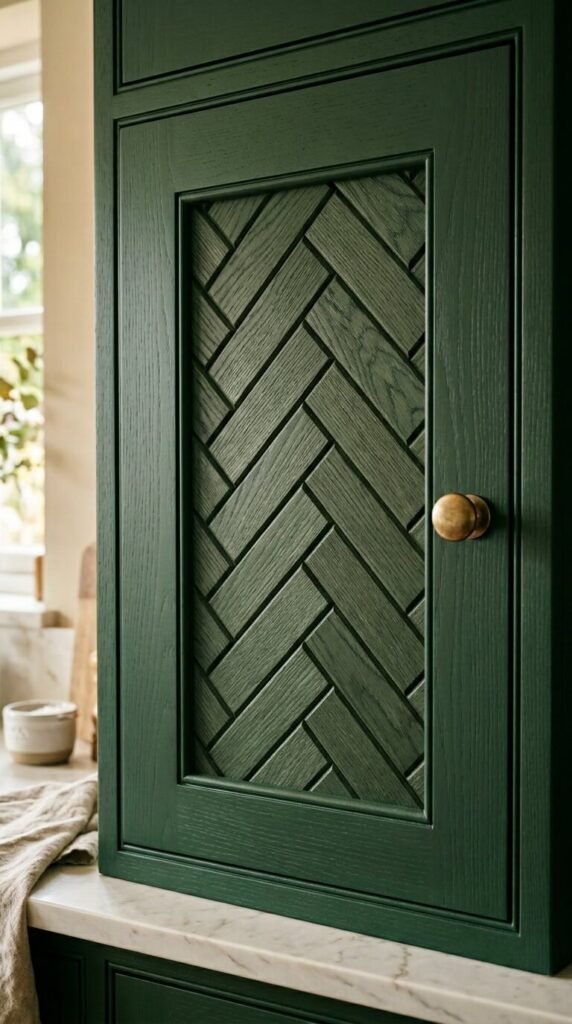
19. Herringbone Parquet Panels on Cabinet Doors
Adding a herringbone wood inset to flat cabinet doors is a furniture-maker trick that’s surprisingly DIY-friendly. Small parquet tiles or tongue-and-groove strips can be cut and glued into a recessed panel frame. Sand flush, prime, and paint — the herringbone texture shows through the paint as subtle depth and shadow. This works on kitchen cabinets, bathroom vanities, and bedroom wardrobes. Chalk paint or eggshell finish shows the texture best. Material cost is minimal — this upgrade is mostly about time and patience, not budget.
20. Garden Wall in Reclaimed Brick
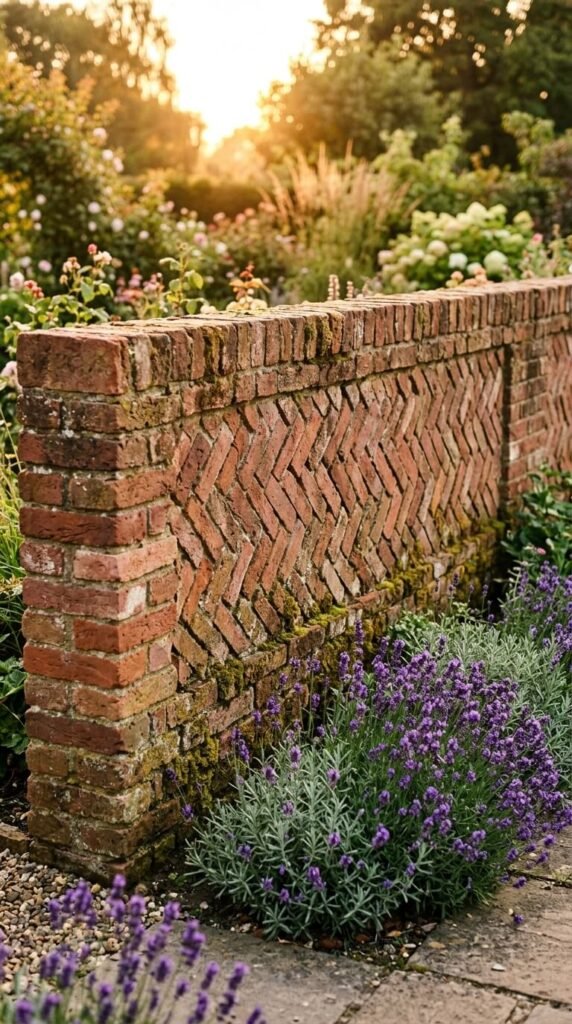
A reclaimed brick herringbone garden wall has the kind of character that only age and material variation can provide. Unlike a flat stretcher-bond wall, the angled herringbone layout requires careful planning — start with a drawn template. Reclaimed bricks sourced locally typically cost $0.30–$0.80 each and look far more interesting than new stock. Use a general-purpose exterior mortar and keep joints consistent at 10mm for a professional finish. Cap the top course with a soldier course of bricks laid flat — this protects the herringbone from direct rain and ties the design together.
21. Herringbone on a Kitchen Floor
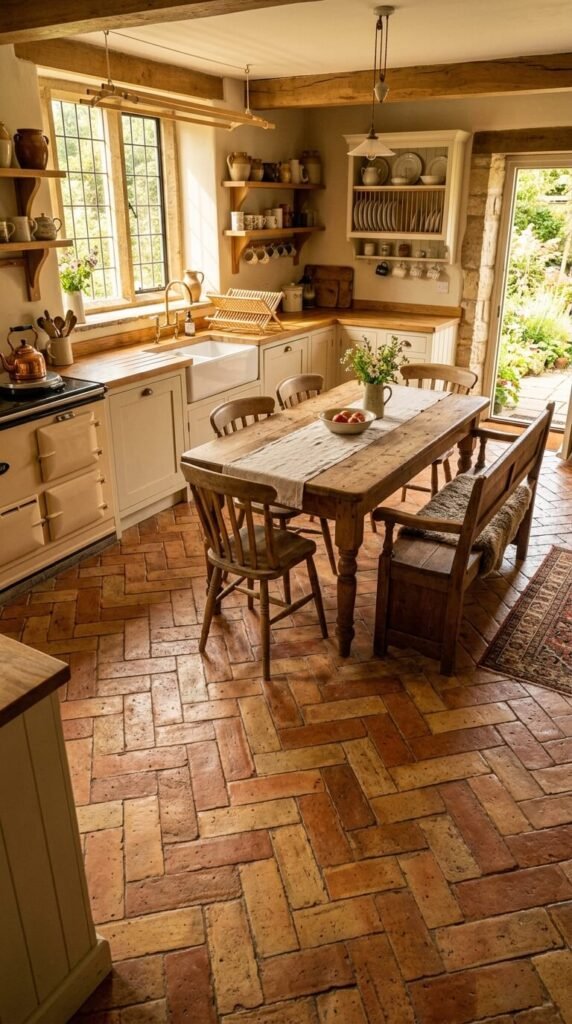
Kitchen floors get heavy traffic, grease splatter, and dropped pots. Terracotta herringbone tiles handle all of this while aging beautifully rather than showing wear. Handmade terracotta starts around $4–$8 per sq ft but will outlast most modern alternatives. Seal with a penetrating stone sealer before grouting and again annually — this prevents staining without changing the matte appearance of the tile. The natural warm tones of terracotta work with almost every kitchen color: cream, white, green, navy, and raw wood all complement it.
22. Herringbone Timber Decking
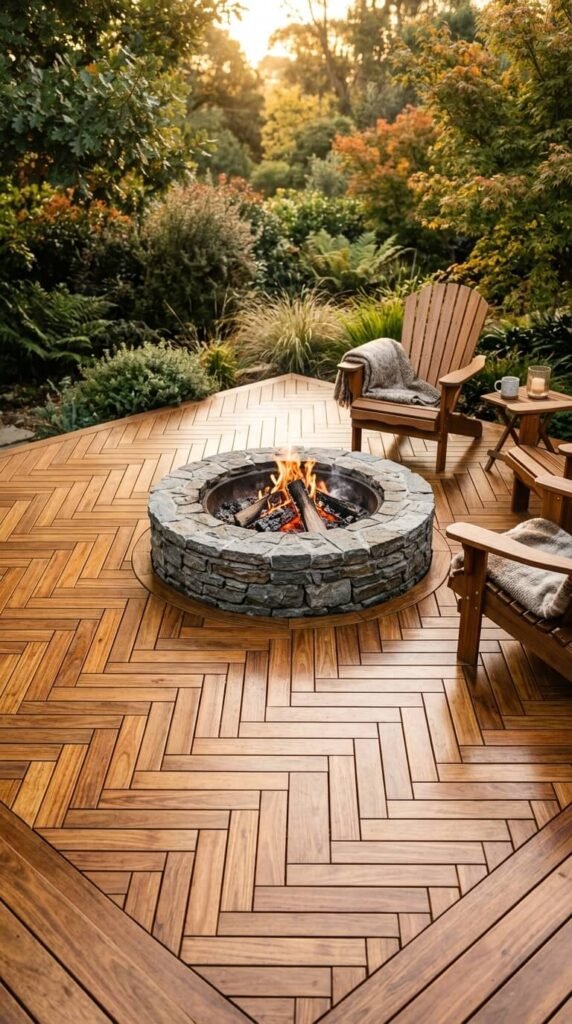
A herringbone timber deck is a woodworking project for the more confident DIYer — but the result looks like professional landscaping work. Hardwood decking boards in 70x19mm or 90x19mm work well for this pattern. The key challenge is the central layout point: all the angle changes must radiate consistently from a defined origin. Use chalk lines to map the pattern before cutting. Stainless steel hidden fasteners keep the surface screw-free for a cleaner look. Finish with a quality decking oil each year to maintain the color and prevent cracking.
23. Hallway Runner Rug in Herringbone Weave
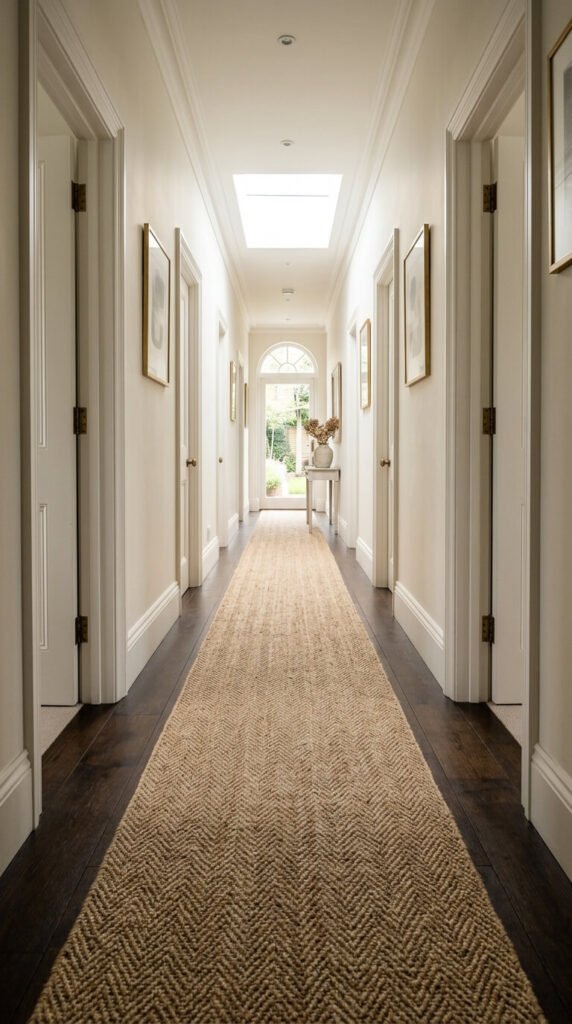
A herringbone runner rug is one of the simplest and most affordable ways to bring the pattern into a home. Jute or wool-blend herringbone runners start around $60–$120 for a standard hallway length. The pattern echoes the movement down a corridor naturally — its angles reinforce the sense of direction. In a dark hallway, choose a lighter colorway to bounce light. Add a non-slip underlay beneath the rug — it’s cheap, prevents accidents, and keeps the rug from bunching. Shake out or vacuum weekly; spot clean with mild soap and water.
24. Exterior Cladding in a Modern Build
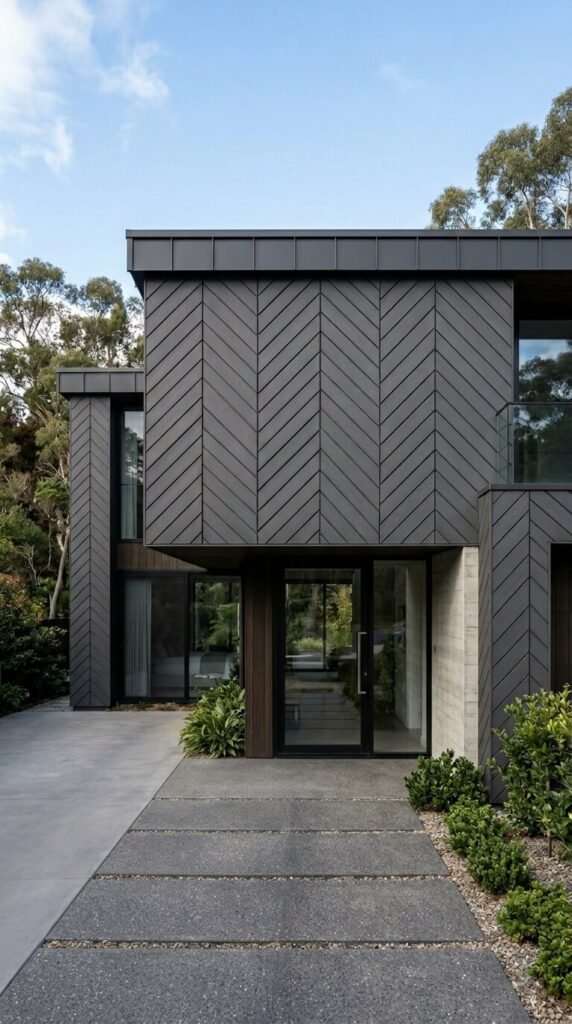
Herringbone exterior cladding on a modern home is striking from the street. Fiber cement boards are the most practical choice — fire-resistant, maintenance-low, and durable in all climates. Budget $10–$20 per sq ft installed, depending on board size and finish. Narrower boards (150–200mm) create a finer, more graphic pattern. The shadow gap between boards (created by a batten system) adds depth and prevents water ingress. This is a job for a professional installer — exterior weatherproofing requires precise flashing and sealing at all joints and corners.
25. Herringbone Tile Around a Swimming Pool
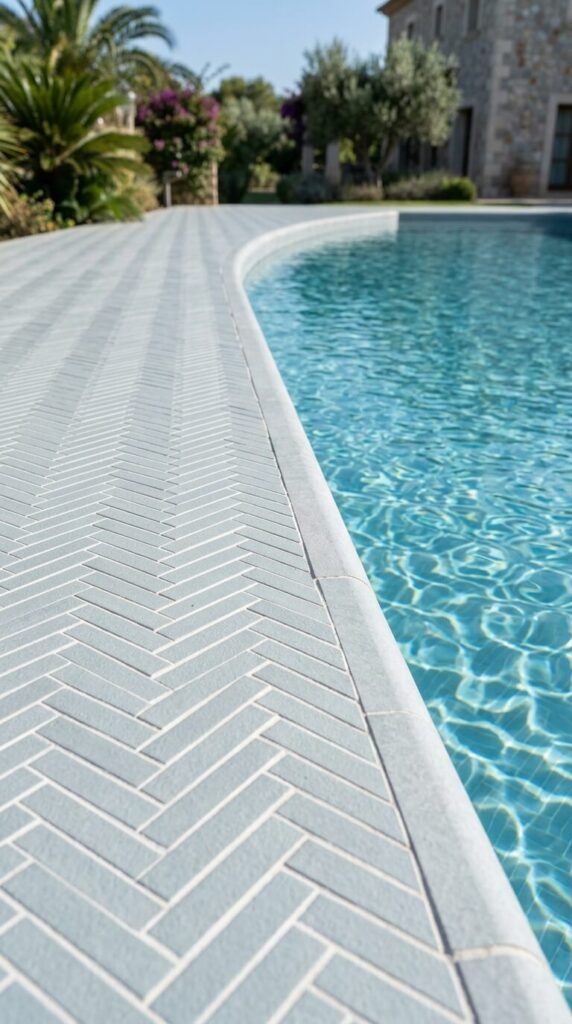
Pool surrounds need to be slip-resistant, durable, and resistant to chlorine. Small-format porcelain or glass mosaic tiles in herringbone are well-suited — the additional grout lines add traction, and porcelain handles chemical exposure without degrading. Use epoxy grout rated for pool use — it won’t crack or absorb moisture. Pale blue-gray tones are the most popular, but terracotta-look porcelain gives a Mediterranean feel at a lower cost. This is not a DIY project for the inexperienced — pool-edge tiling requires precise waterproofing membrane work underneath.
26. Laundry Room Floor Upgrade
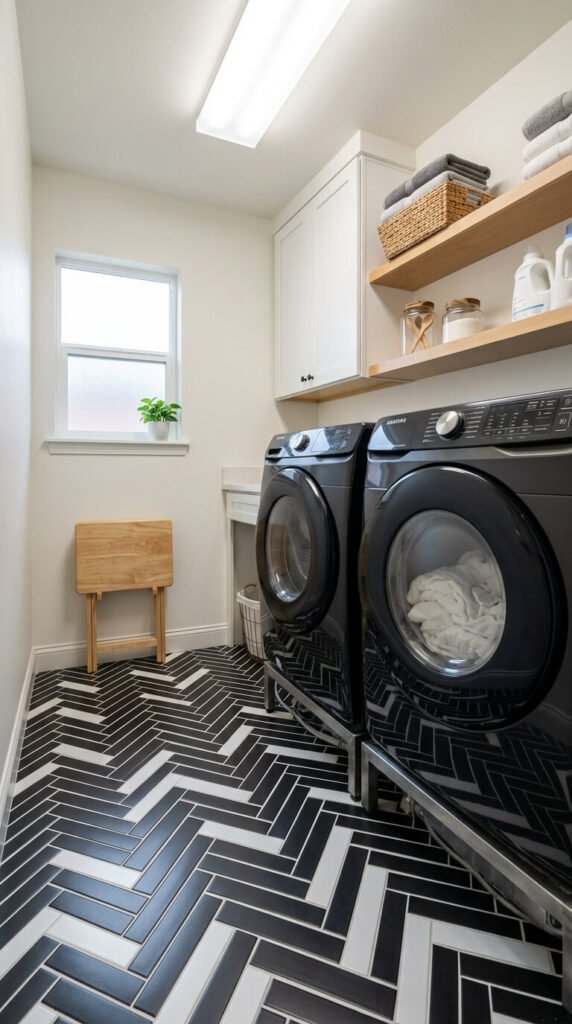
The laundry room is often the most neglected space in a home. A black-and-white herringbone ceramic tile floor costs very little — a small laundry room might need only 30–50 sq ft of tile — and transforms the room from purely functional to actually pleasant to spend time in. Ceramic tile handles water, detergent spills, and heavy appliance vibration without issue. Use a flexible adhesive under appliances to reduce cracking risk. White grout will discolor over time — go with gray or charcoal to stay ahead of the laundry room grime cycle.
27. Kids’ Room Accent Wall in Painted Wood Strips
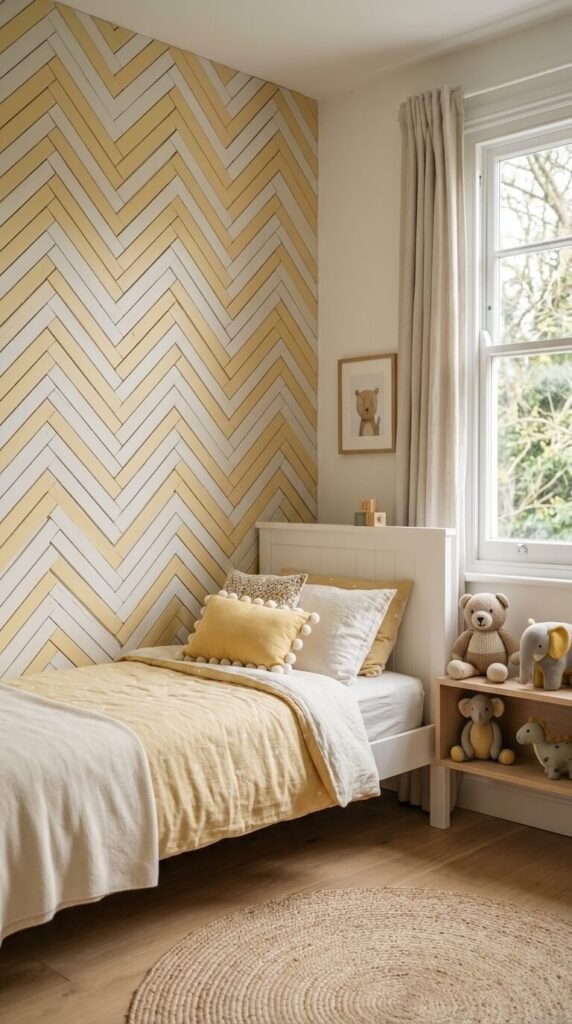
A herringbone wood-strip accent wall in a kids’ room is a project that costs under $100 in materials and takes a weekend. Pine screen molding or hobby strips (available at any hardware store) are thin enough to cut with a utility knife and light enough to apply with construction adhesive — no nails required in plaster or drywall. Paint the strips before applying them so every cut edge is finished. Two alternating colors — soft yellow and white, for example — add more dimension than a single tone. The pattern grows with the child and doesn’t feel juvenile.
28. Herringbone in a Commercial Café Floor
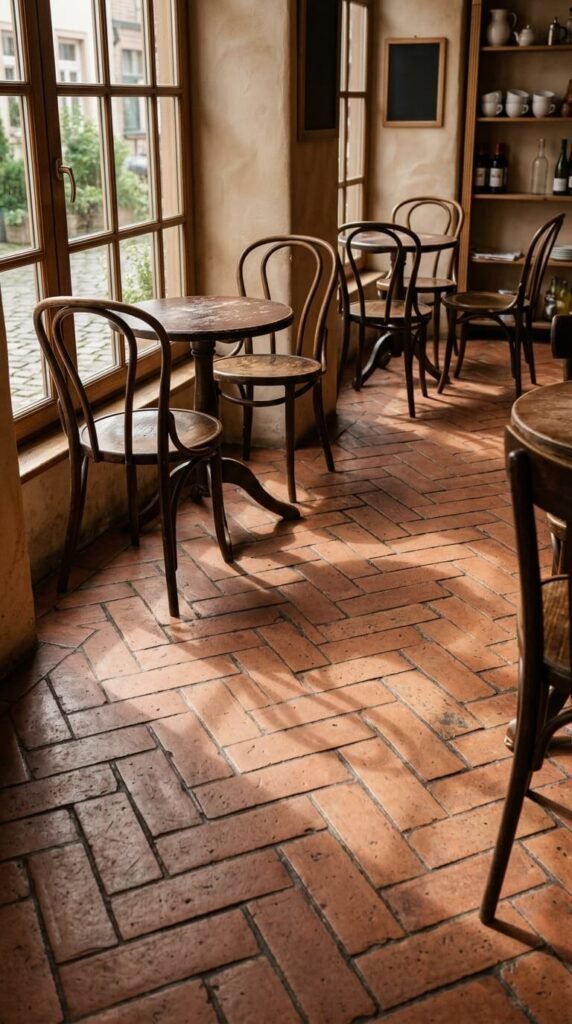
Commercial spaces demand flooring that performs under heavy daily use while maintaining visual appeal. Porcelain or fired terracotta herringbone checks both boxes. In a café or retail space, the pattern subtly directs customer flow — the angled layout draws people through the space. Specify a slip-coefficient rating of 0.6 or above for commercial safety compliance. Budget $12–$25 per sq ft installed for a commercial-grade job. The herringbone layout also makes worn sections easier to replace selectively — individual tiles can be swapped out without affecting the surrounding pattern.
Conclusion
Herringbone is one of those rare patterns that works across almost every scale, material, and budget. A $30 peel-and-stick wallpaper panel and a $25-per-sq-ft engineered oak floor are doing the same fundamental thing: using angle and rhythm to make a surface feel alive. The 28 applications in this article cover the full range — from weekend DIY projects that cost less than a restaurant dinner to long-term investments that add real value to a property. The best place to start is wherever you have the smallest surface and the most to gain. A mudroom, an entryway, a backsplash. Get one right, understand how the pattern behaves with your materials, and the bigger projects become far less intimidating. Herringbone rewards patience and planning — but it always pays back more than it asks for.