Limewash walls have a way of making a room feel lived-in, warm, and completely one-of-a-kind. That layered, faded look — somewhere between aged Italian plaster and sun-bleached stone — is something no regular paint can fake. The good news? You don’t need a professional or a big budget to get there. Whether you’re working on a single accent wall or an entire room, the right technique makes all the difference. This guide walks you through 25 real, hands-on methods that add genuine depth and texture to any wall — from raw beginners to confident DIYers.
1. The Classic Two-Coat Limewash Method
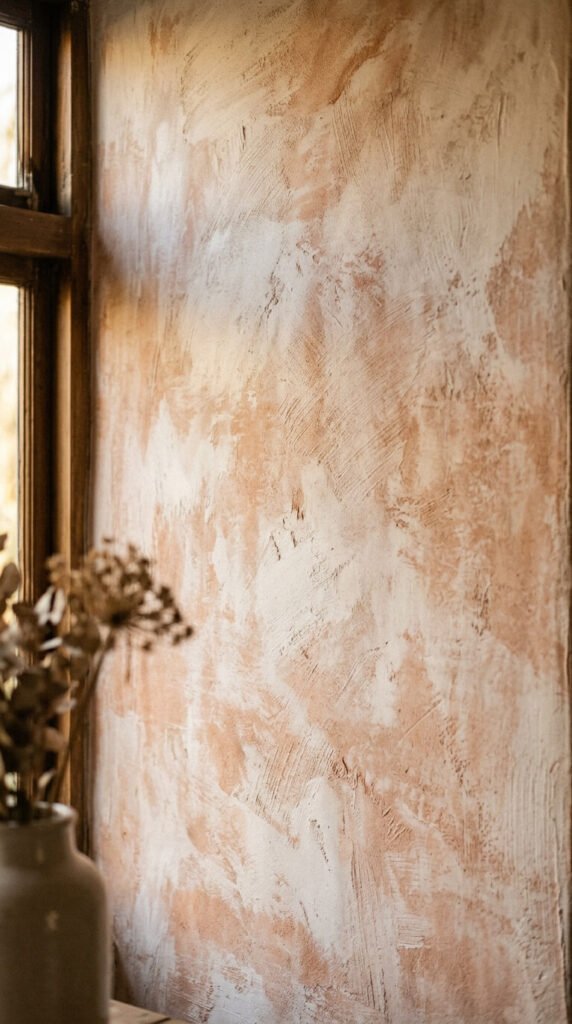
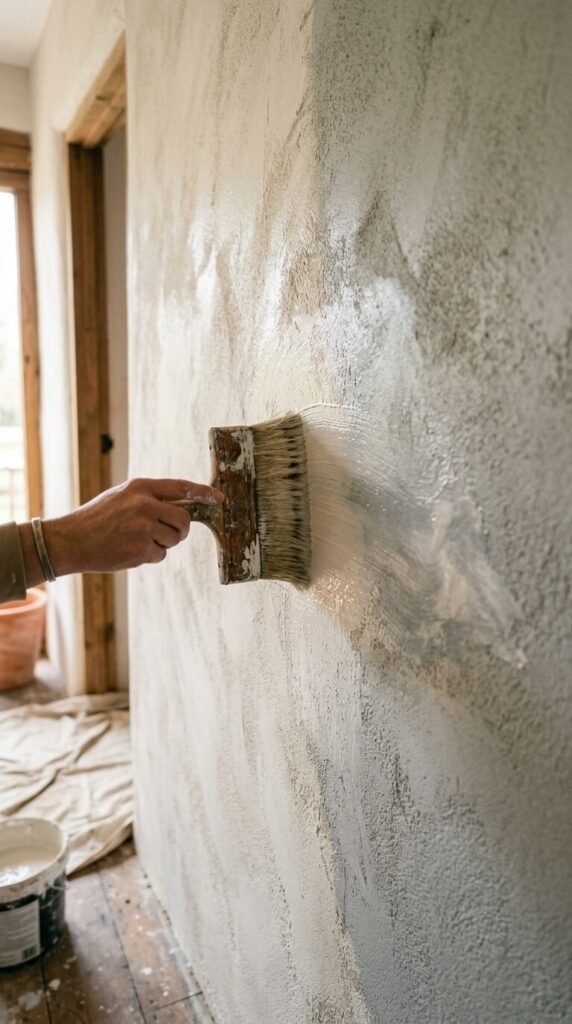
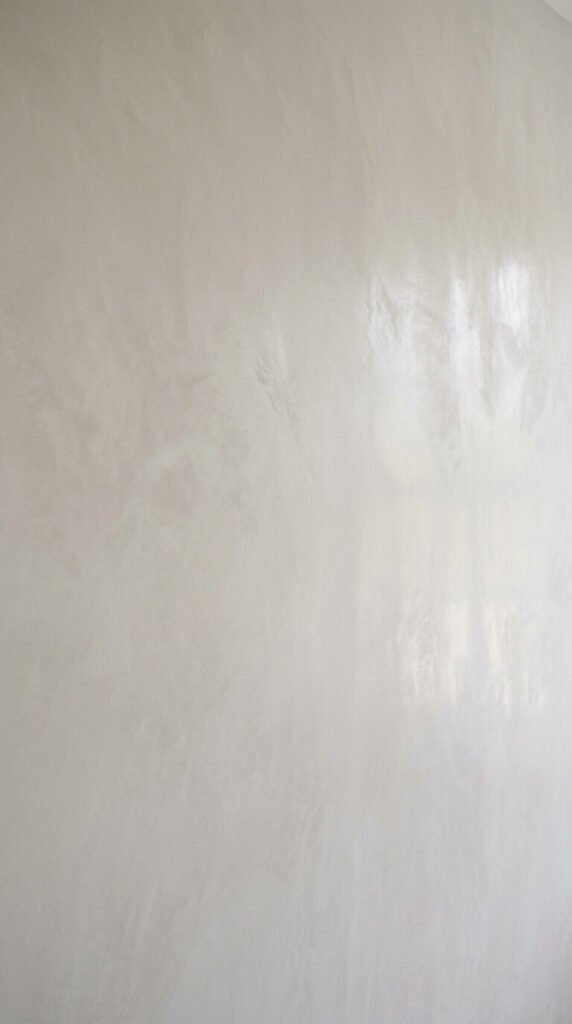
Start with two coats and keep it simple. Apply a slightly darker base coat first, let it dry fully, then brush on a thinner, lighter top coat. Don’t try to cover everything. Leave patches of the base showing through. This is exactly how old European plaster walls get that naturally worn look. Use a wide, stiff-bristled brush and work in circular strokes. The drier the top coat, the more texture you get. Budget tip: mix standard limewash with a splash of water to stretch it further.
2. Dry Brush Dragging for Streak Effects
Load your brush lightly and drag it down the wall in long vertical pulls. The key is a nearly dry brush — too much paint and you lose the streaky, organic effect. This works especially well on dining room walls or behind a bed. It gives the impression of aged plaster without the full commitment of a plastered wall. Practice on a piece of cardboard first. Once you get the pressure right, it goes fast. A 4-inch chip brush from any hardware store is all you need.
3. Sponge Stippling for Mottled Depth
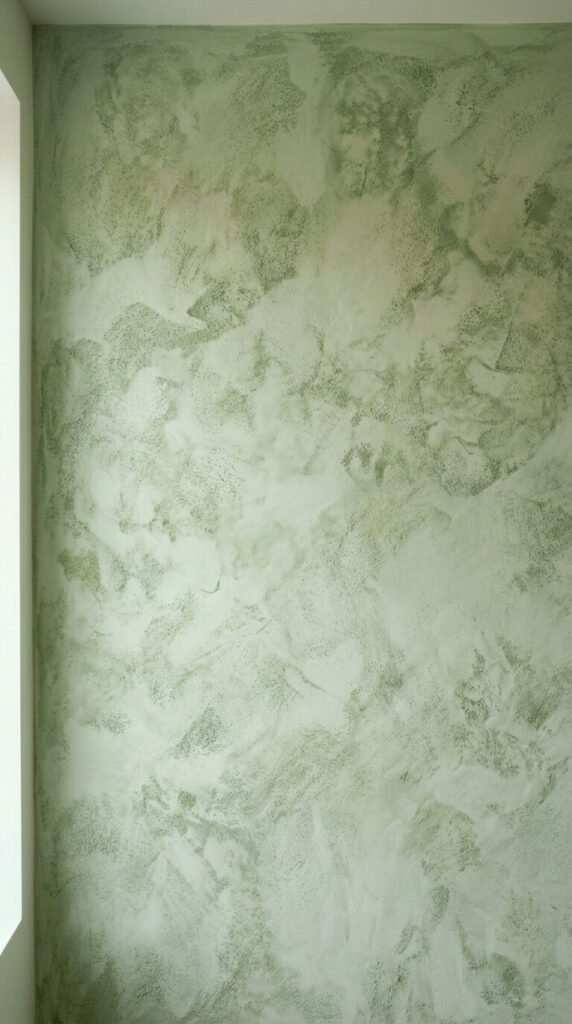
A natural sea sponge creates uneven, spotted texture that’s impossible to replicate with a brush. Dip it lightly into your limewash mix, dab off excess on a rag, then press and twist it gently against the wall. Overlap your impressions randomly. No two spots should look the same. This method works beautifully in bathrooms or bedrooms where you want softness over drama. Sea sponges cost very little at craft stores. Use two slightly different shades of limewash for even more dimension.
4. The Italian Slaked Lime Technique
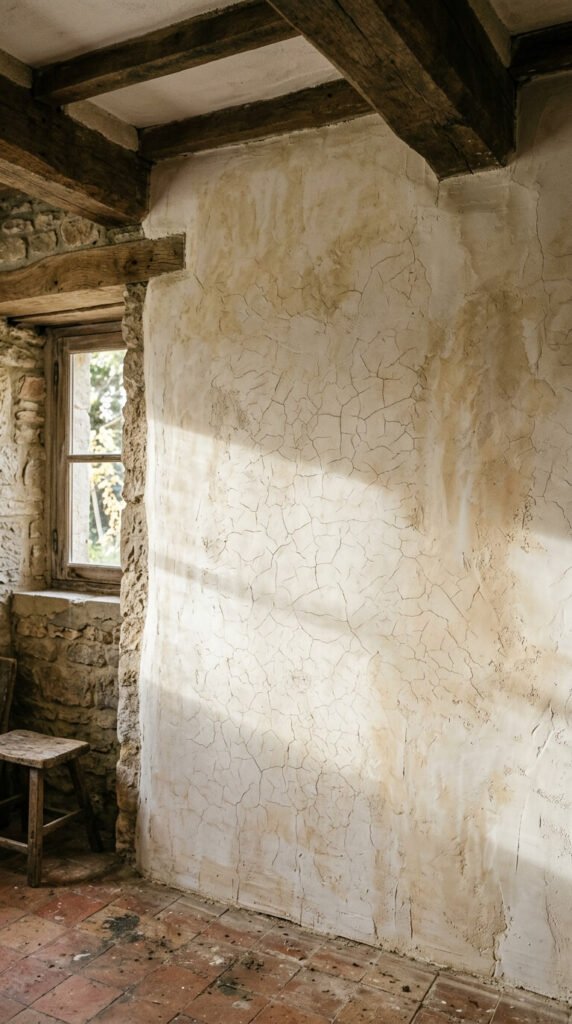
This is the original, old-world method. Slaked lime — also called hydrated lime — mixed with water and a touch of pigment gives the most authentic result. It soaks into porous walls and bonds differently than paint-based limewash. The finish is more matte, more mineral, and more durable. Apply it with a wide masonry brush in loose, overlapping strokes. It dries lighter than it looks wet. Always wear gloves — slaked lime is alkaline and can irritate skin. Buy it at masonry supply stores for very low cost.
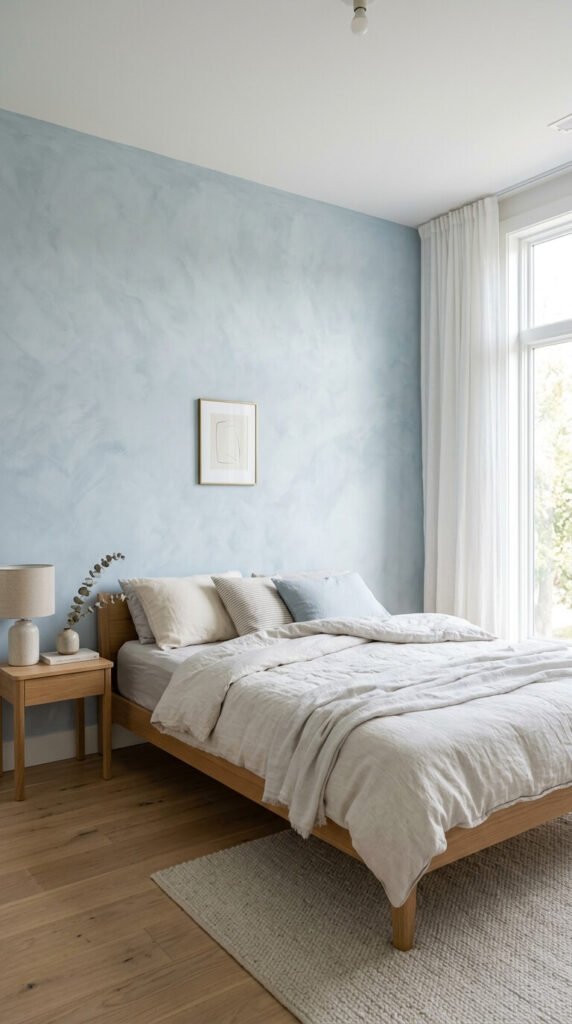
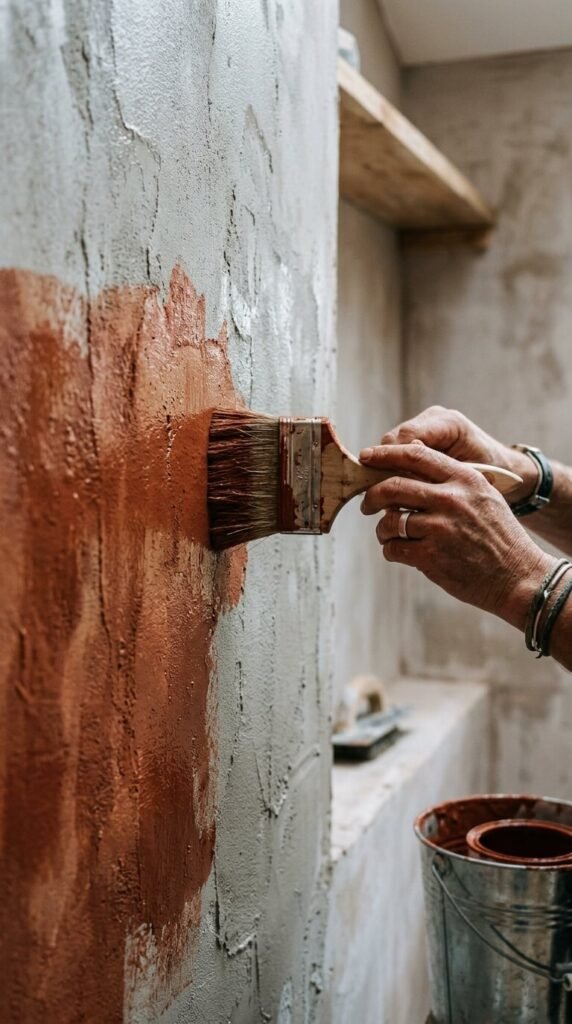
5. Color Washing Over a Tinted Base

Pick a base color — say, warm terracotta — then wash over it with a translucent, diluted limewash in a lighter or contrasting tone. The base peeks through everywhere the top coat thins out. This creates color depth that flat paint simply cannot achieve. Dilute your top coat limewash to about 30% paint and 70% water. Apply it quickly with a large brush and wipe back sections with a damp rag while still wet. You control exactly how much base shows through.
6. Rag Rolling for Organic Variation
Crumple a cotton rag — old t-shirts work perfectly — and roll it up the wall in an irregular path. The folds in the fabric create unpredictable, organic marks. No two patches look alike. Apply a fresh coat of limewash first, then immediately work the rag over it before it dries. Work in small 2-foot sections so the paint stays workable. This technique is forgiving and fast. It’s one of the best options for people who feel intimidated by brushwork. Cost? Just a few old rags and a can of limewash.
7. Feather Dusting for Soft Haze
Use a large feather duster loaded with a tiny amount of thinned limewash. Dust it lightly across a freshly painted wall while the surface is still slightly tacky. The result is a dreamy, hazy layer that softens everything beneath it. It works like a glaze. This is ideal for bedrooms or nurseries where you want softness without strong texture. The technique takes less than 10 minutes per wall. Combine it with a solid limewash base for best results. Any cheap feather duster from a dollar store does the job.
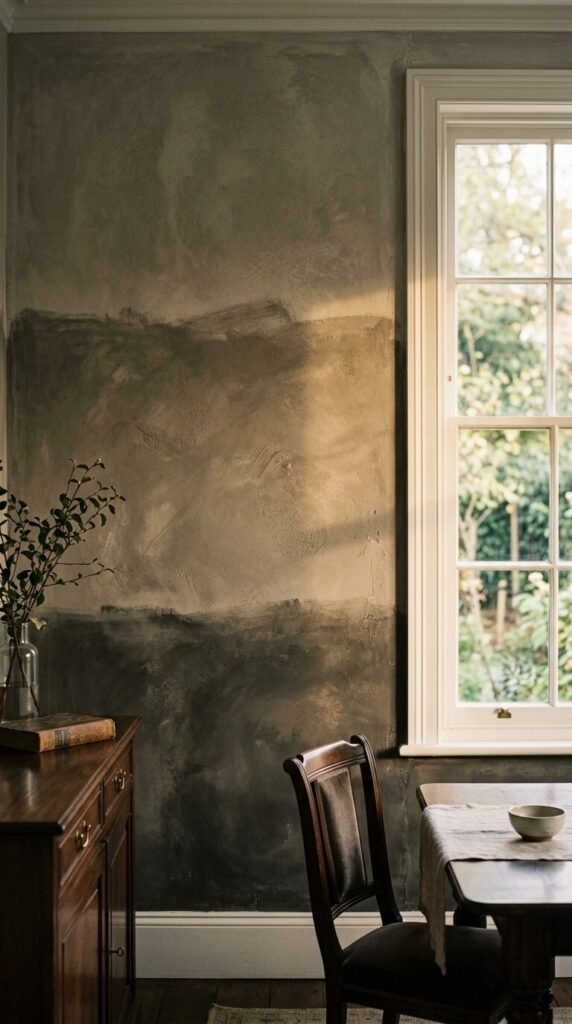
8. Wet-on-Wet Blending
Apply two shades of limewash at the same time, wet-on-wet, and blend where they meet. Use a wide brush to feather the transition zone so there’s no hard line. This creates a gradient effect on the wall — lighter at the top, deeper at the bottom, or vice versa. Work quickly because limewash dries fast. Have a helper apply one color while you apply the other. This method is great for tall walls where you want the ceiling to feel higher. No special tools needed — just two colors and one wide brush.
9. Salt Crystals for Natural Texture
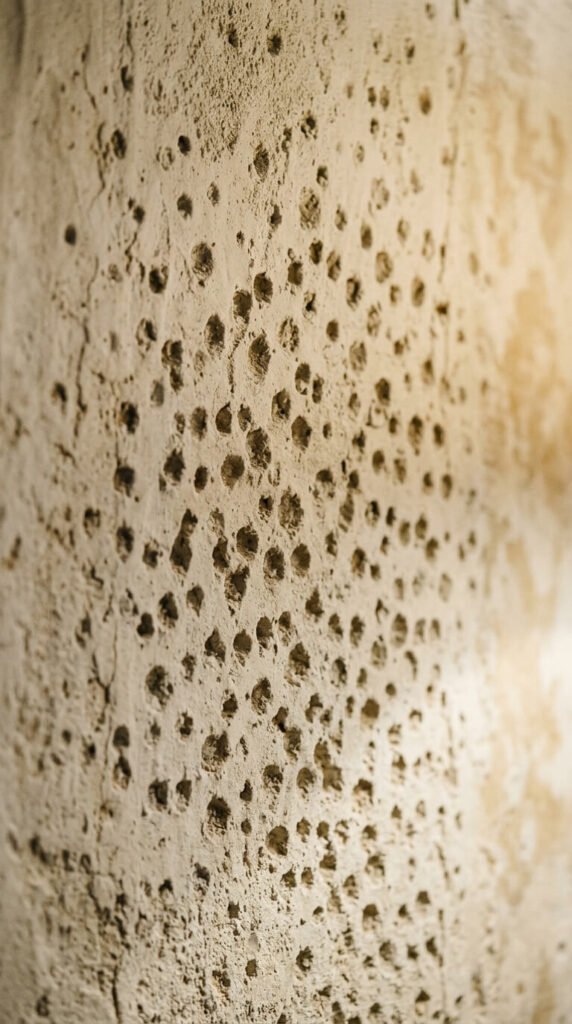
While your limewash is still wet, sprinkle coarse sea salt across the surface. As it dries, the salt absorbs moisture and leaves small pitted marks in the surface. Brush the dried salt off after 20 minutes. What’s left is a naturally pocked, mineral-looking texture that resembles aged stone. This is a fantastic trick for bathroom walls. The effect is subtle but adds real authenticity. Use coarse kosher salt or rock salt — fine table salt dissolves too quickly and doesn’t leave enough texture.
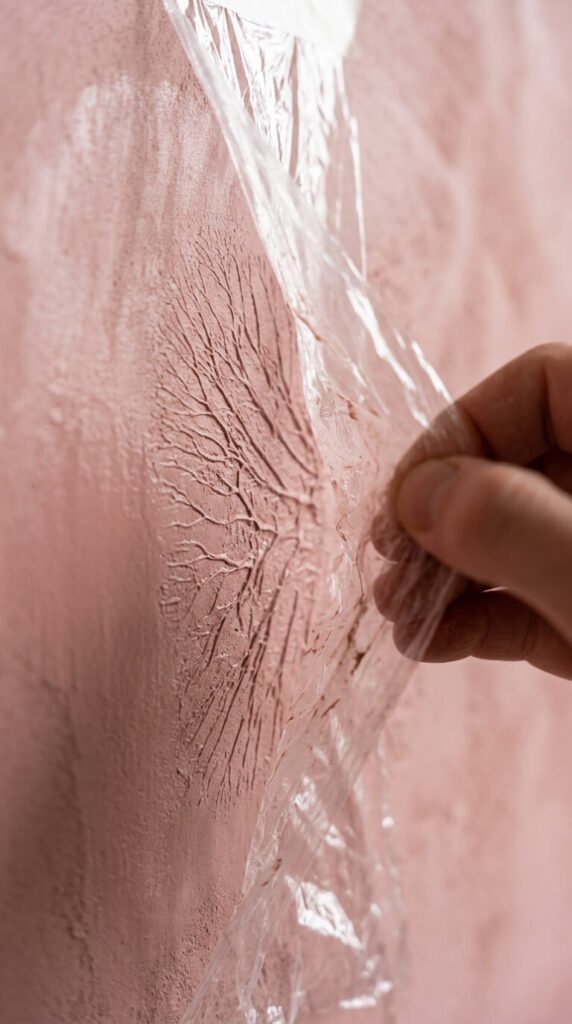
10. Plastic Wrap Lifting
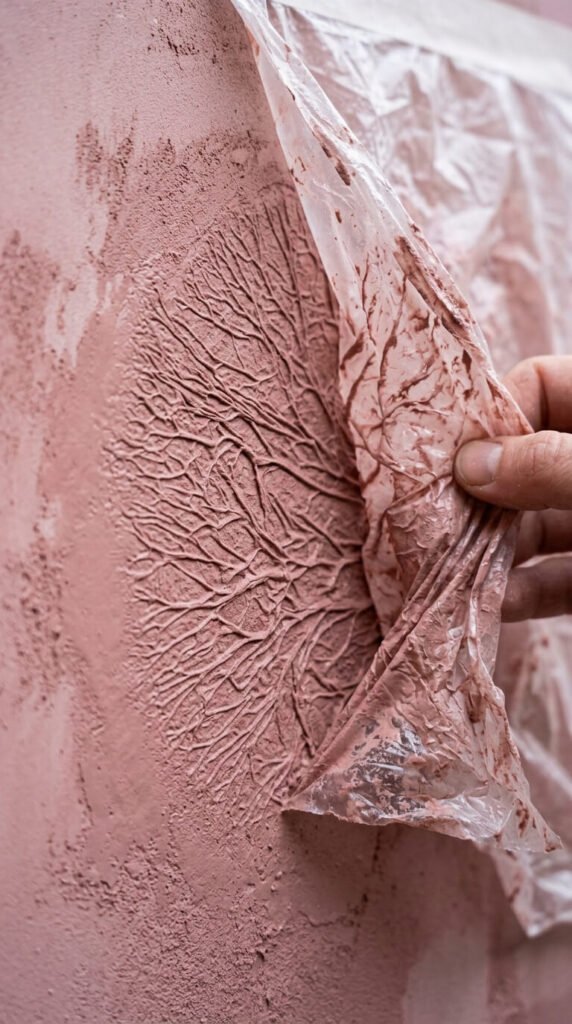
Press a sheet of crumpled plastic wrap onto wet limewash and pull it away immediately. The plastic lifts the wet paint in random, web-like patterns that look almost like cracked earth or weathered stone. Work in small sections — about 18 inches at a time — so the limewash doesn’t dry before you lift. Each pull creates a unique pattern. Layer this over a dried base coat for even more depth. A single roll of plastic wrap can cover an entire accent wall. It’s one of the most dramatic effects for almost no cost.
11. Cross-Hatch Brushwork
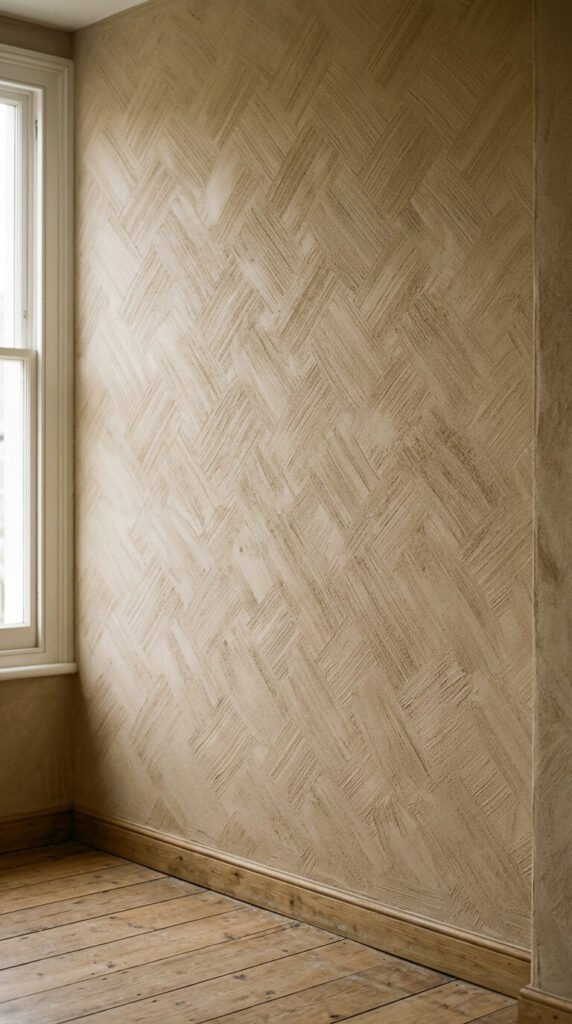
Apply limewash in one direction — say, diagonal left — let it sit for two minutes, then apply a second thin coat in the opposing diagonal direction. Where the strokes cross, the paint builds up slightly and creates a woven, grid-like texture. This is one of the most controlled limewash techniques. It suits formal spaces like dining rooms or studies. Use a stiff-bristled 3-inch brush and keep the coat thin. The cross-hatch becomes more visible as the paint dries because the overlapping layers catch light differently.
12. Trowel Application for Plaster Effect
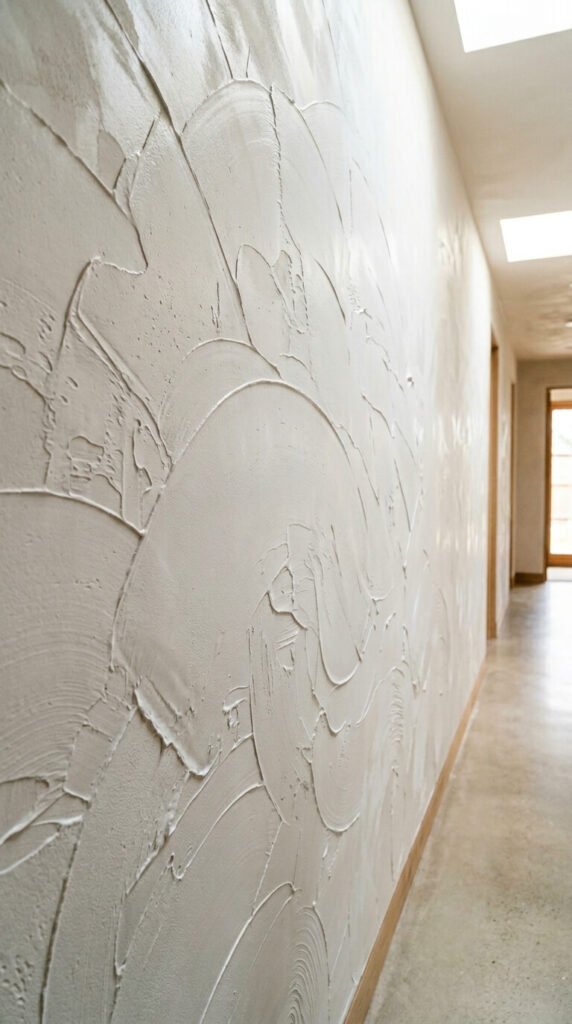
Use a wide steel trowel to spread limewash in thin, swooping passes across the wall. The trowel leaves subtle arcs and ridges that mimic real Venetian plaster — at a fraction of the cost. Don’t overwork it. One or two passes per section, then move on. Let areas dry before layering another coat. The trowel gives you the smoothest of all limewash finishes while still keeping that mineral depth. A basic 10-inch drywall trowel from any hardware store works perfectly and costs very little.
13. Limewash Over Brick
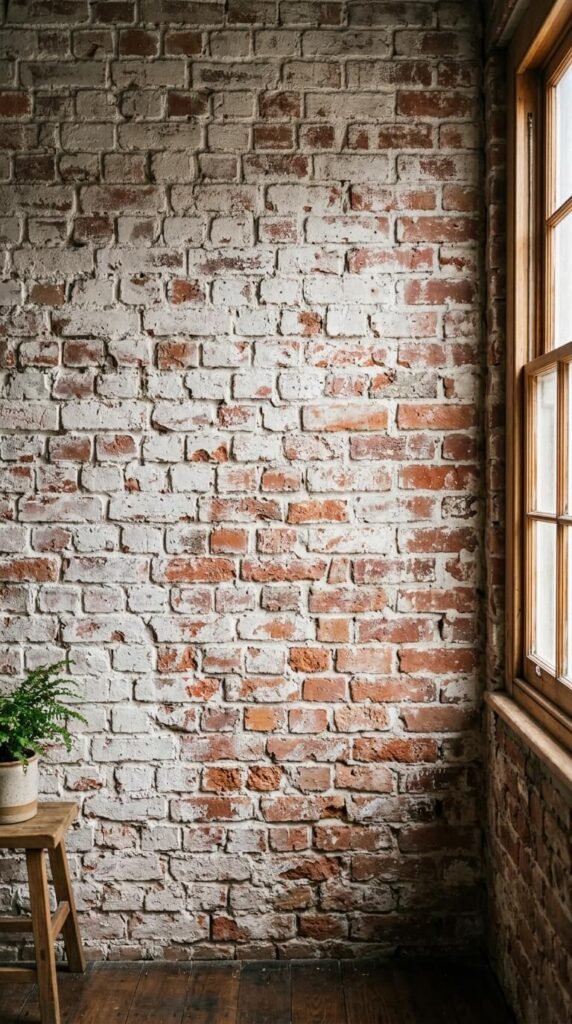
Applying limewash directly over raw brick gives one of the most beautiful results possible. The paint sinks into the mortar joints and thins over the brick faces, letting the warm terracotta show through in patches. Dilute your limewash slightly more than usual for brick — about 50/50 with water. Use a stiff brush and scrub it in. Don’t try to get even coverage. Uneven is the goal. This is perfect for fireplace surrounds or exposed feature walls. Let it dry and assess — you can always add a second coat if you want more coverage.
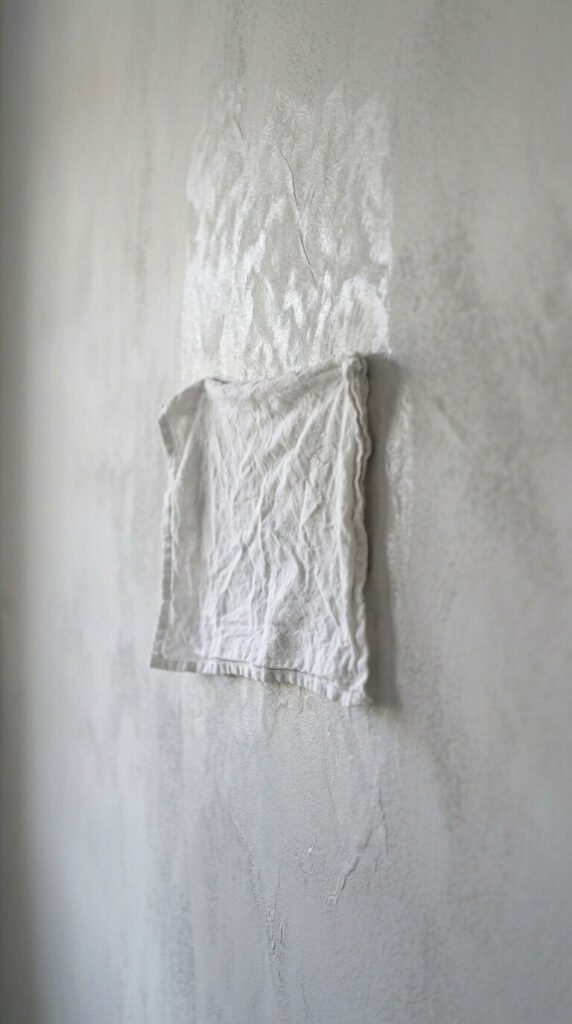
14. Negative Space Wiping
Apply a full coat of limewash, then immediately wipe back sections with a damp rag or sponge before it dries. The areas you wipe reveal the layer beneath — whether that’s a base coat or primer. The result is a deliberately faded, sun-bleached look. Work randomly. Don’t create a pattern. This technique suits rustic and coastal-style interiors. It’s also very forgiving — if you wipe too much, you can always re-apply. This is one of the easiest techniques for beginners to practice without fear of ruining the wall.
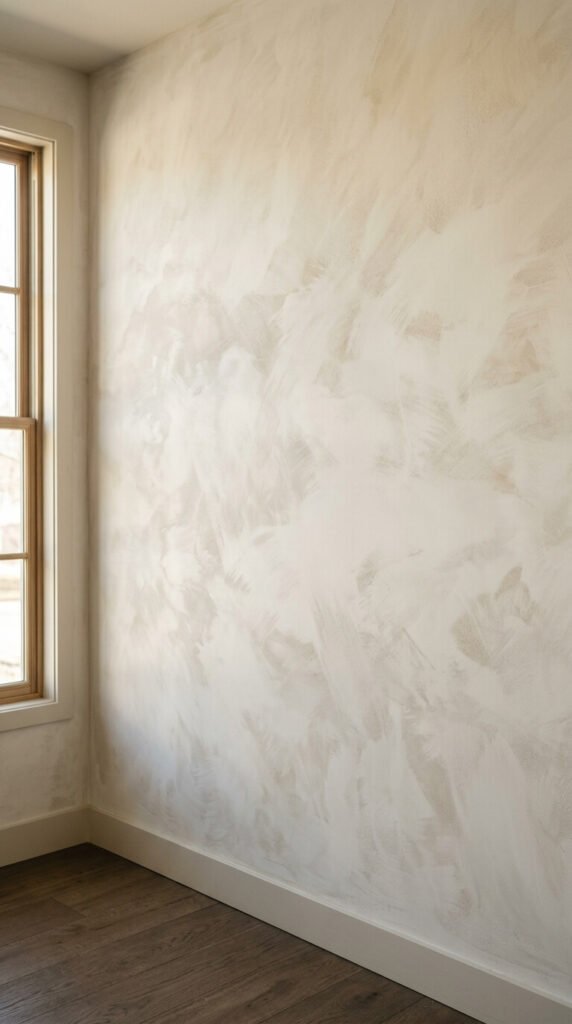
15. Layered Tonal Glazing
Build up three or four thin layers of the same color, each slightly diluted differently. The first coat is your thickest. Each subsequent coat gets thinner and more transparent. By the final coat, you’re essentially adding a translucent haze. The result is extraordinary tonal depth — like light passing through colored glass. Let each coat dry completely before the next. This technique takes patience but almost no skill. The paint does the work. It’s particularly effective in rooms with strong natural light that changes throughout the day.
16. Stippling Brush Technique
Hold a thick stippling brush perpendicular to the wall and jab it lightly against the surface in a dabbing motion. Don’t drag — just press and lift. This creates a dense, even texture that looks like rough stone or aged plaster. It’s one of the most controlled texturing methods because you can stop and start without losing consistency. Work in small 2-foot sections, overlapping slightly as you go. This technique is excellent for people who want texture without visible directional brush strokes. The result is beautifully uniform.
17. Reverse Painting: Dark Over Light
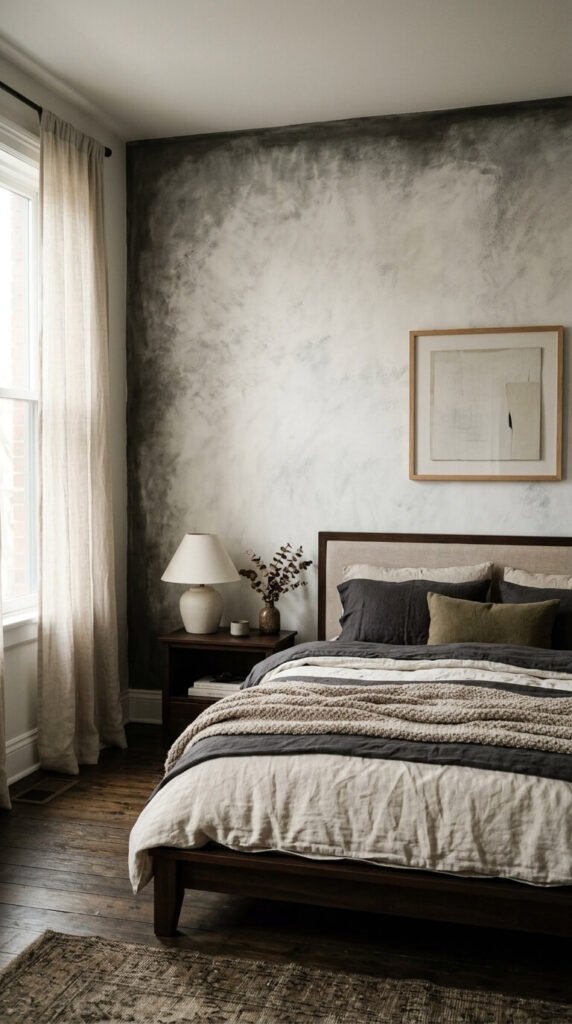
Most people go light over dark. Try the reverse: start with a pale base, then apply a darker top coat. Wipe or dry-brush sections of the dark coat away immediately to reveal the lighter base beneath. The areas where dark limewash remains give shadow and weight to corners and edges, making the room feel more dimensional. This approach works especially well in bedrooms or moody reading rooms. The contrast between wiped and un-wiped areas mimics the look of naturally aged plaster that’s darkened near the floor and edges over decades.
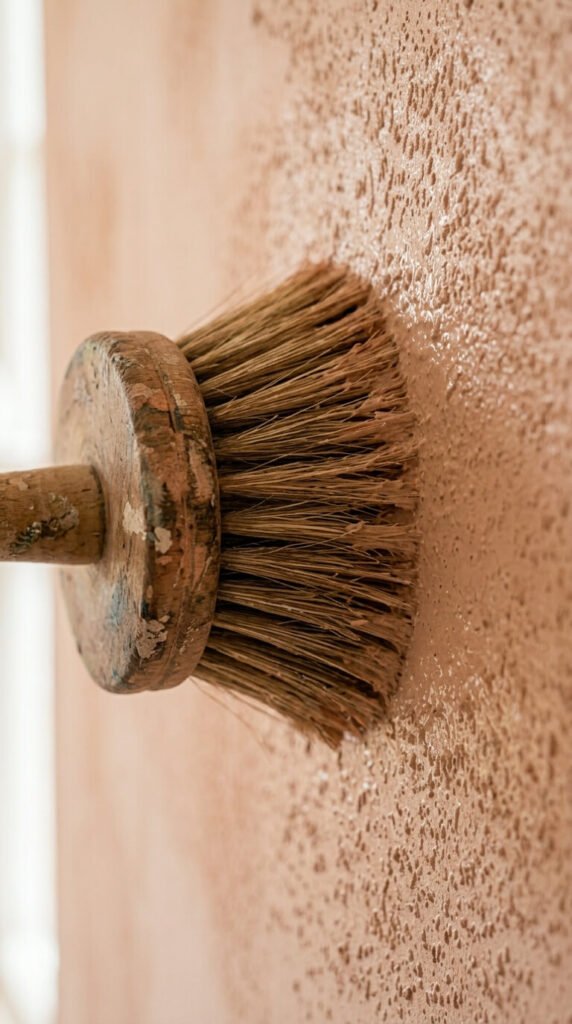
18. Stucco Brush for Rough Plaster Look
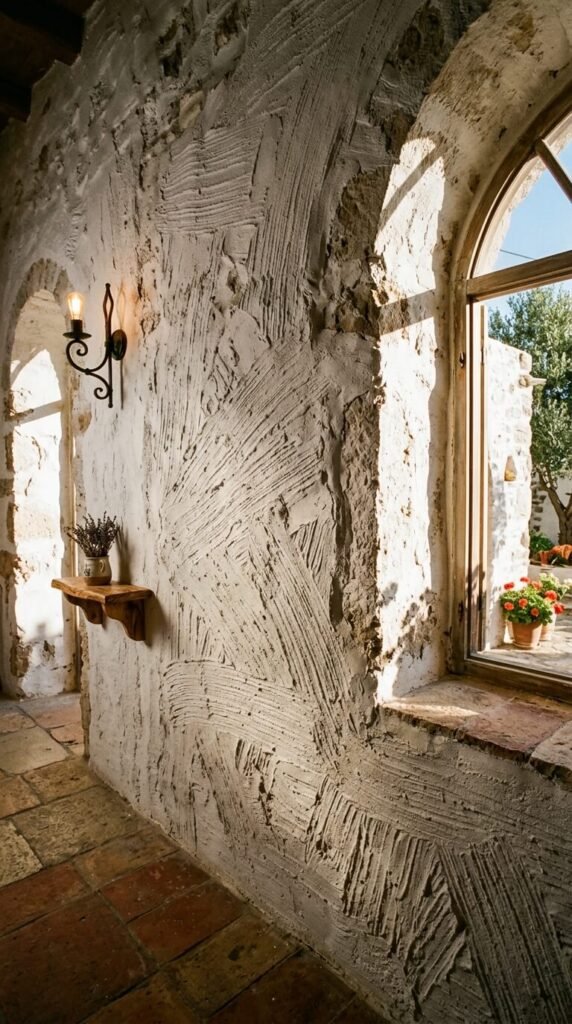
A large stucco brush — the kind used in masonry work — has stiff, coarse bristles that leave deep, grooved marks in the limewash surface. Apply a thicker coat than usual and work the brush in sweeping arcs or short, jabbing strokes. The result is the roughest, most dramatic of all limewash textures. It suits Mediterranean, Southwestern, or farmhouse-style interiors. Stucco brushes are inexpensive at any masonry supply store. This technique is especially impactful in entryways or behind a fireplace where you want maximum visual impact.
19. Fresco-Style Wet Application
Traditional fresco involves painting on wet plaster so the color becomes part of the wall. You can replicate this by applying limewash to freshly skim-coated drywall while it’s still slightly damp — not wet. The limewash soaks deeper into the surface and the color becomes more permanent and mineral-looking. The finish is richer and less likely to chip over time. Time is tight — you have about 20 minutes before the plaster fully sets. Practice the stroke you want before the plaster goes on so you’re ready to move fast.
20. Geometric Masking With Tape
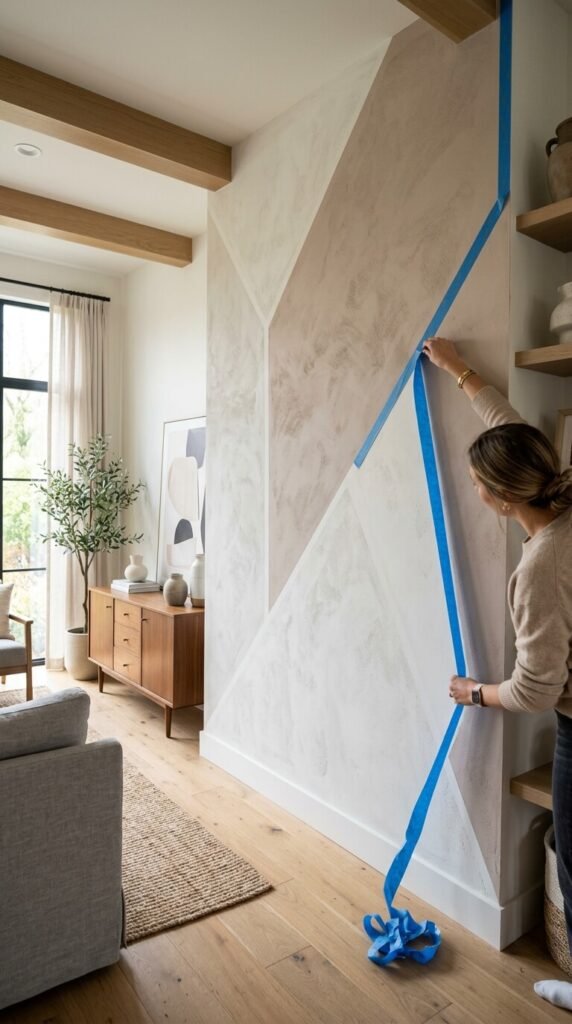
Use painter’s tape to mask off geometric shapes — triangles, wide stripes, diamonds — and apply different limewash tones within each section. The texture flows across both tones but the color contrast creates a modern graphic element. Peel the tape while the paint is still slightly wet for the cleanest edge. The slight bleed that sometimes occurs actually looks intentional and adds character. This is a great way to make limewash feel contemporary rather than purely rustic. Plan your shapes on paper first and mark the wall lightly with a pencil before taping.
21. Brush-and-Buff Polishing
After your final coat dries, take a clean dry cloth and buff the surface in circular motions. This compresses the outermost layer slightly and creates a subtle sheen — not glossy, just a soft, stone-like glow. It also knocks down any rough brush marks that feel too prominent. The buffed finish looks more refined and suits contemporary or transitional interiors. You can buff the entire wall or just select areas to create variation. No additional products needed. This step costs nothing and takes about 10 minutes per wall.
22. Wax Finish for Weather Resistance

In bathrooms or kitchens, protect your limewash with a coat of clear beeswax or furniture wax. Apply it with a soft cloth in circular motions, let it haze, then buff to a soft finish. Wax makes limewash more water-resistant and slightly deepens the color. It also makes the surface washable — important in high-traffic areas. Use only clear wax. Tinted waxes can change your color significantly. Re-wax every year or two depending on use. A small tin of clear wax covers an entire bathroom wall and costs very little.
23. Layering Contrasting Mineral Pigments

Instead of pre-tinted limewash, mix your own color using raw mineral pigments — raw sienna, yellow ochre, iron oxide red — stirred directly into a white limewash base. Mineral pigments behave differently than synthetic colorants. They stay translucent and shift subtly in different lights. Use small amounts — even a teaspoon of pigment changes a full bucket significantly. Start conservative. Layer one color over another for complex, shifting tones. Mineral pigments are available online and at art supply stores. A small bag goes a very long way.
24. Crackle Effect Using Sizing Glue
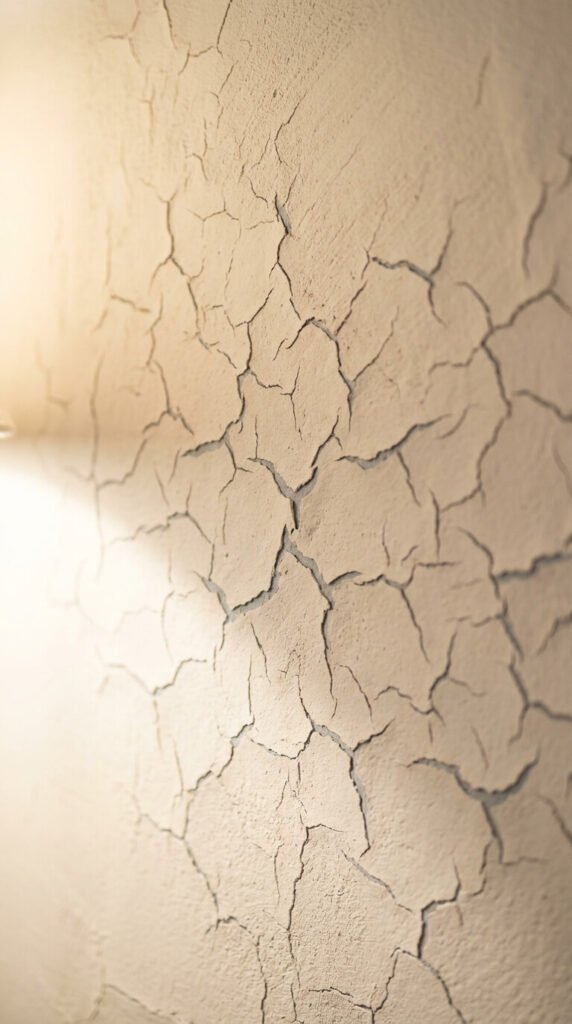
Apply a thin coat of water-based sizing glue over your base coat limewash. Let it dry to tacky. Then apply your top coat limewash quickly and evenly. As the top coat dries, the sizing causes it to contract and crack — creating fine, spiderweb-like fissures across the surface. The cracks reveal the base coat beneath. The more sizing you apply, the larger the cracks. This technique mimics centuries-old plaster naturally. Sizing glue is inexpensive and available at paint and hardware stores. Test on a small section first.
25. Aged Patina With Coffee or Tea Wash
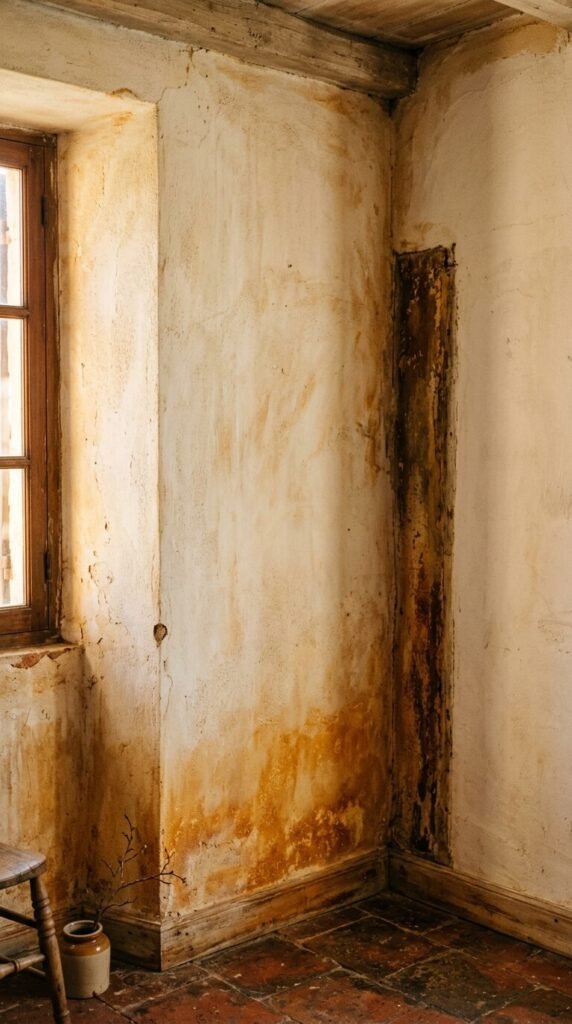
Brew a very strong batch of black tea or coffee, let it cool, and apply it as a diluted wash over your finished, fully dry limewash wall. Use a wide brush or sponge and apply it unevenly — heavier near the floor and corners, lighter toward the center. This adds a warm, amber patina that makes the wall look genuinely aged. Let it dry and evaluate. You can always add more. The tea or coffee wash is completely natural, costs almost nothing, and is one of the most dramatic aging tricks in DIY decorating.
Conclusion
Limewash walls aren’t about perfection — they’re about personality. Every technique here creates something that a paint roller and a tin of flat paint simply cannot. The beauty of limewash is that mistakes often become the best parts. A drip, an uneven section, a spot you wiped too hard — these become the texture and story of the wall. Start with one technique on a small section. Get a feel for how the paint moves and dries. Then commit to the full wall. You don’t need expensive tools or professional help. You need a brush, some patience, and the confidence to let the wall be imperfect. That imperfection is exactly what makes it extraordinary.